Create Deka Box
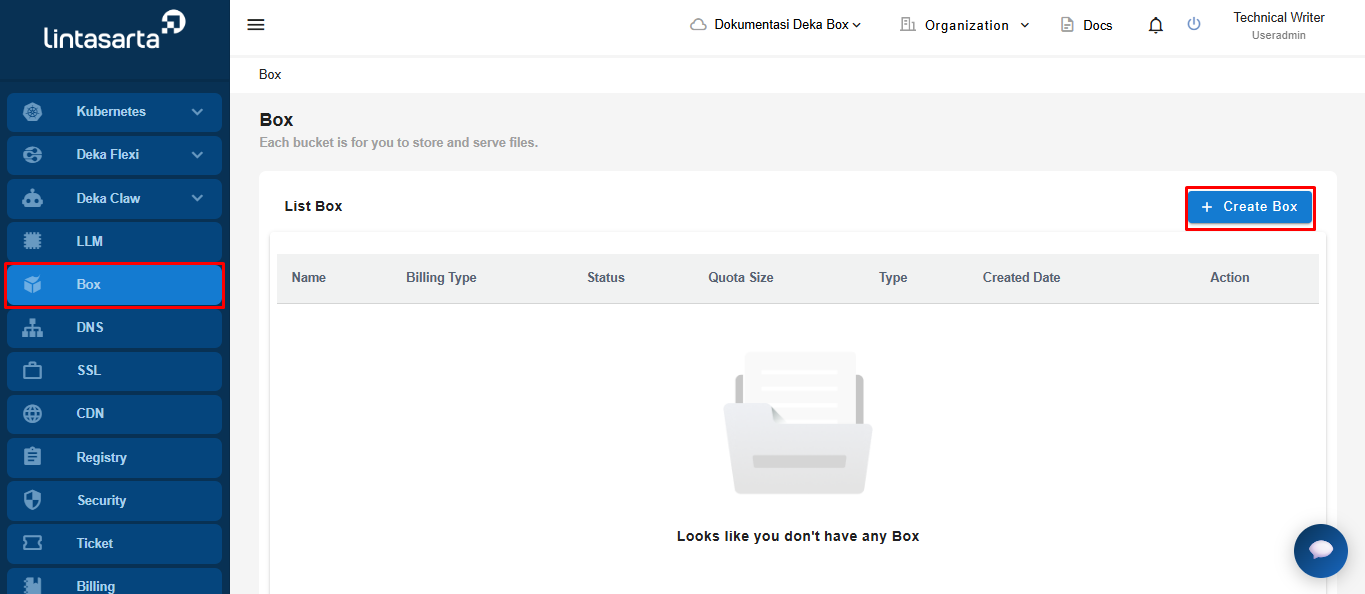
Create Deka Box, on the Service Portal Cloudeka select the Deka Box menu and then click the Create Deka Box button

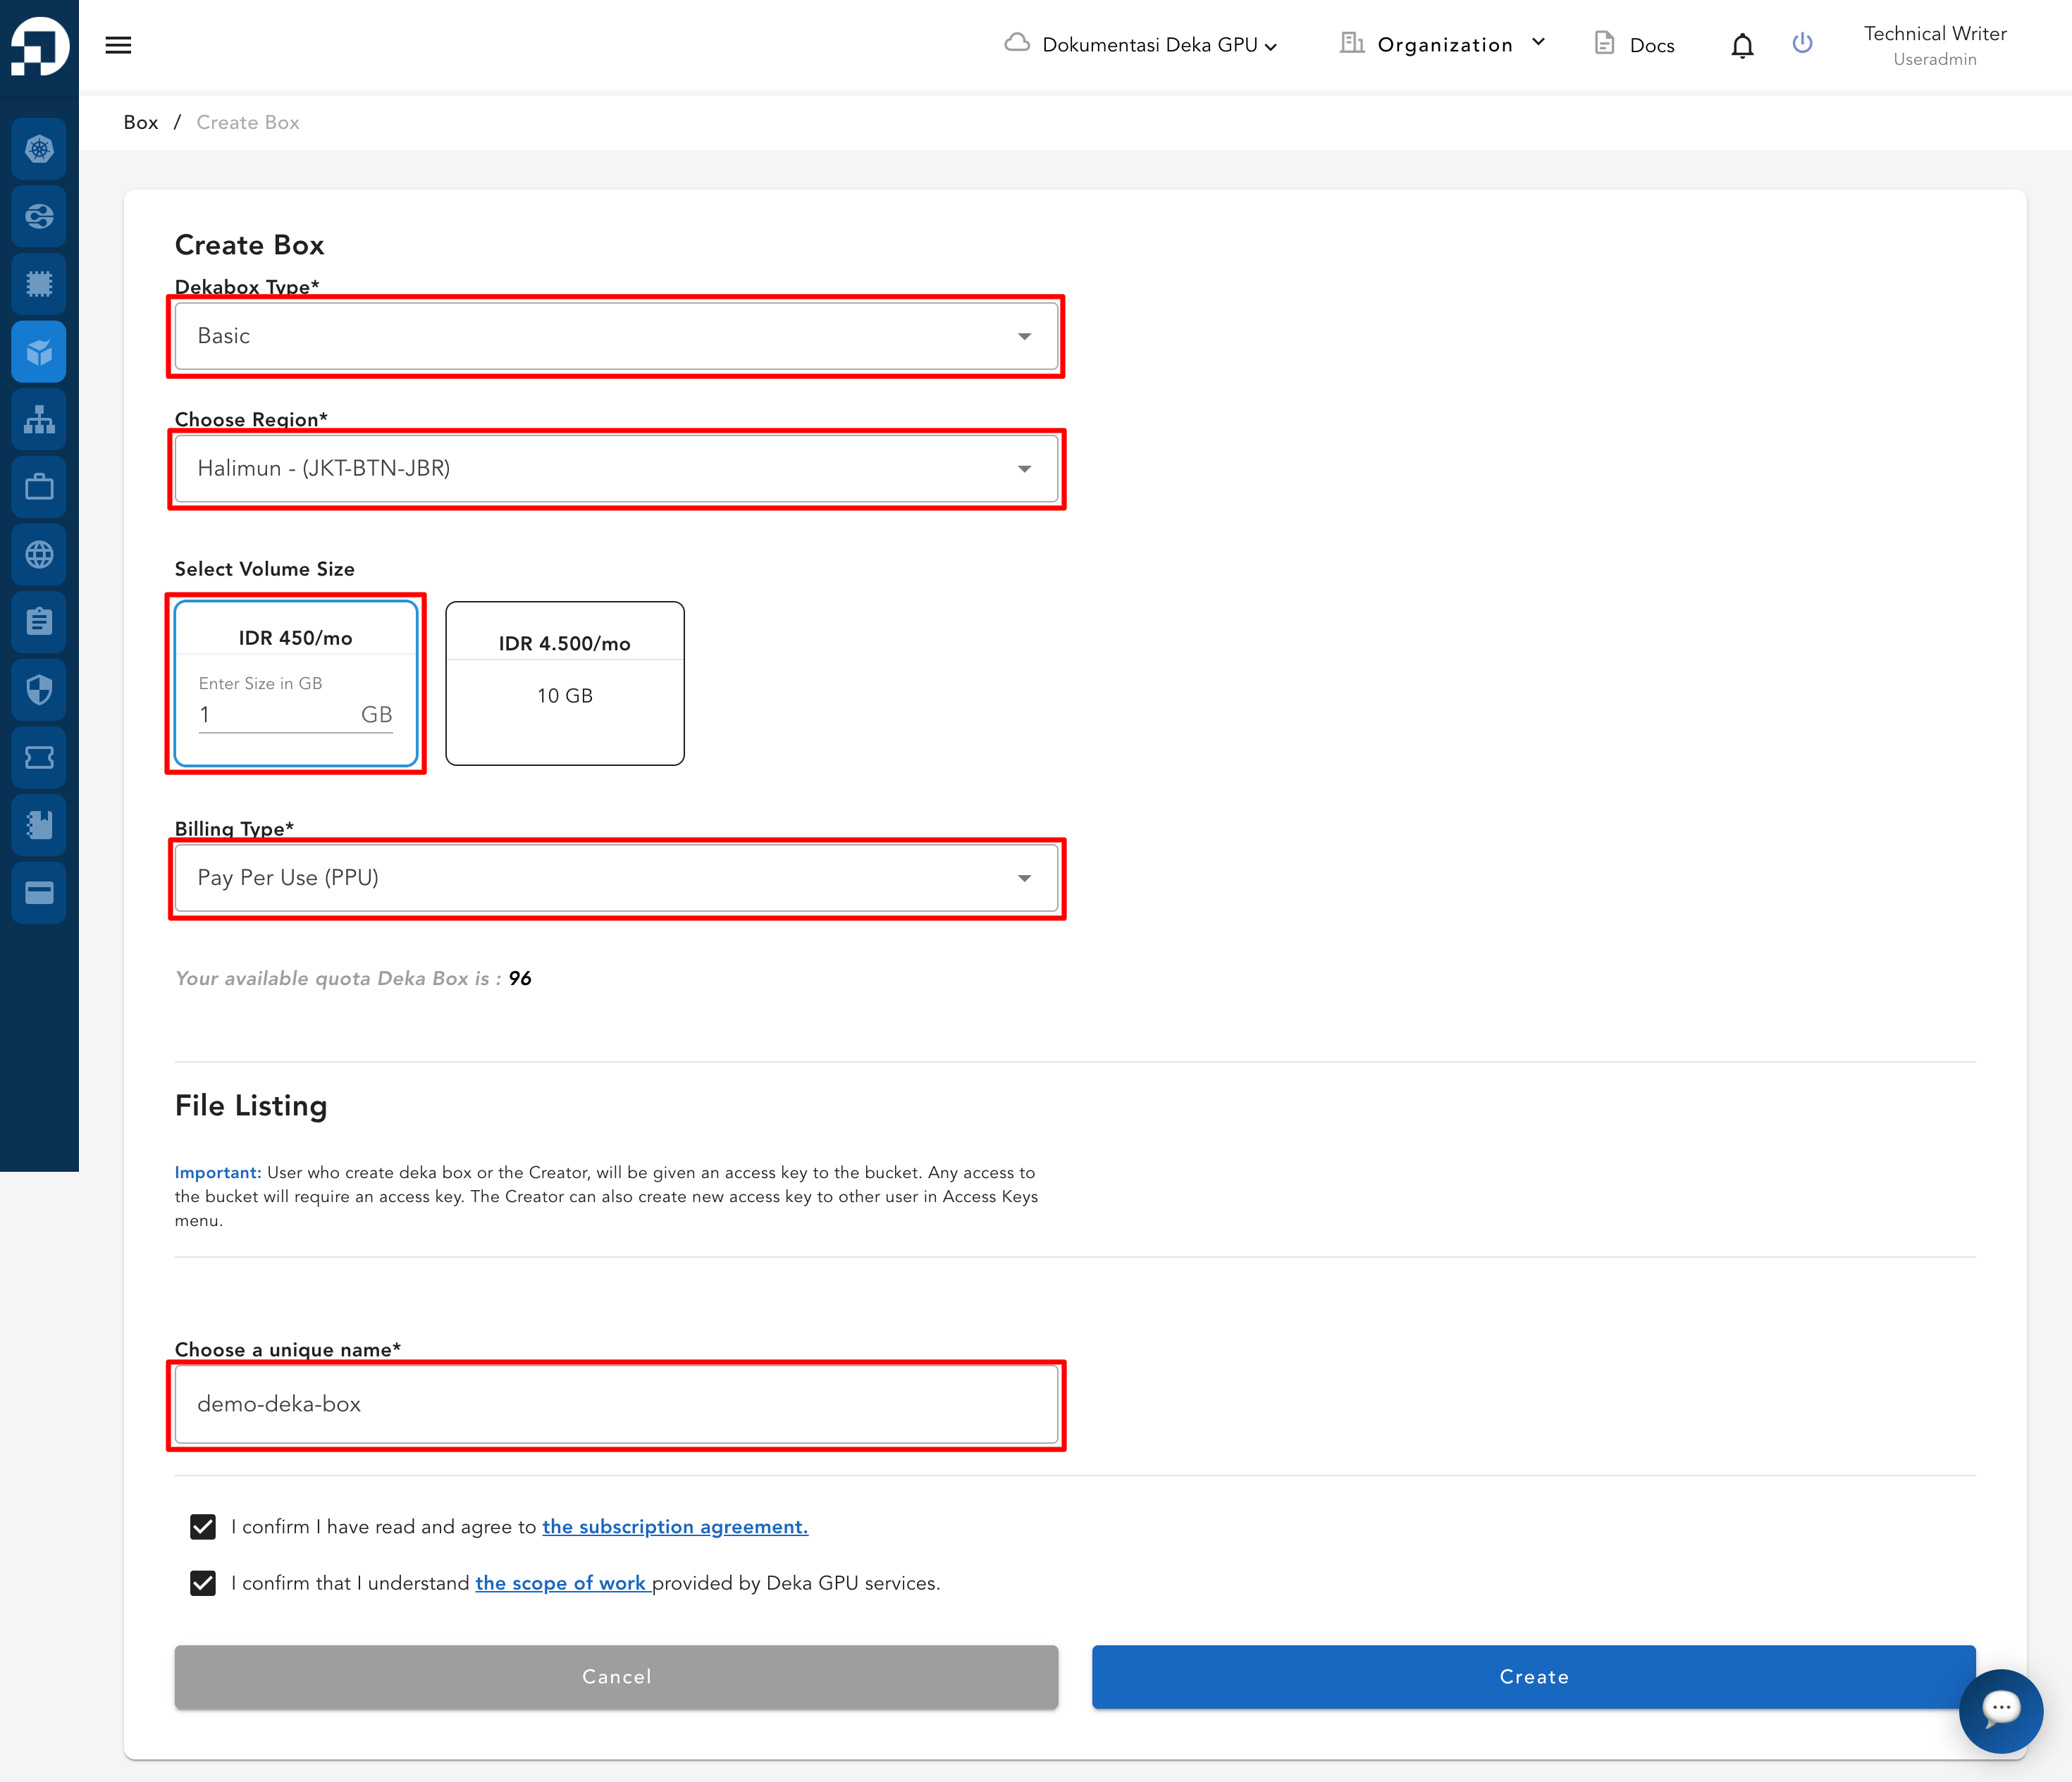
The Create Deka Box form page appears, fill in all the columns available on the Create Deka Box page.

Dekabox Type
There are one types of Deka Box available namely Basic.
Choose Region
The Deka Box region to use. Currently there are several areas available that can be used including:
Kencana JKT
Putri JKT-JBR
Halimun JKT-BTN-JBR
Karang JKT-BTN
Parahu - JBR
Salak BTN-JBR
Krakatau BTN
Select Volume Size
Enter the volume size in GB.
Billing Type
Select the billing type for your Deka Box.
Choose a unique name
Give your Deka Box a unique name, using only lowercase letters, numbers and a dash (-).
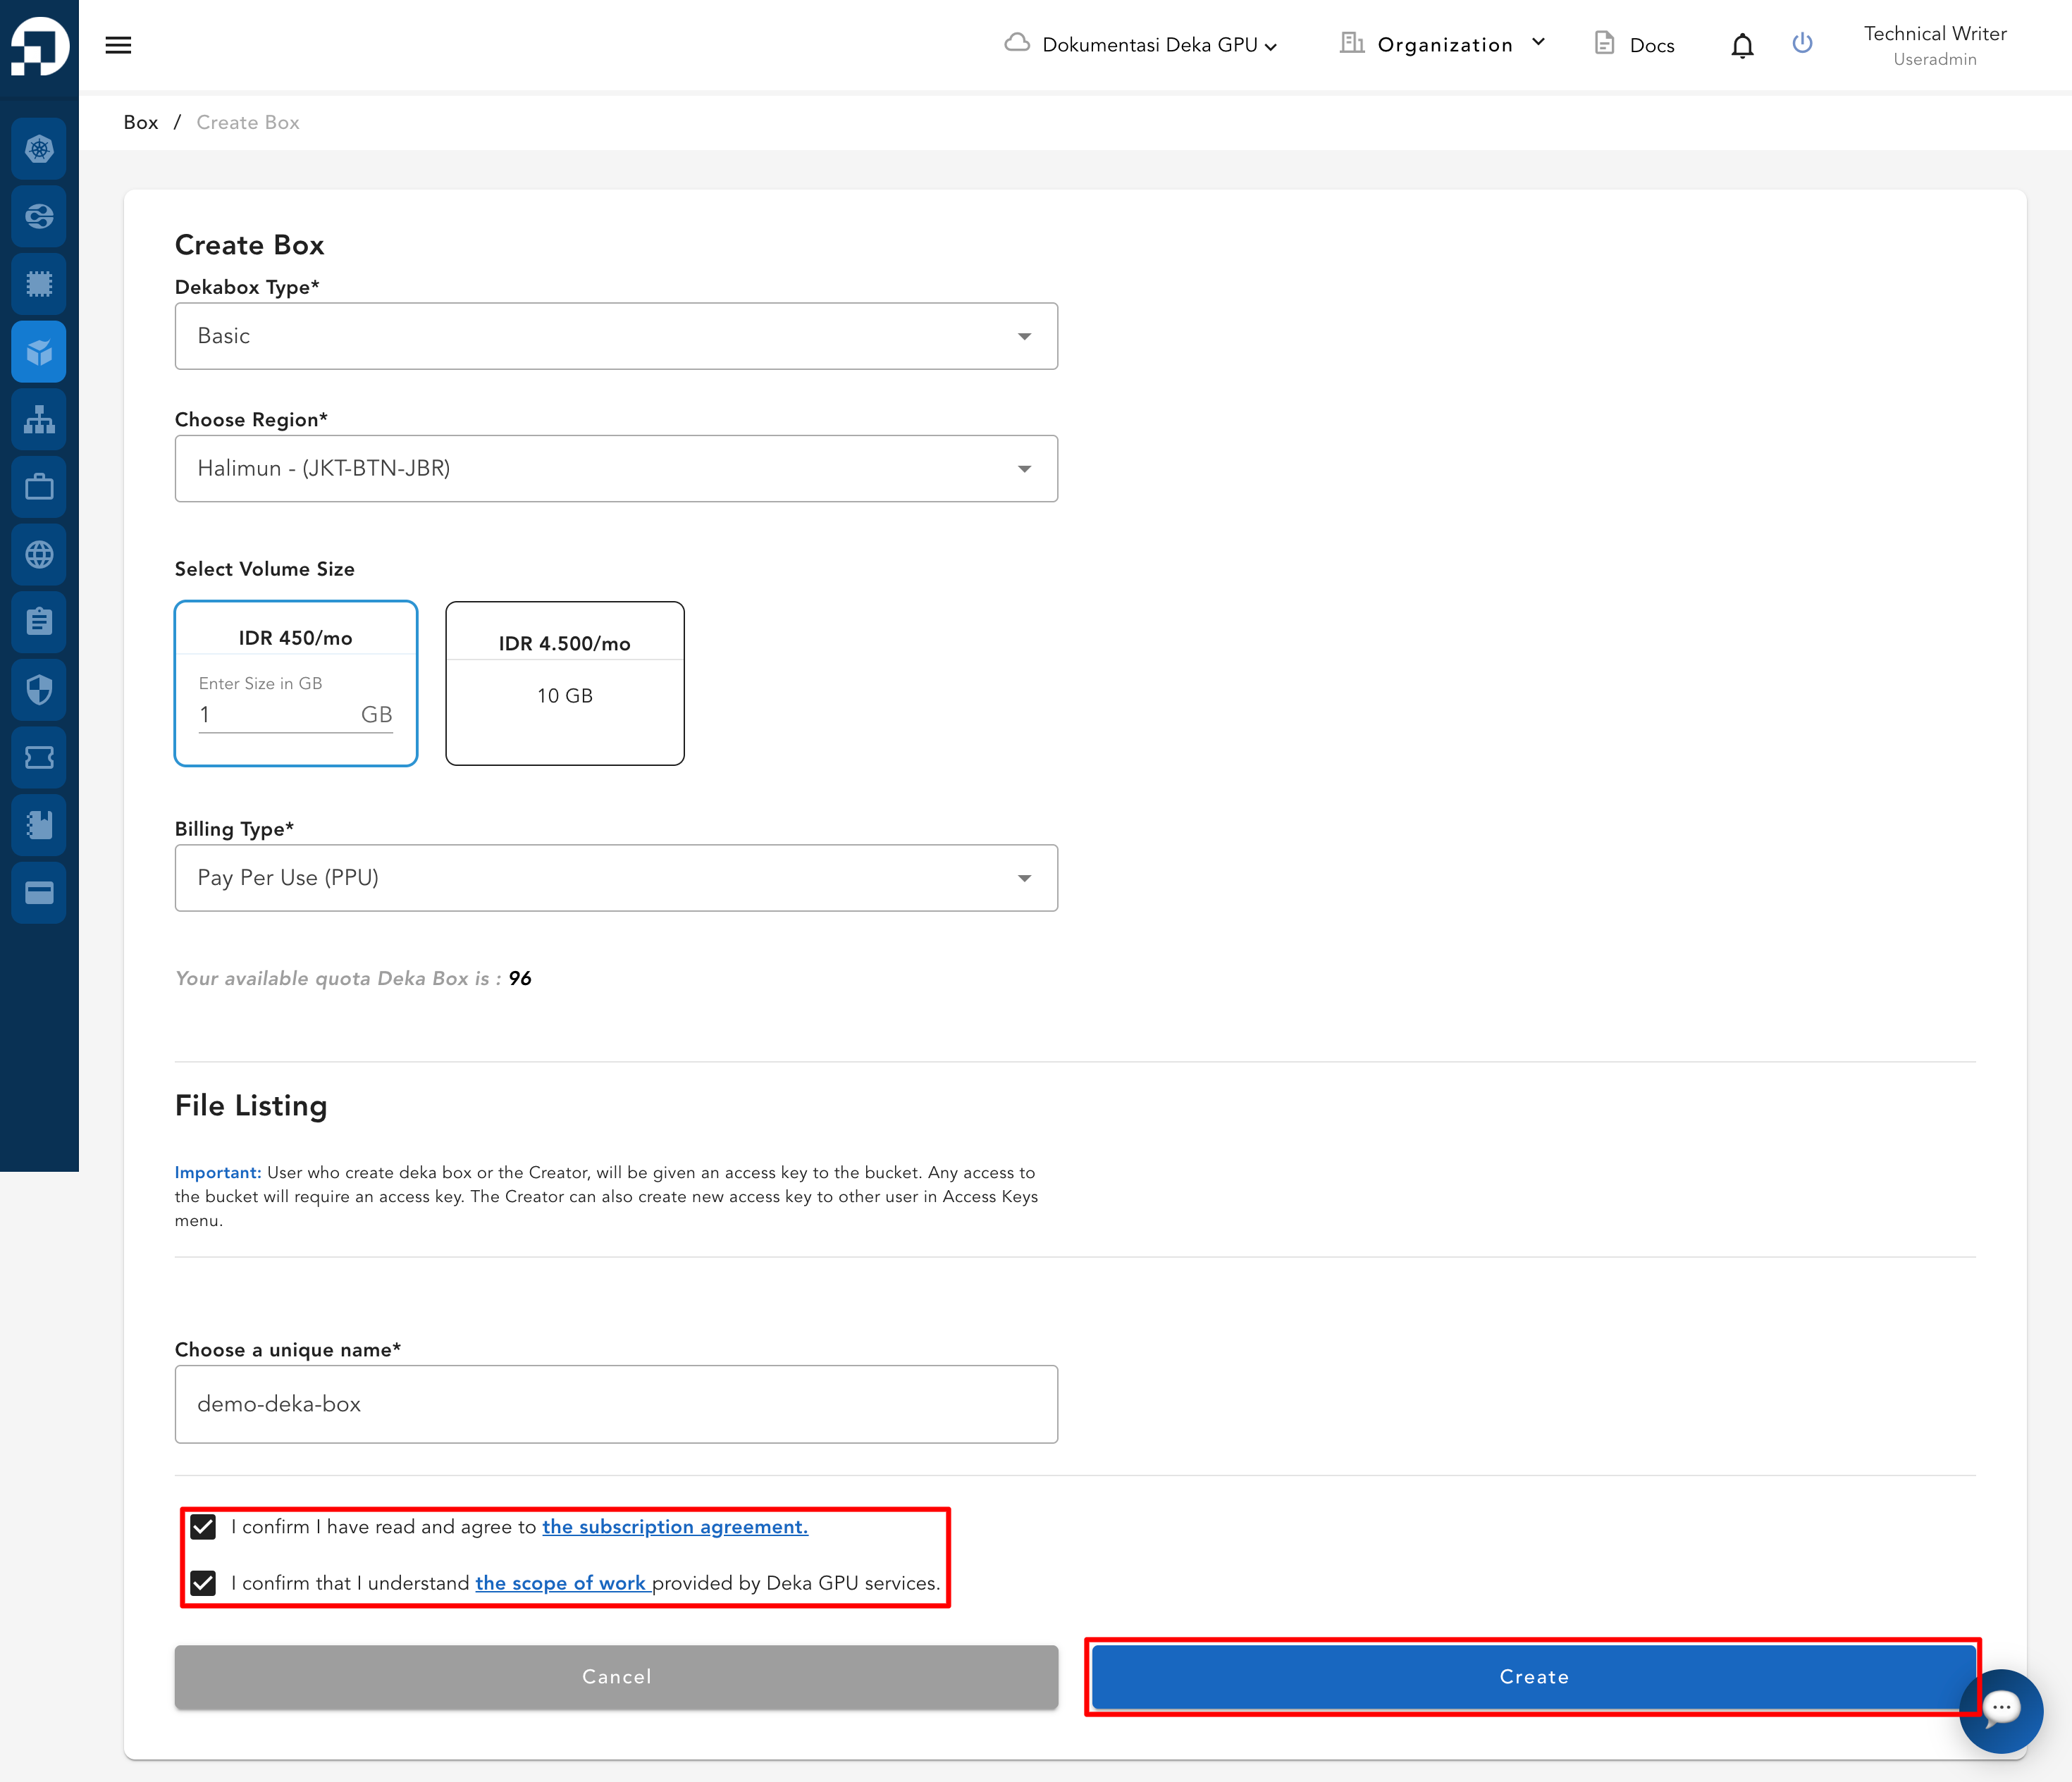
If you are creating a Deka Box for the first time, you should begin by reading the Subscription Agreement and the Scope of Work. Once you have finished reviewing both documents, select the I confirm I have read and agree to the Subscription Agreement and I confirm that I understand the Scope of Work provided by Deka GPU services checkboxes. Then, click Create to proceed with the Deka Box creation process in the Service Portal Cloudeka.
These checkboxes are used to confirm that users have read and agreed to the Subscription Agreement and understand the Scope of Work provided by Deka GPU services. Users must select both checkboxes before proceeding to the next step.

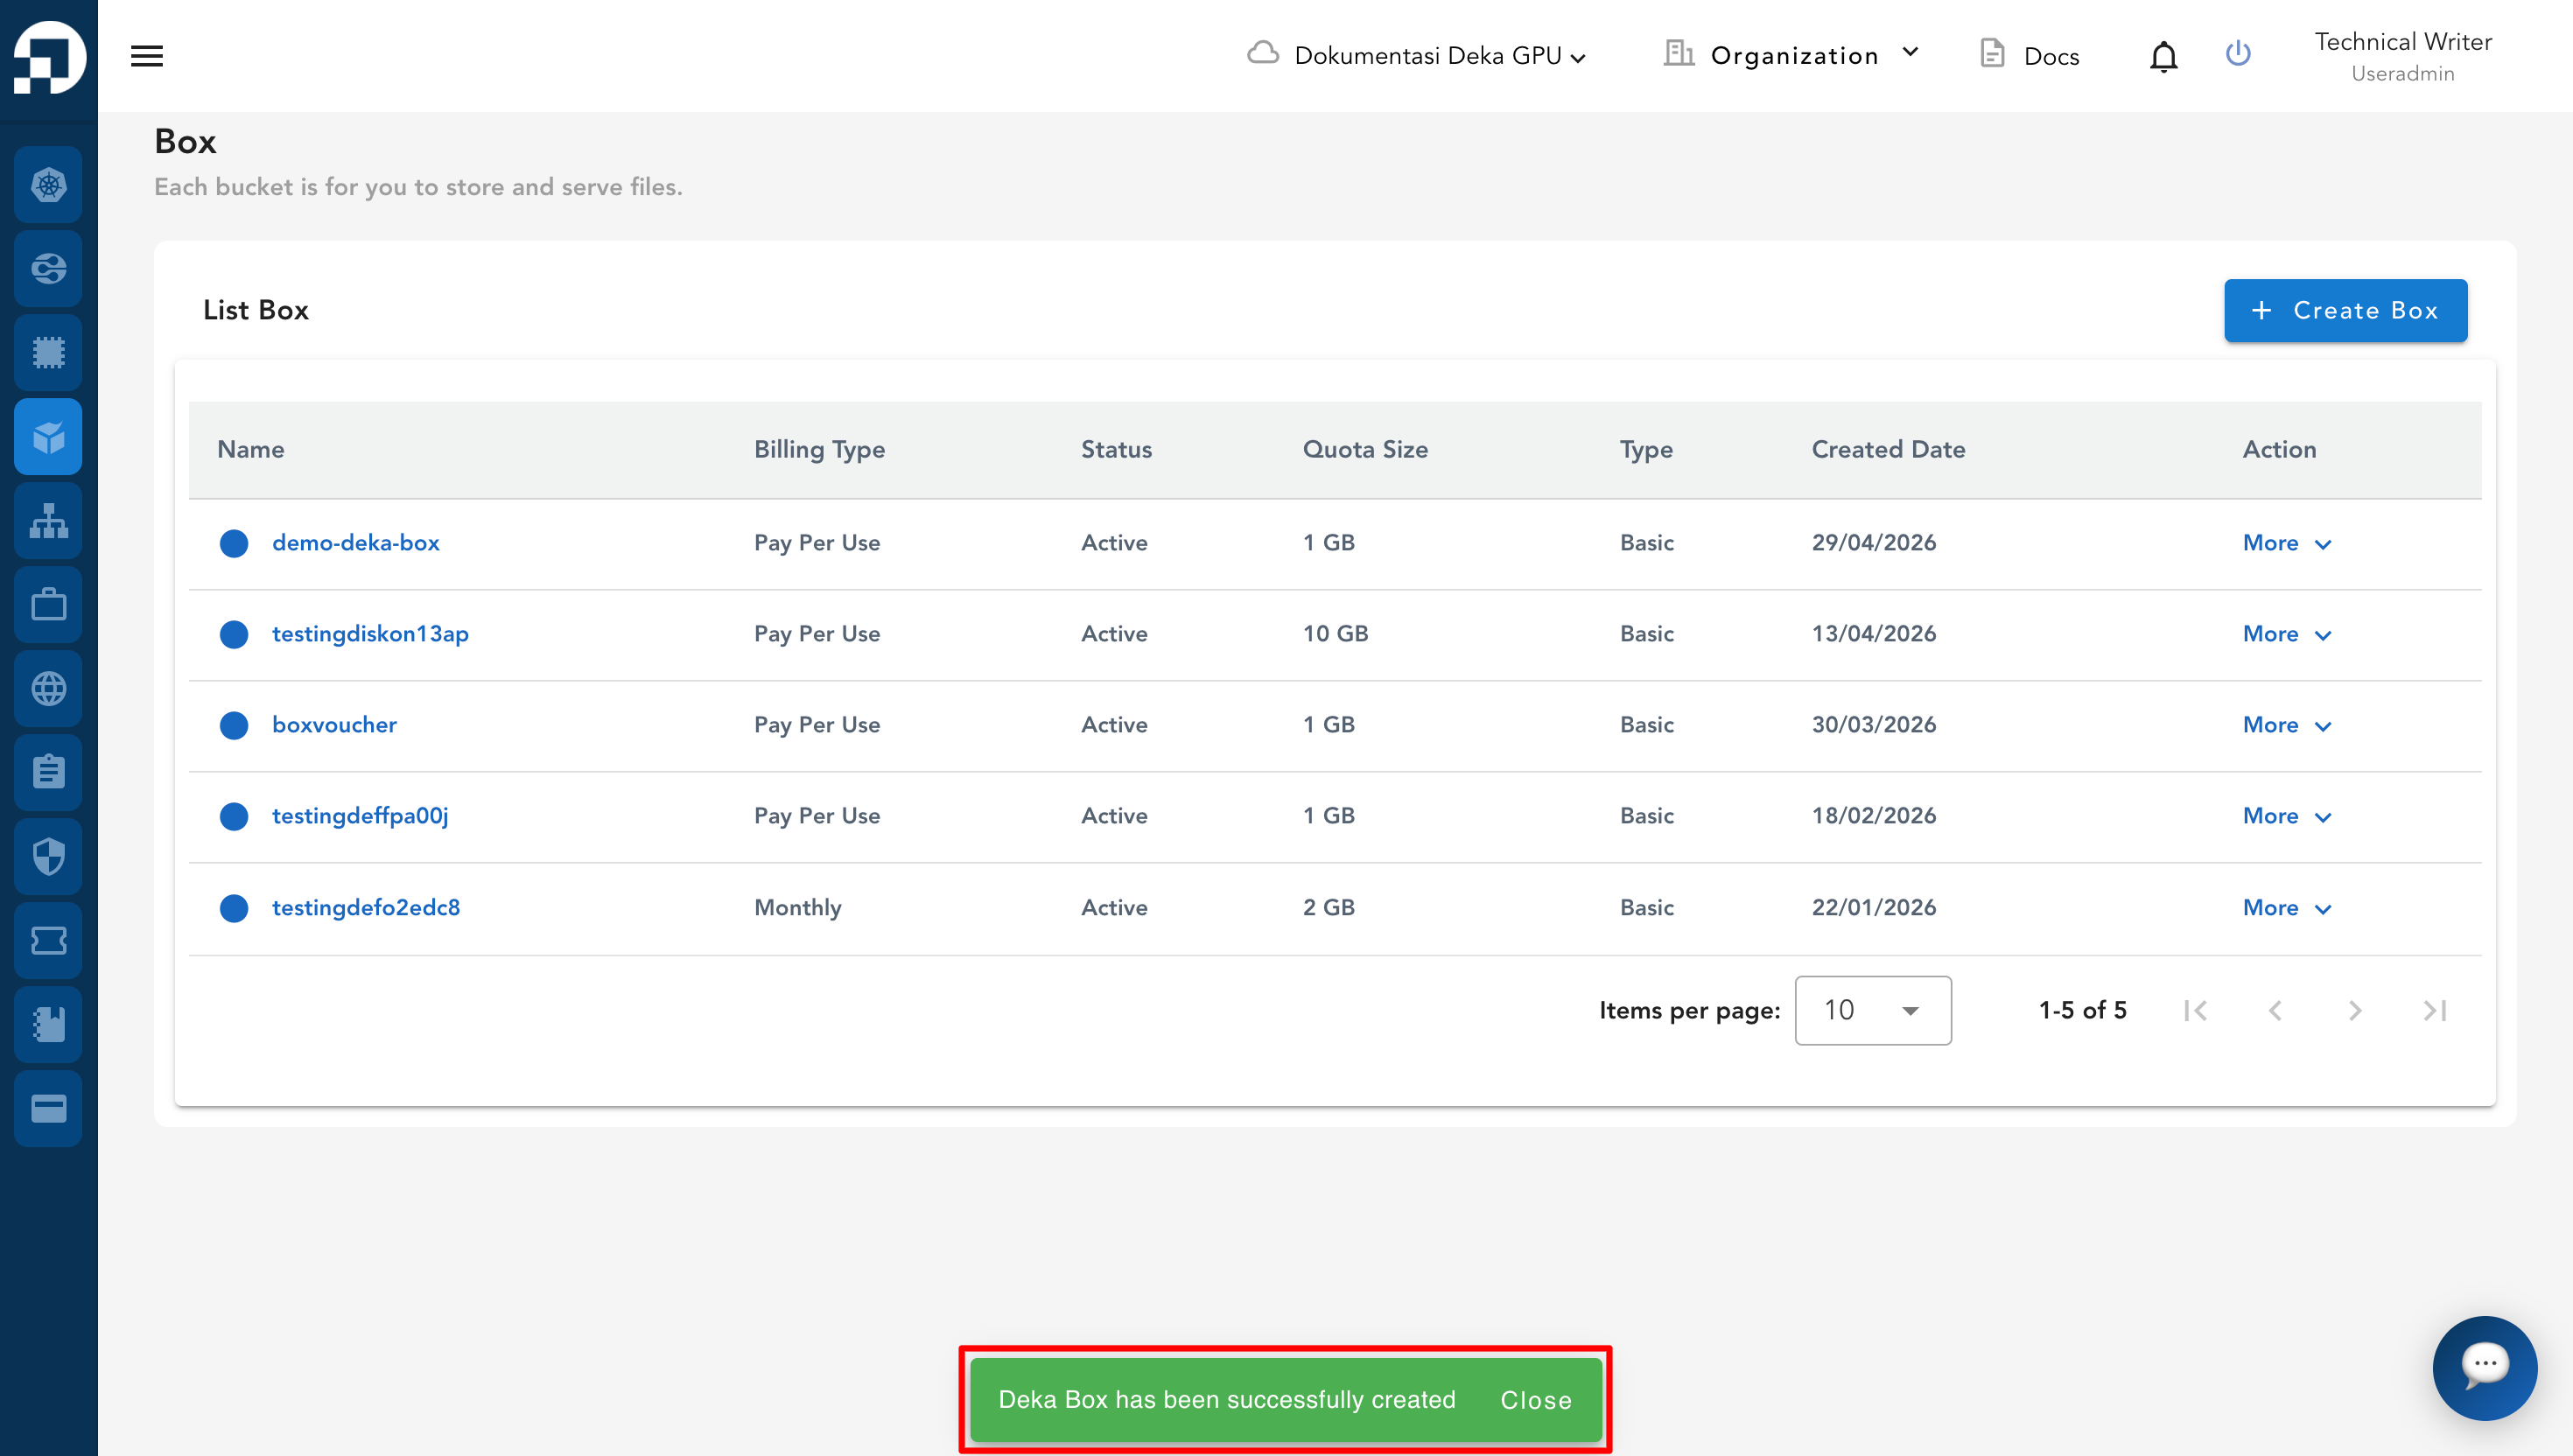
If Deka Box is successfully created a notification will appear "Deka Box has been successfully created".

Last updated