> For the complete documentation index, see [llms.txt](https://docs.cloudeka.ai/llms.txt). Markdown versions of documentation pages are available by appending `.md` to page URLs; this page is available as [Markdown](https://docs.cloudeka.ai/deka-gpu-documentations/panduan-untuk-enterprise/deka-gpu/deka-gpu-vms/how-to-create-a-virtual-machine-on-service-portal.md).

# Cara Membuat Mesin Virtual di Service Portal

*Storage Class* adalah komponen sistem penyimpanan data Kubernetes untuk menentukan jenis penyimpanan yang dapat digunakan oleh *PersistentVolumes*. Tersedia tiga pilihan namespace. Tabel berikut menjelaskan fungsi setiap namespace.

<figure><img src="https://putri.box.cloudeka.id/cloudeka-assets/docs.cloudeka.ai/1dekagpu/howtovms_01.png" alt=""><figcaption></figcaption></figure>

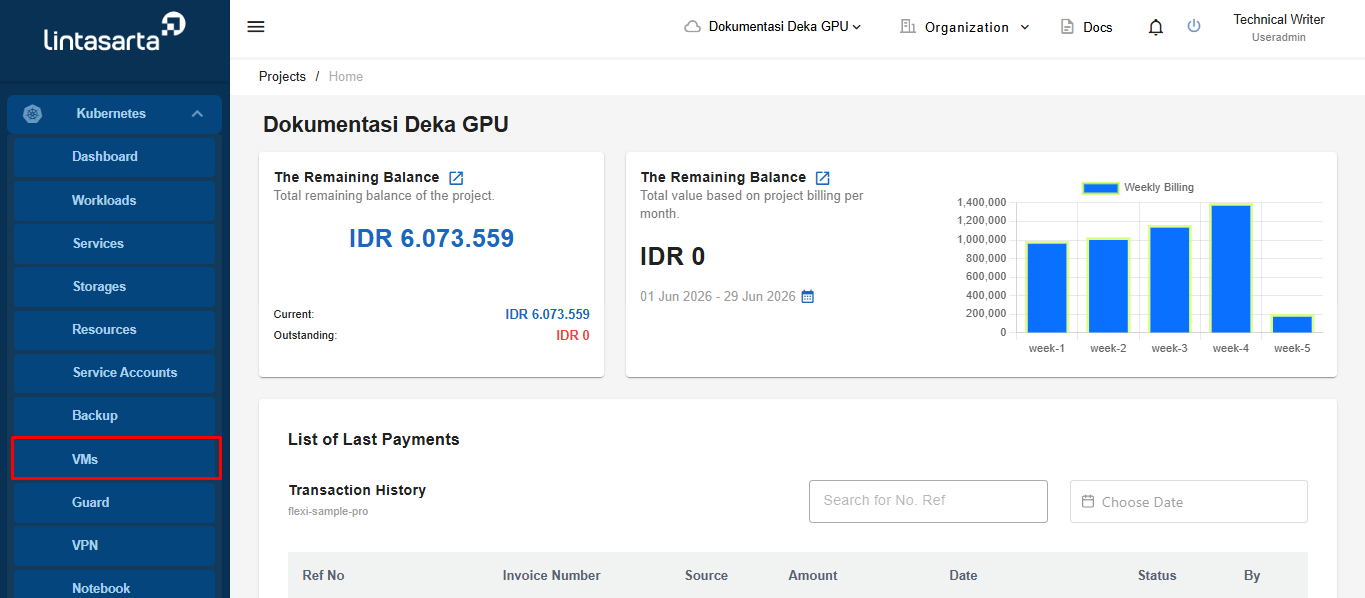
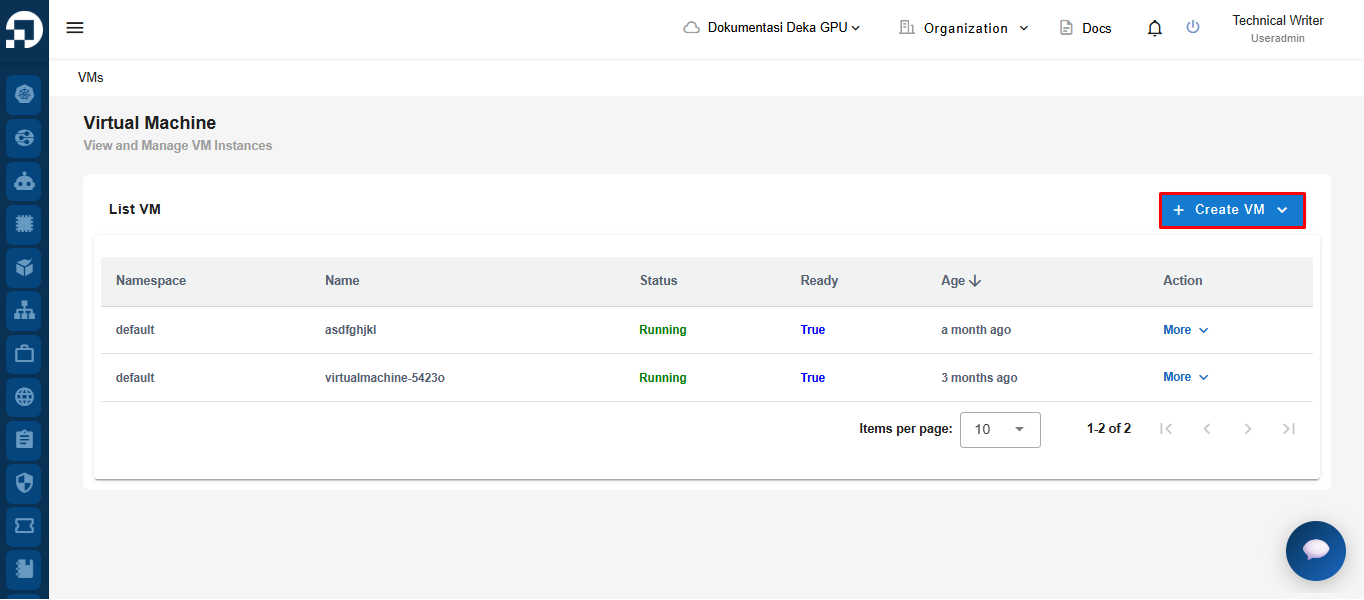
Pada halaman *VMs* di *Service Portal* Cloudeka, tekan *+ Create VM*.

<figure><img src="https://putri.box.cloudeka.id/cloudeka-assets/docs.cloudeka.ai/1dekagpu/createvm_01.png" alt=""><figcaption></figcaption></figure>

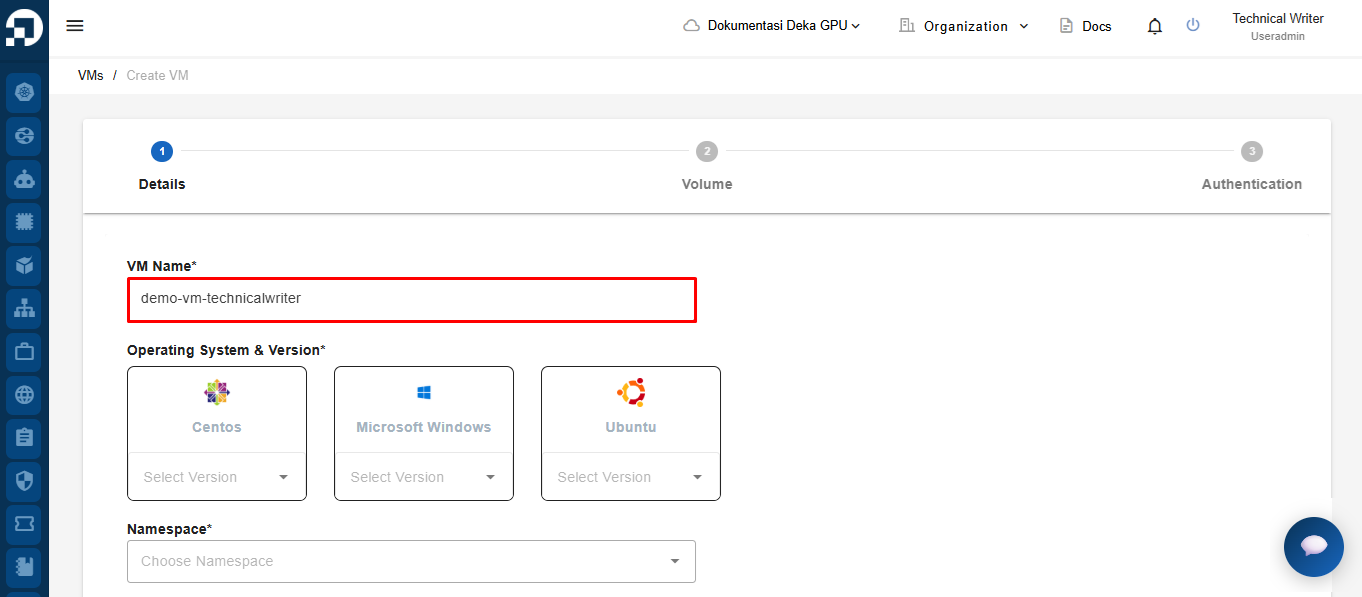
Pembuatan instance VM di *Service Portal* Cloudeka terdiri dari tiga tahap: *Details*, *Volume*, dan *Authentication*. Pada tahap pertama, halaman *Details* menyediakan tiga kolom yang harus diisi. Mulai dengan memasukkan nama VM.

<figure><img src="https://putri.box.cloudeka.id/cloudeka-assets/docs.cloudeka.ai/1dekagpu/createvm_02.png" alt=""><figcaption></figcaption></figure>

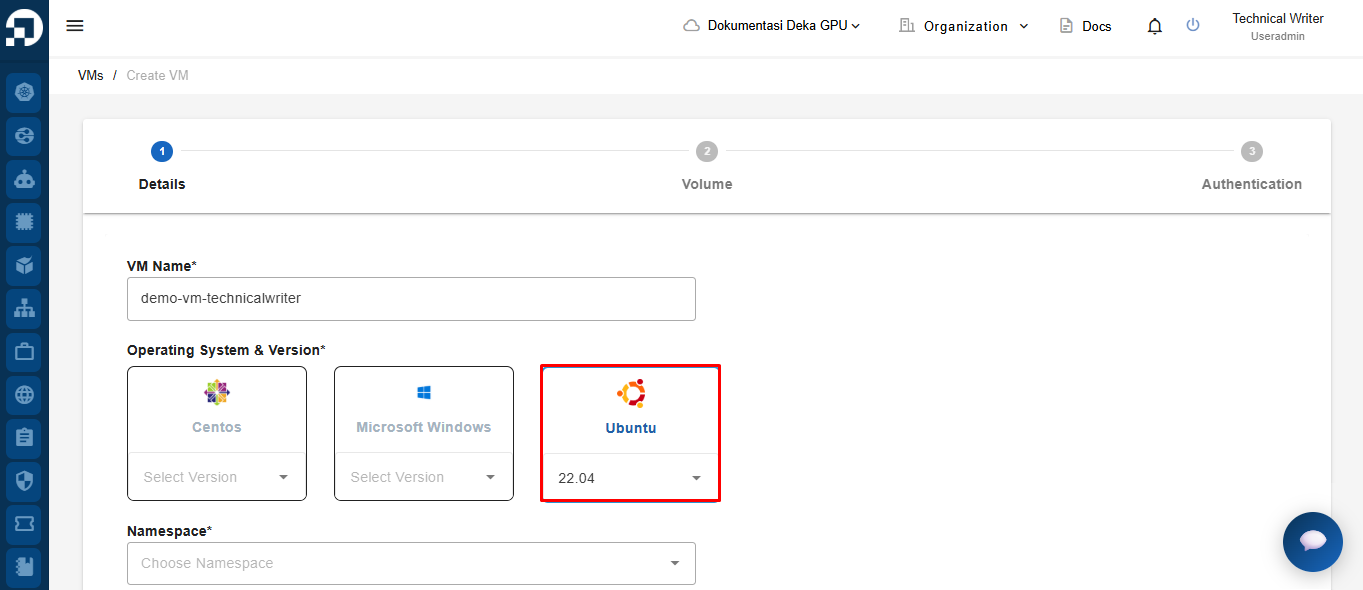
Setelah memasukkan nama VM, tentukan sistem operasi melalui kolom *Choose Image*. Informasi selengkapnya tersedia pada subbab *Operating System* dalam dokumentasi ini.

<figure><img src="https://putri.box.cloudeka.id/cloudeka-assets/docs.cloudeka.ai/1dekagpu/createvm_03.png" alt=""><figcaption></figcaption></figure>

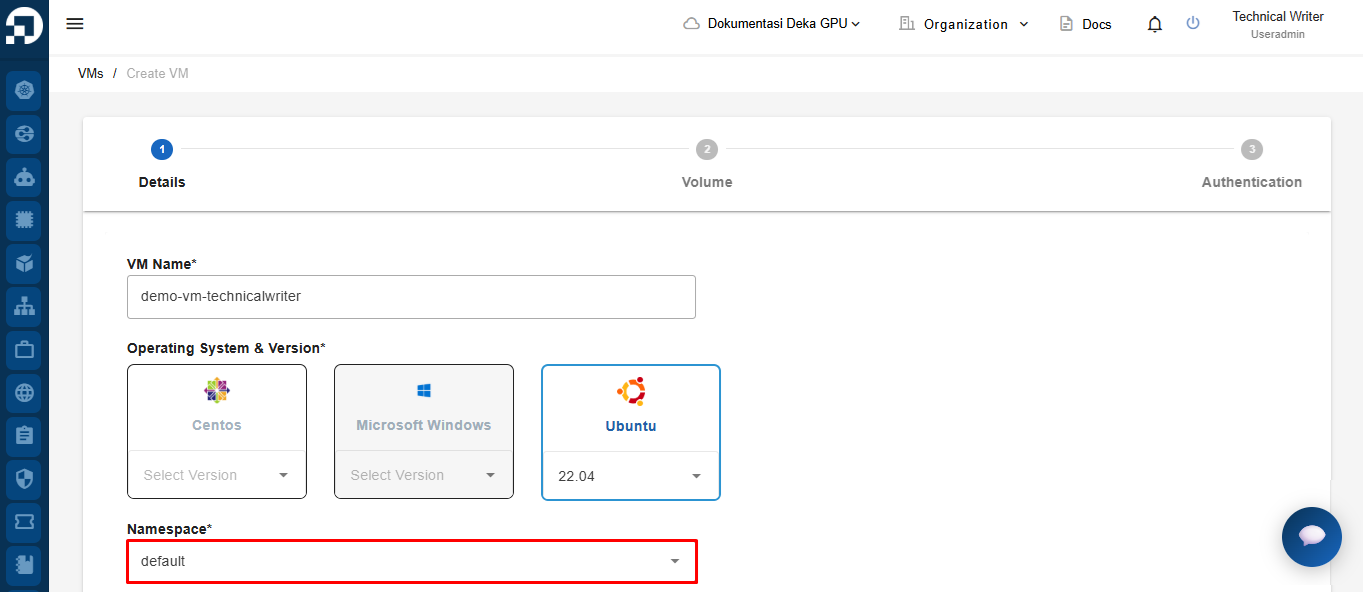
Setelah memilih sistem operasi, tentukan namespace yang akan digunakan. Informasi selengkapnya tersedia pada subbab *Namespaces* dalam dokumentasi ini.

<figure><img src="https://putri.box.cloudeka.id/cloudeka-assets/docs.cloudeka.ai/1dekagpu/createvm_04.png" alt=""><figcaption></figcaption></figure>

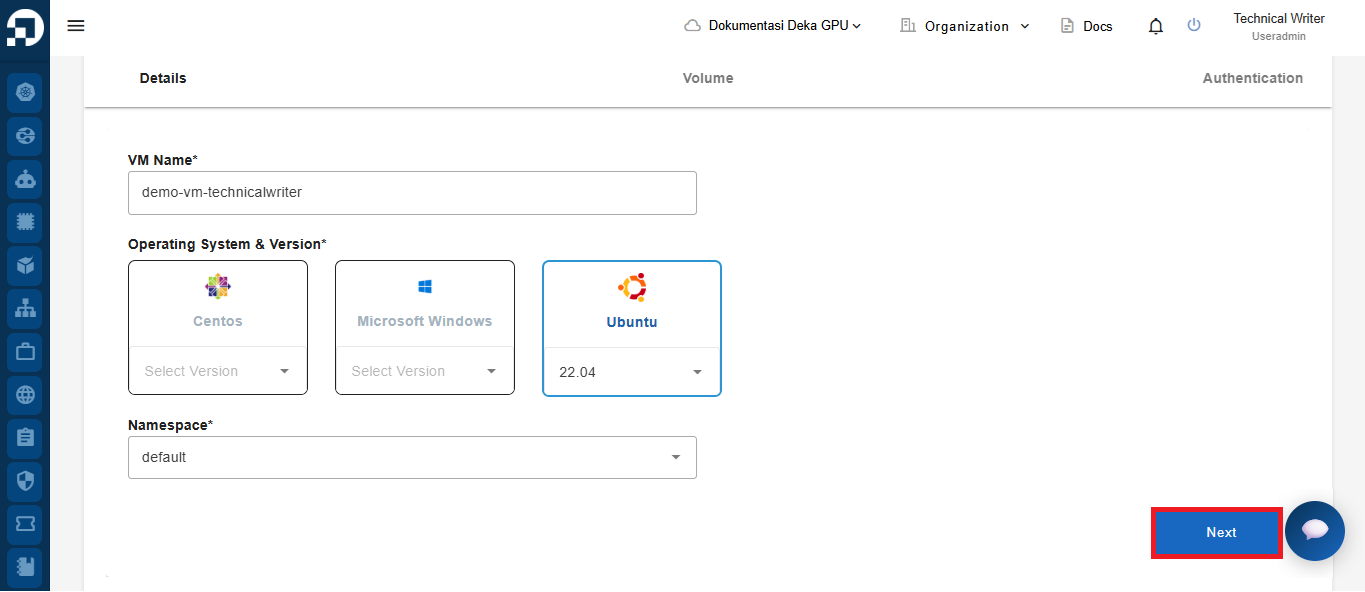
Setelah mengisi semua kolom, klik *Next* untuk melanjutkan.

<figure><img src="https://putri.box.cloudeka.id/cloudeka-assets/docs.cloudeka.ai/1dekagpu/createvm_05.png" alt=""><figcaption></figcaption></figure>

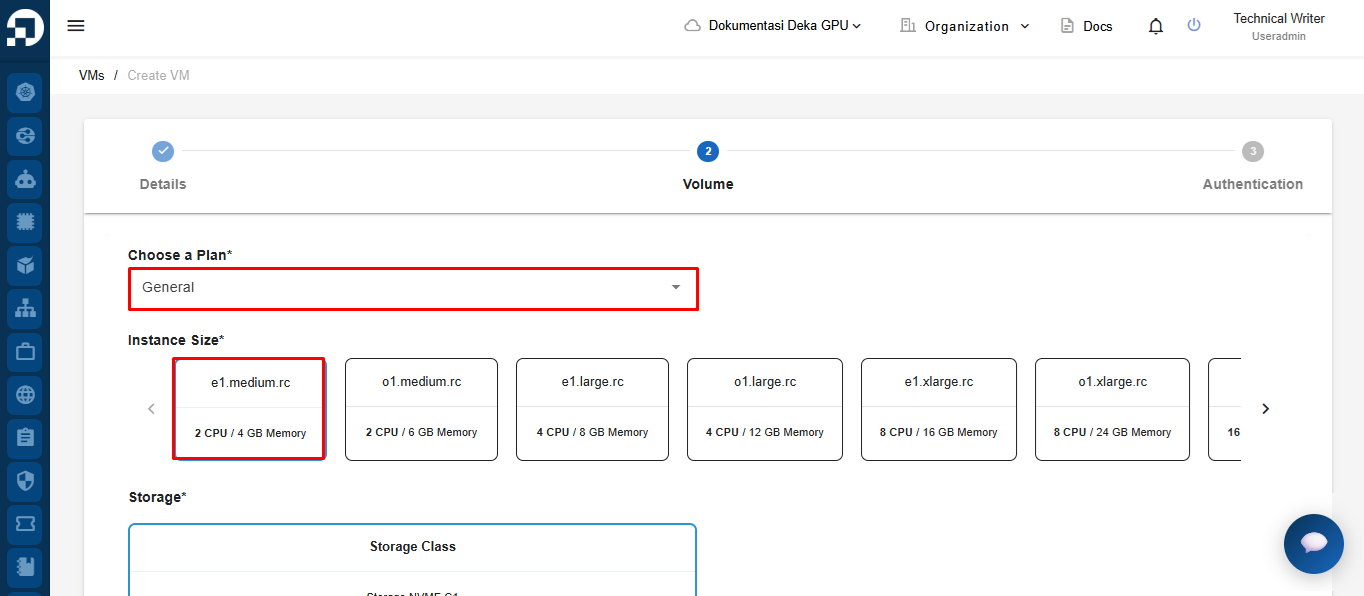
Pada tahap kedua, halaman *Volume* menyediakan dua kolom yang harus diisi. Pilih jenis mesin pada kolom *Choose a Plan*. Setelah memilih jenis mesin, pilih *Instance Size* untuk menentukan sumber daya CPU dan RAM VM.

<figure><img src="https://putri.box.cloudeka.id/cloudeka-assets/docs.cloudeka.ai/1dekagpu/createvm_06.png" alt=""><figcaption></figcaption></figure>

<table><thead><tr><th width="205">Tipe</th><th width="154">Deskripsi</th><th>vCPU/RAM</th></tr></thead><tbody><tr><td><em>General</em></td><td>Rasio CPU:RAM 1:2, 1:3</td><td><p>Pilihan <em>Instance Size</em>:</p><ol><li>o1.medium.rc: 2 vCPU dan memori 6 GB</li><li>e1.medium.rc: 2 vCPU dan memori 4 GB</li><li>o1.large.rc: 4 vCPU dan memori 12 GB</li><li>e1.large.rc: 4 vCPU dan memori 8 GB</li><li>o1.xlarge.rc: 8 vCPU dan memori 24 GB</li><li>e1.xlarge.rc: 8 vCPU dan memori 16 GB</li><li>o1.cclarge.rc: 16 vCPU dan memori 48 GB</li><li>e1.xxlarge.rc: 16 vCPU dan memori 32 GB</li><li>o1.qlarge.rc: 32 vCPU dan memori 96 GB</li><li>e1.qlarge.rc: 32 vCPU dan memori 64 GB</li></ol></td></tr><tr><td><em>Compute Optimized</em></td><td>Rasio CPU:RAM 1:1</td><td><p>Pilihan <em>Instance Size</em>:</p><ol><li>c1.medium.rc: 2 vCPU dan memori 2 GB</li><li>c1.large.rc: 4 vCPU dan memori 4 GB</li><li>c1.xlarge.rc: 8 vCPU dan memori 8 GB</li><li>c1.xxlarge.rc: 16 vCPU dan memori 16 GB</li><li>c1.qlarge.rc: 32 vCPU dan memori 32 GB</li></ol></td></tr><tr><td><em>Shared</em></td><td>1 vCPU</td><td><p>Pilihan <em>Instance Size</em>:</p><ol><li>s1.small.rc: 1 vCPU dan memori 4 GB</li><li>o1.small.rc: 1 vCPU dan memori 3 GB</li><li>c1.qsmall.rs: 1 vCPU dan memori 2 GB</li><li>c1.small.rc: 1 vCPU dan memori 1 GB</li></ol></td></tr><tr><td><em>Memory Optimized</em></td><td>Rasio CPU:RAM 1:4</td><td><p>Pilihan <em>Instance Size</em>:</p><ol><li>o1.xxxxlarge.rc: 2 vCPU dan memori 32 GB</li><li>o1.xxxLarge.rc: 2 vCPU dan memori 16 GB</li><li>s1.medium.rc: 2 vCPU dan memori 8 GB</li><li>c1.sxLarge.rc: 4 vCPU dan memori 64 GB</li><li>c1.xxxLarge.rc: 4 vCPU dan memori 32 GB</li><li>s1.large.rc: 4 vCPU dan memori 16 GB</li><li>q1.xlarge.rc: 8 vCPU dan memori 128 GB</li><li>s1.sxlarge.rc: 8 vCPU dan memori 32 GB</li><li>s1.xlarge.rc: 8 vCPU dan memori 32 GB</li><li>s1.xxlarge.rc: 16 vCPU dan memori 64 GB</li><li>s1.qlarge.rc: 32 vCPU dan memori 128 GB</li><li>a1.xxxlarge.rc: 64 vCPU dan memori 512 GB</li></ol></td></tr></tbody></table>

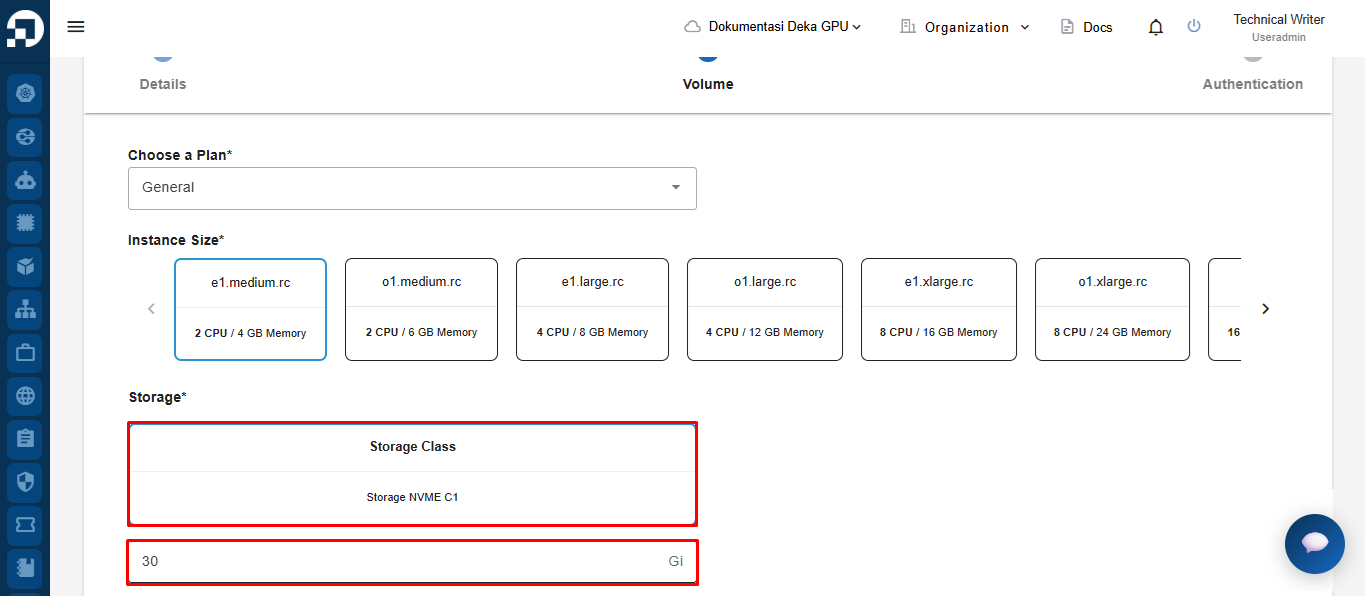
Setelah memilih *Choose a Plan*, tentukan ukuran penyimpanan VM pada kolom *Storage*. Penyimpanan yang digunakan bertipe *Tier 2* (NVME), dengan ukuran minimum 30 Gi.

<figure><img src="https://putri.box.cloudeka.id/cloudeka-assets/docs.cloudeka.ai/1dekagpu/createvm_07.png" alt=""><figcaption></figcaption></figure>

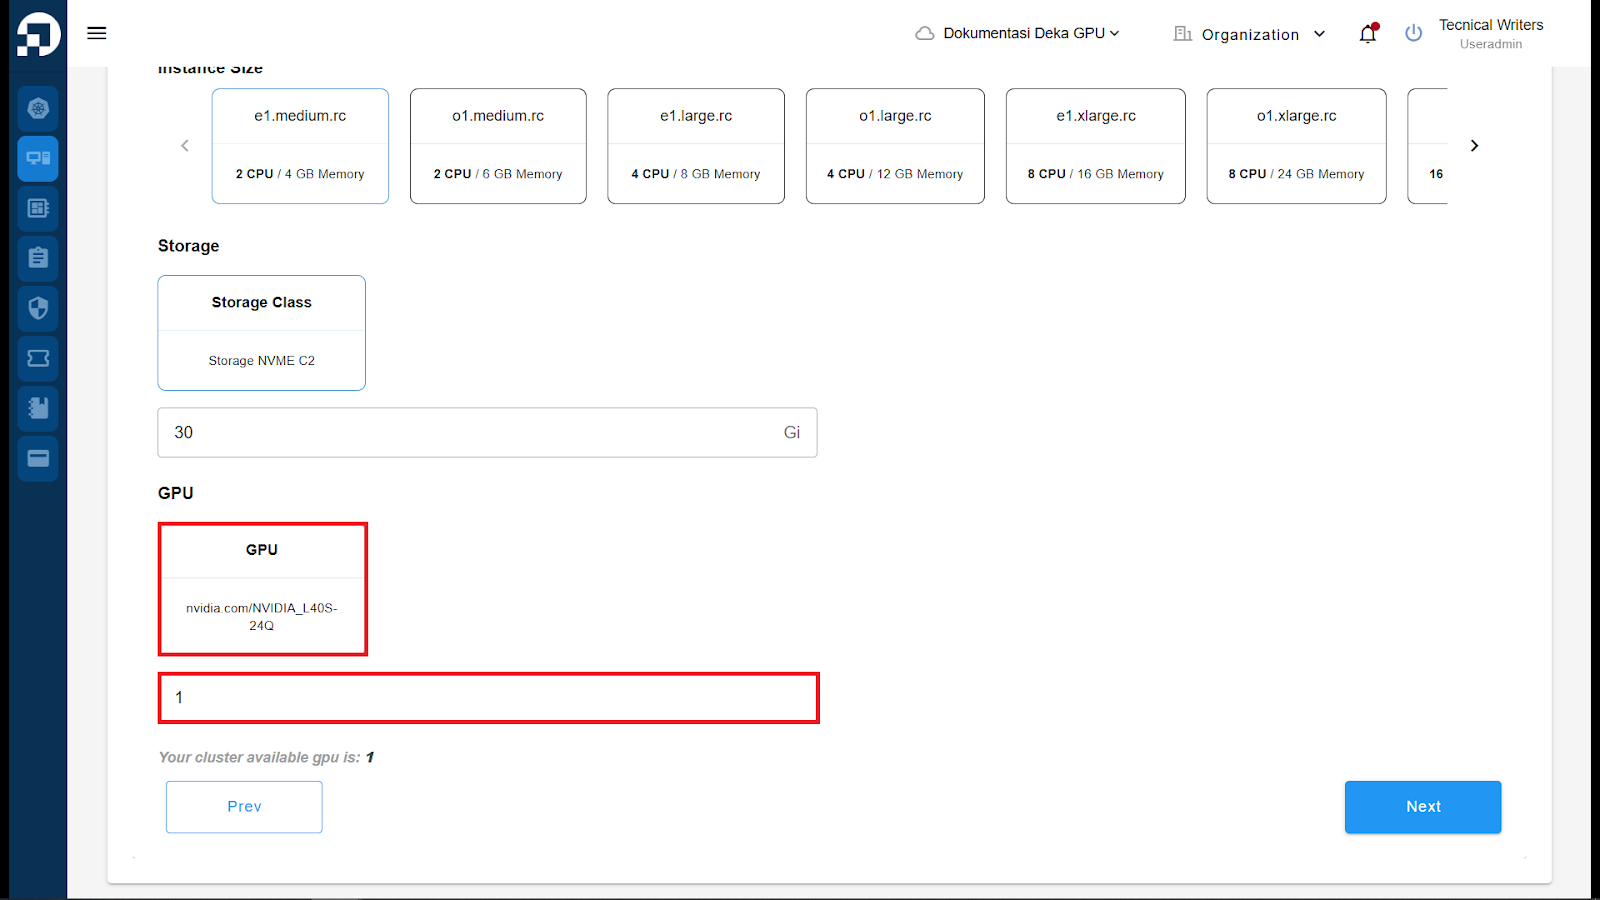
Setelah memilih *Storage*, tentukan GPU yang digunakan pada kolom jumlah GPU.

<figure><img src="https://putri.box.cloudeka.id/cloudeka-assets/docs.cloudeka.ai/1dekagpu/createvm_08.png" alt=""><figcaption><p><em>Add GPU</em></p></figcaption></figure>

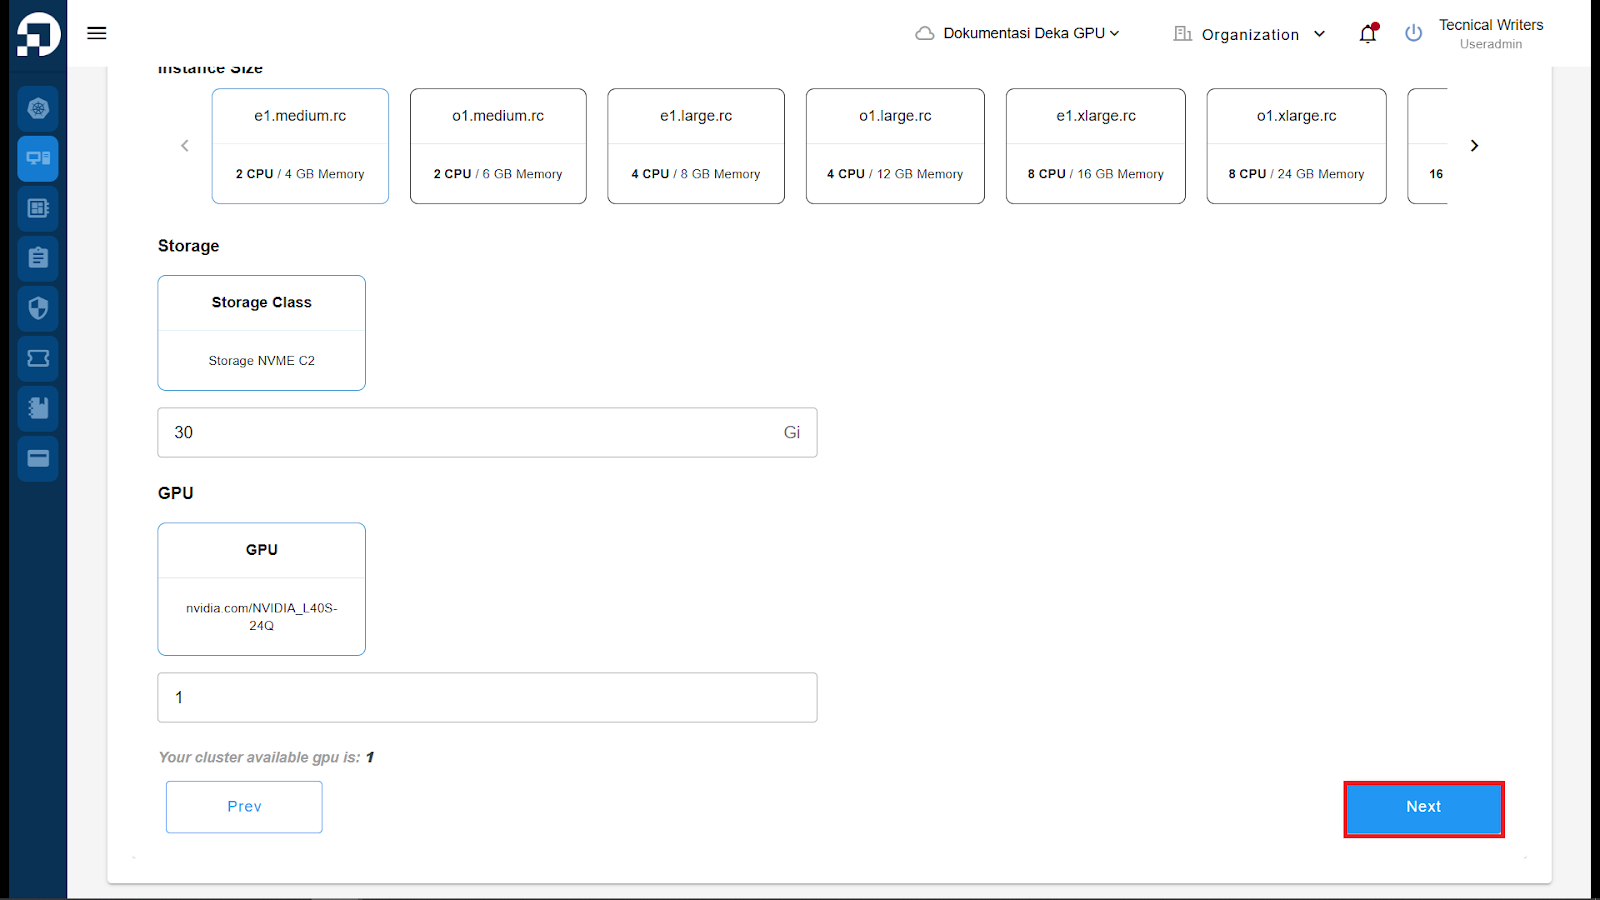
Setelah mengisi semua kolom, klik *Next* untuk melanjutkan.

<figure><img src="https://putri.box.cloudeka.id/cloudeka-assets/docs.cloudeka.ai/1dekagpu/createvm_09.png" alt=""><figcaption><p><em>Next Page</em></p></figcaption></figure>

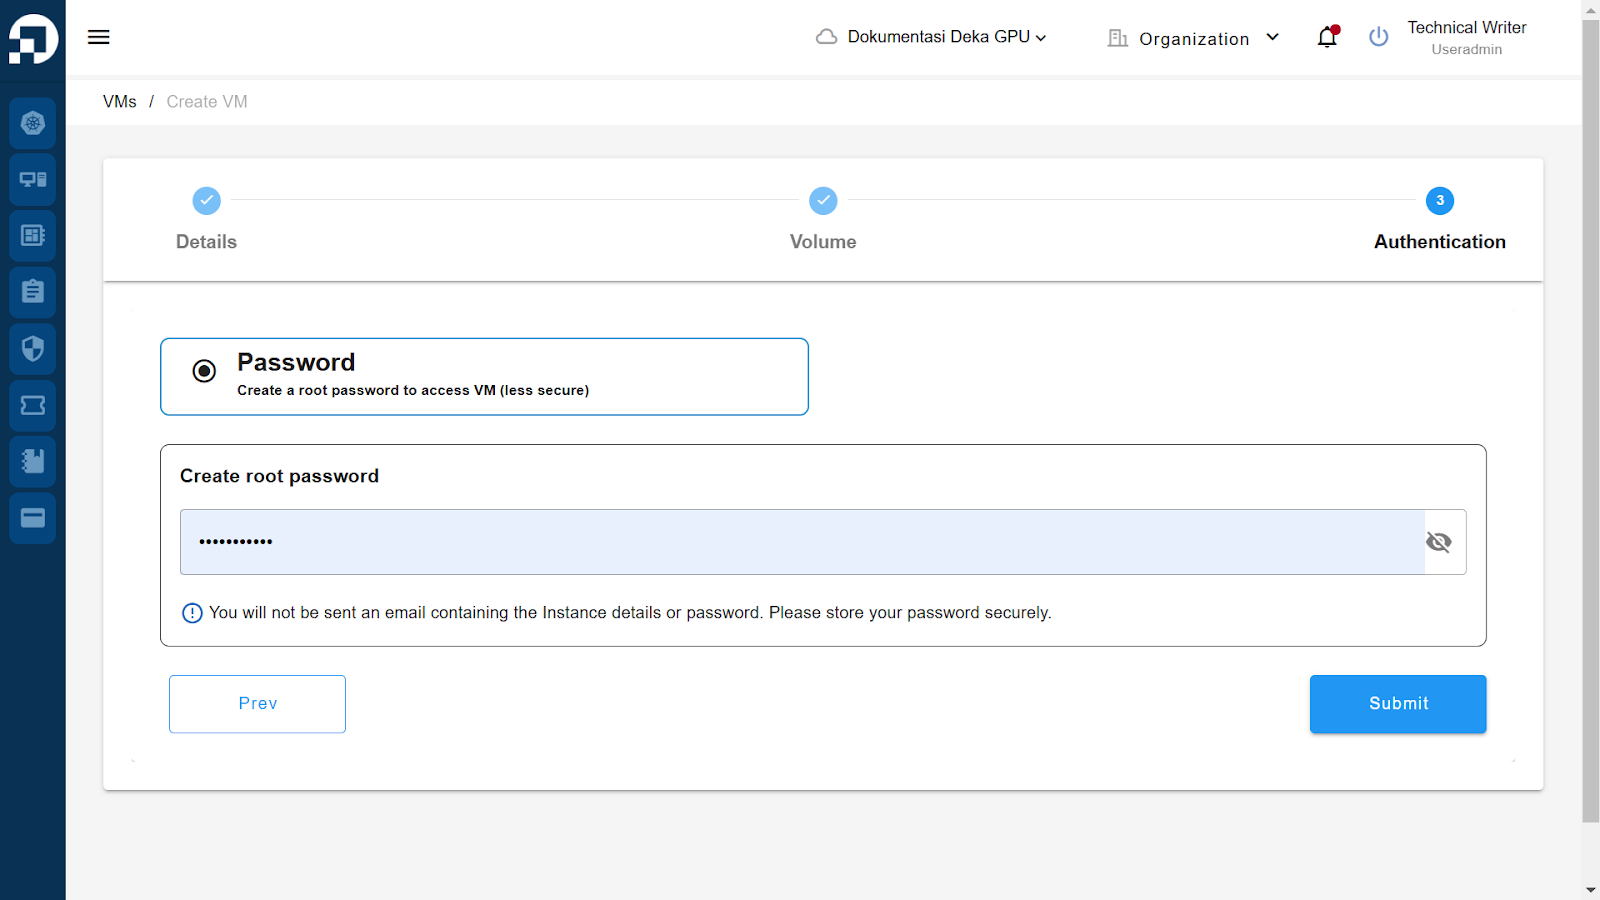
Pada tahap ketiga, halaman *Authentication*, masukkan kata sandi untuk mengakses instance VM. Kata sandi harus memiliki sedikitnya 12 karakter dengan kombinasi huruf kecil (a-z), angka (0-9), simbol (!@#$%^&\*), dan huruf besar (A-Z). Klik *Submit* untuk membuat VM.

<figure><img src="https://putri.box.cloudeka.id/cloudeka-assets/docs.cloudeka.ai/1dekagpu/createvm_10.png" alt=""><figcaption><p><em>Password</em></p></figcaption></figure>

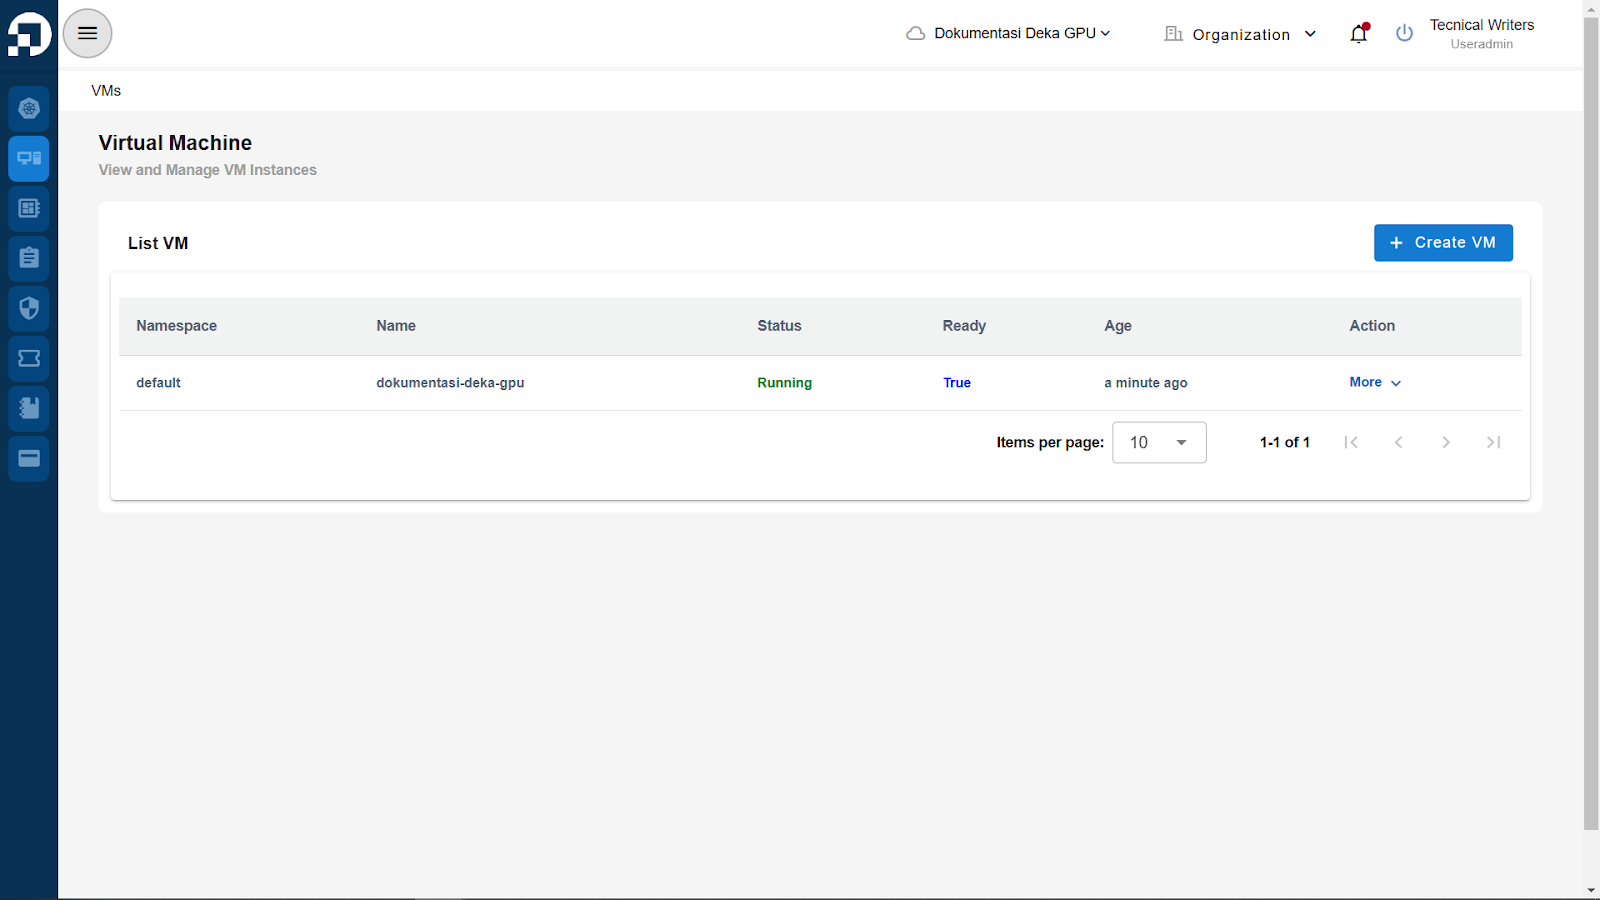
Setelah konfigurasi instance VM berhasil dibuat, VM akan tersedia pada halaman *VMs* di *Service Portal* Cloudeka.

<figure><img src="https://putri.box.cloudeka.id/cloudeka-assets/docs.cloudeka.ai/1dekagpu/createvm_11.png" alt=""><figcaption><p><em>Success Create a VM</em></p></figcaption></figure>