> For the complete documentation index, see [llms.txt](https://docs.cloudeka.ai/llms.txt). Markdown versions of documentation pages are available by appending `.md` to page URLs; this page is available as [Markdown](https://docs.cloudeka.ai/guide-for-individual/bahasa/deka-claw/detail-deka-claw/channel/create-channel.md).

# Create Channel

{% hint style="warning" %}
Before create Channel, make sure you have a agent. You can see this section for [Create Agent](/guide-for-individual/bahasa/deka-claw/detail-deka-claw/agent/create-agent.md).&#x20;
{% endhint %}

The **Create Channel** feature is used to set up a new connection between Deka Claw and a communication platform (such as Telegram), allowing bots or agents to interact with users through that channel.

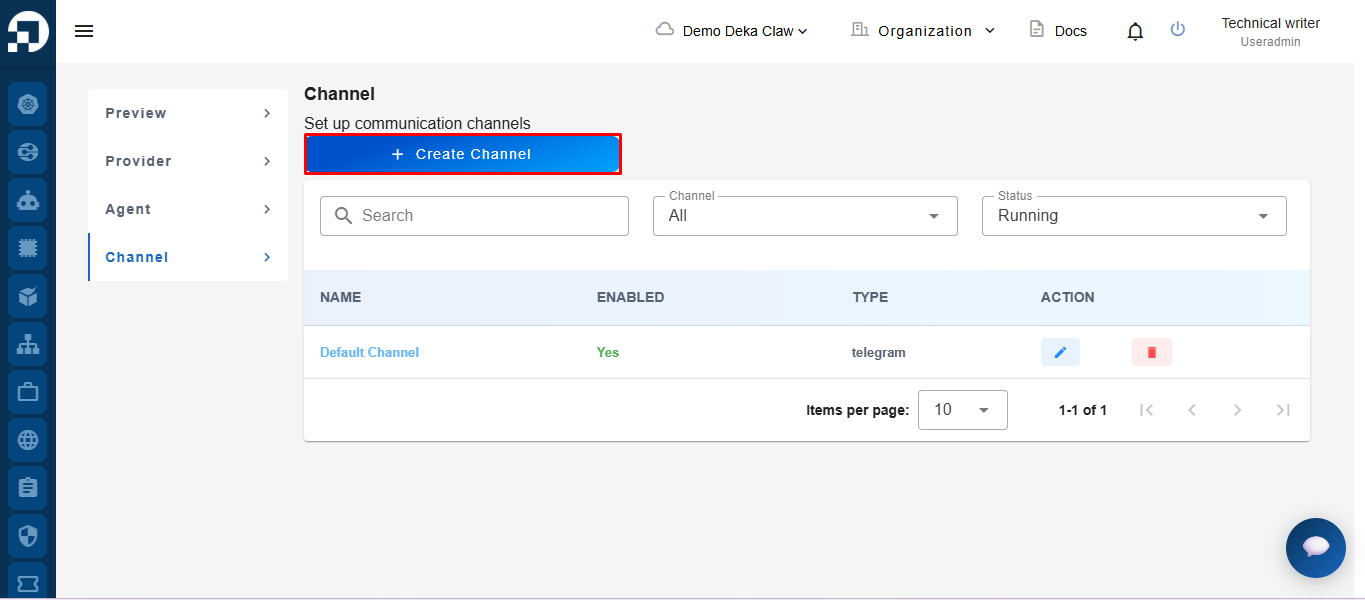
To create a Channel, click the **+ Create Channel** button

<figure><img src="https://content.gitbook.com/content/cjAISi6xXwQD05JzCqqO/blobs/Aypb9IDm9zfyVrHPUZSq/image.png" alt=""><figcaption></figcaption></figure>

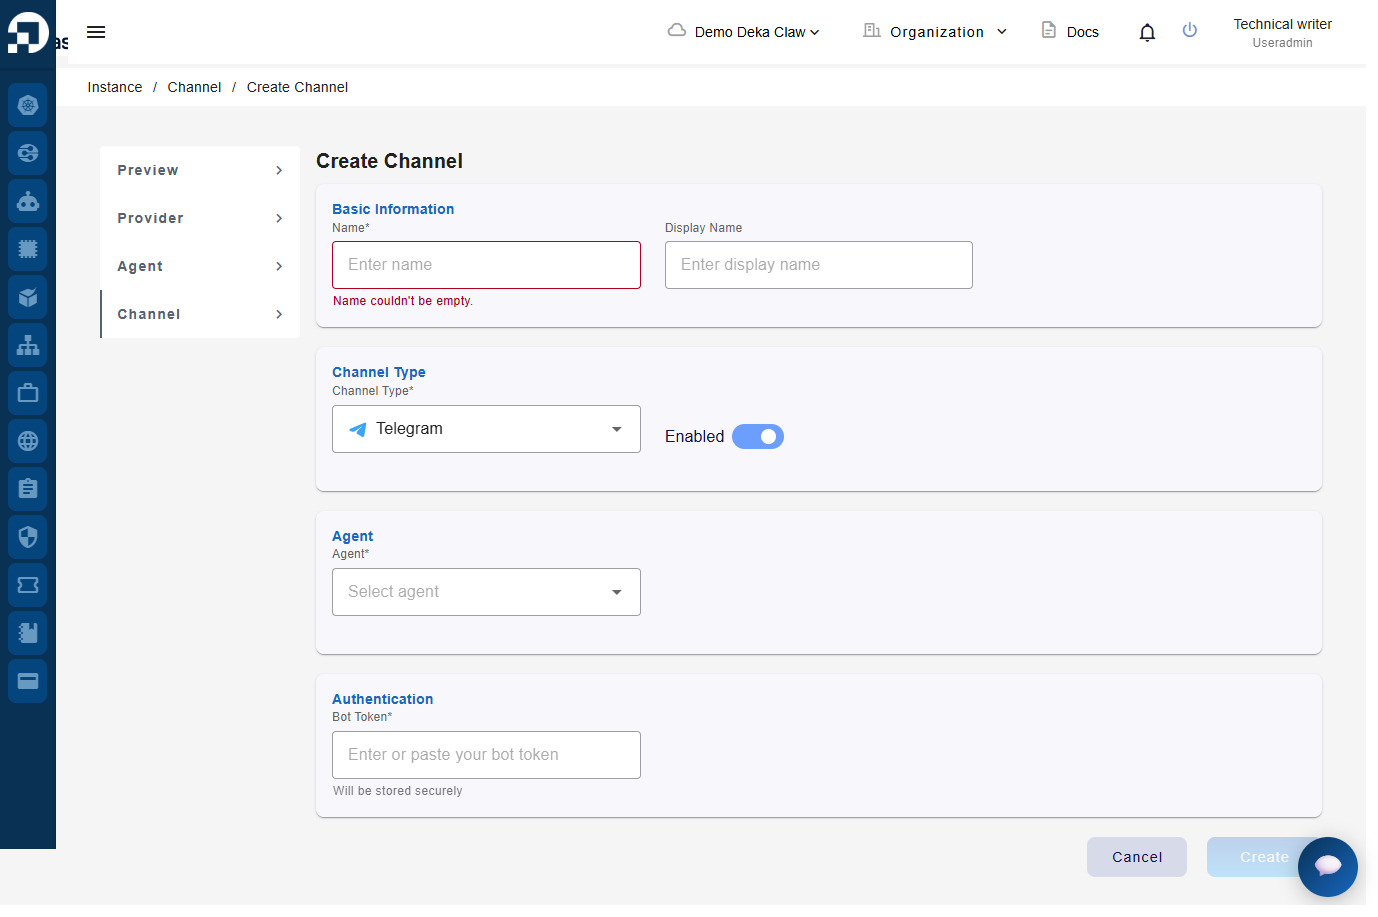
After clicking the **Create Channel** button, the system will display a channel creation form consisting of several sections. These sections include **Basic Information** to enter the channel’s basic information, **Channel Type** to select the Channel type to be used, and **Agent** to specify the agent that will be connected to the Channel.

<figure><img src="https://content.gitbook.com/content/cjAISi6xXwQD05JzCqqO/blobs/u8JIoIUh0SzkR2Esqwjy/screencapture-cmd-ai-cloudeka-id-deka-flexi-instance-claw-387ab87d-f2d1-40dc-a574-d3df558edc75-channel-create-2026-05-26-13_28_11.png" alt=""><figcaption></figcaption></figure>

<table><thead><tr><th width="147.8333740234375">Column</th><th>Description</th></tr></thead><tbody><tr><td>Name</td><td>The unique name used to identify the Channel within the system.</td></tr><tr><td>Display Name</td><td>The display name shown for the Channel in the user interface.</td></tr><tr><td>Channel Type</td><td>The communication platform used by the Channel, such as Telegram.</td></tr><tr><td>Enabled</td><td>Enables or disables the Channel after it is created.</td></tr><tr><td>Agent</td><td>The Agent that will be connected to and used by the Channel.</td></tr><tr><td>Bot Token</td><td>The authentication token used to connect the Channel with the messaging platform.</td></tr></tbody></table>

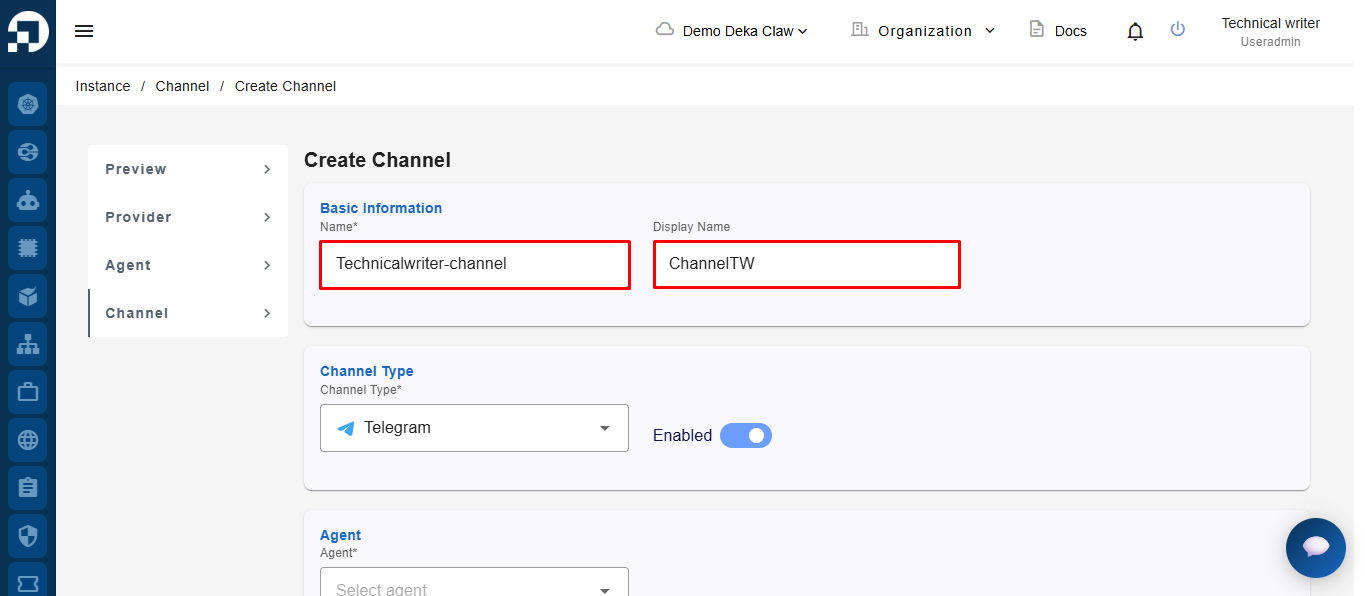
Enter the Channel name in the **Name** field. In the **Display Name** field, enter the Channel display name as needed.

<figure><img src="https://content.gitbook.com/content/cjAISi6xXwQD05JzCqqO/blobs/zIurBJeoKhUWUIzNLZdr/image.png" alt=""><figcaption></figcaption></figure>

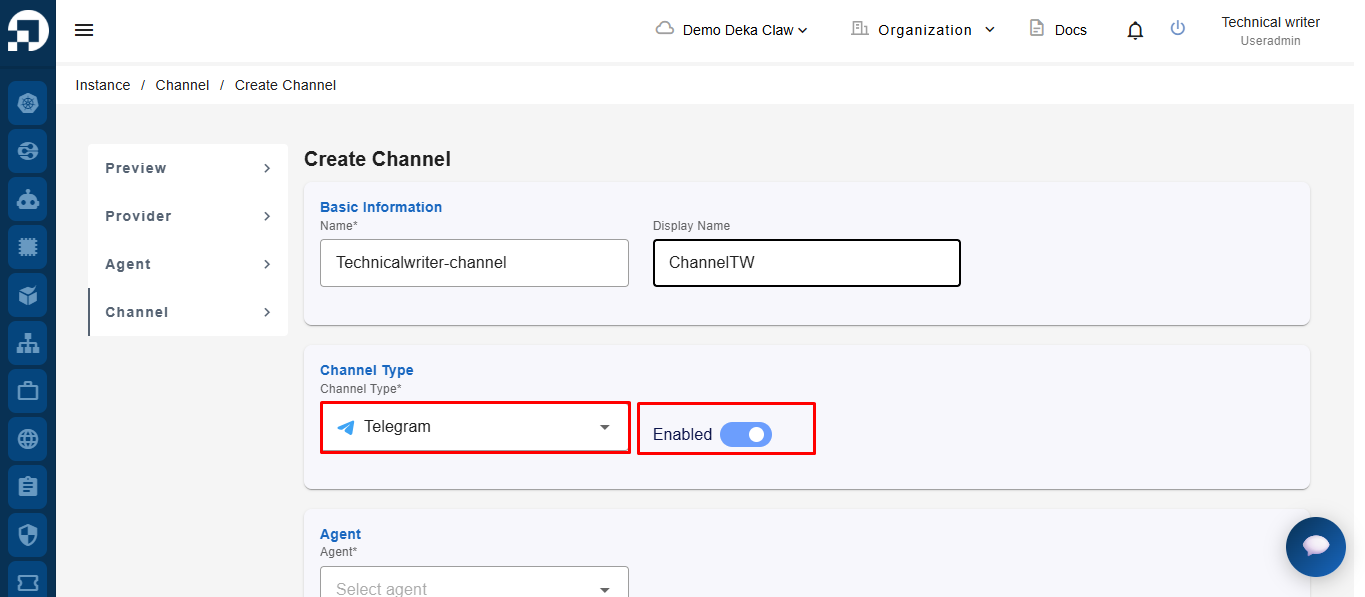
In the **Channel Type** section, select the channel type to be used, then enable the **Enabled** toggle if the Channel should be activated immediately.

<figure><img src="https://content.gitbook.com/content/cjAISi6xXwQD05JzCqqO/blobs/4jajE8hOscDk1fnPM5PX/image.png" alt=""><figcaption></figcaption></figure>

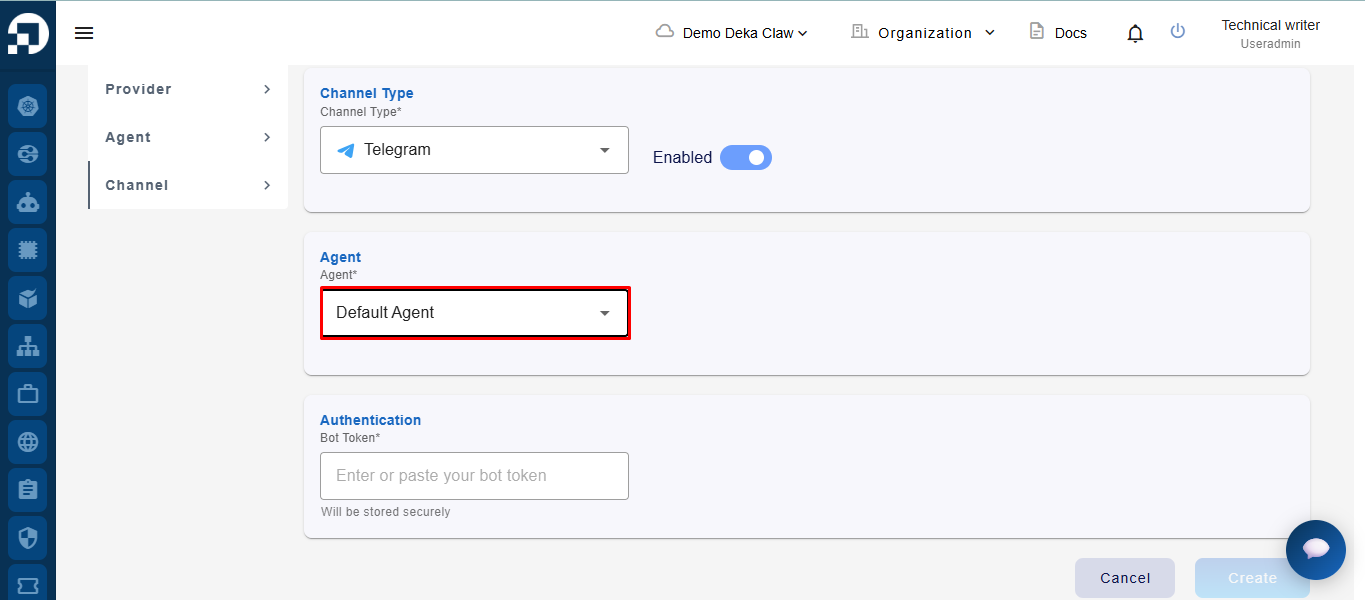
Next, in the **Agent** field, select the Agent to be connected to the Channel.&#x20;

<figure><img src="https://content.gitbook.com/content/cjAISi6xXwQD05JzCqqO/blobs/LP9RrqjExkZZOx8CQXKv/image.png" alt=""><figcaption></figcaption></figure>

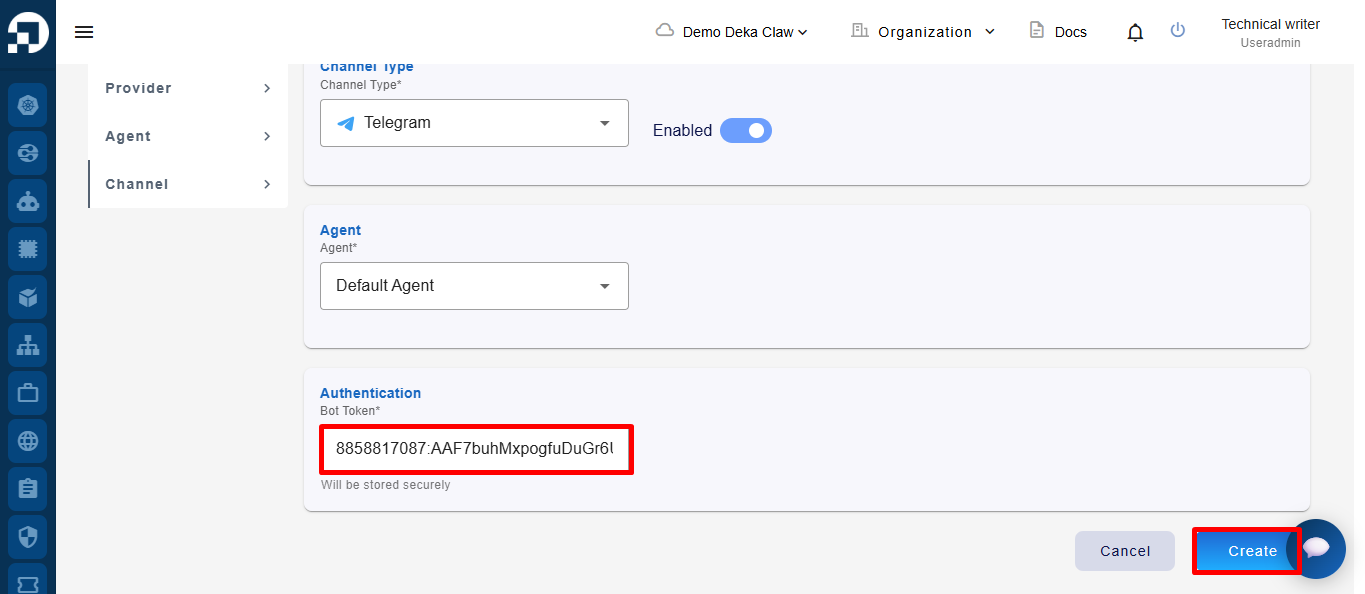
In the **Bot Token** section, enter the bot token for channel authentication. After all data has been filled in, click the **Create** button to create the Channel.

<figure><img src="https://content.gitbook.com/content/cjAISi6xXwQD05JzCqqO/blobs/8nmj9zuKGR6E2KDdzKp8/image.png" alt=""><figcaption></figcaption></figure>

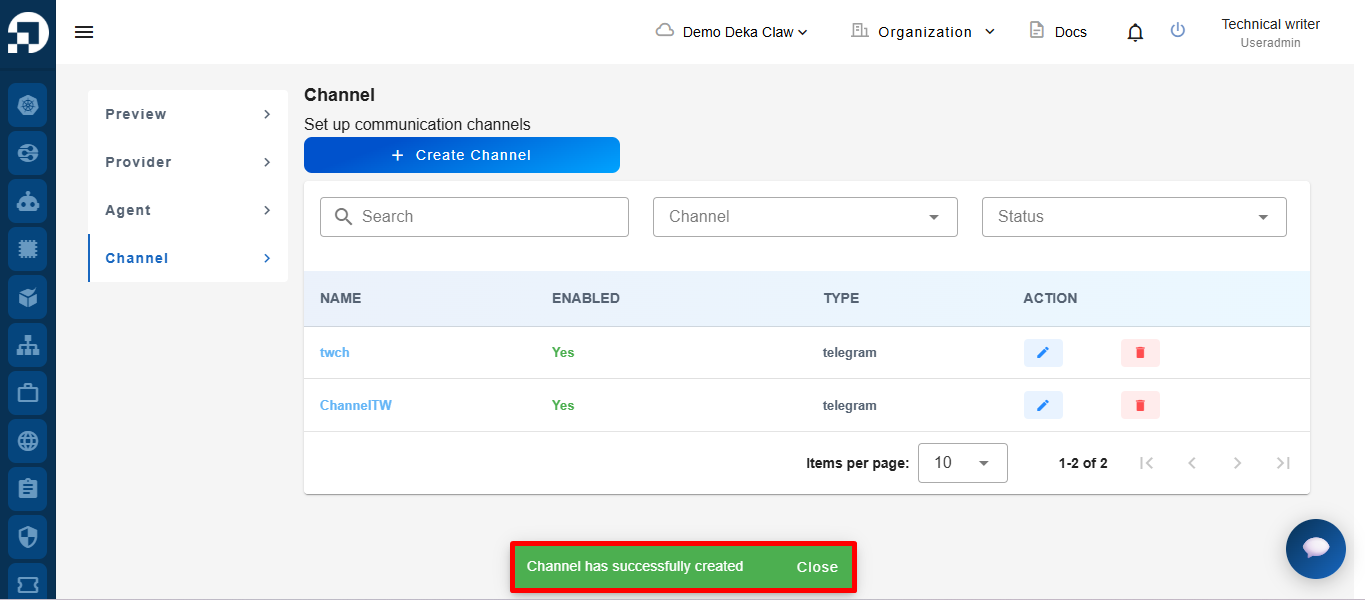
After the create process is completed successfully, the system will display the notification message **"Channel has successfully created"**

<figure><img src="https://content.gitbook.com/content/cjAISi6xXwQD05JzCqqO/blobs/hvXUO5hdRzejJxbBptKd/image.png" alt=""><figcaption></figcaption></figure>