> For the complete documentation index, see [llms.txt](https://docs.cloudeka.ai/llms.txt). Markdown versions of documentation pages are available by appending `.md` to page URLs; this page is available as [Markdown](https://docs.cloudeka.ai/guideline-for-enterprise/deka-gpu-mlops/manage-notebook-schedules/notebook-start-stop-schedules.md).

# Notebook Start/Stop Schedules

## Create Notebook Start/Stop Schedules

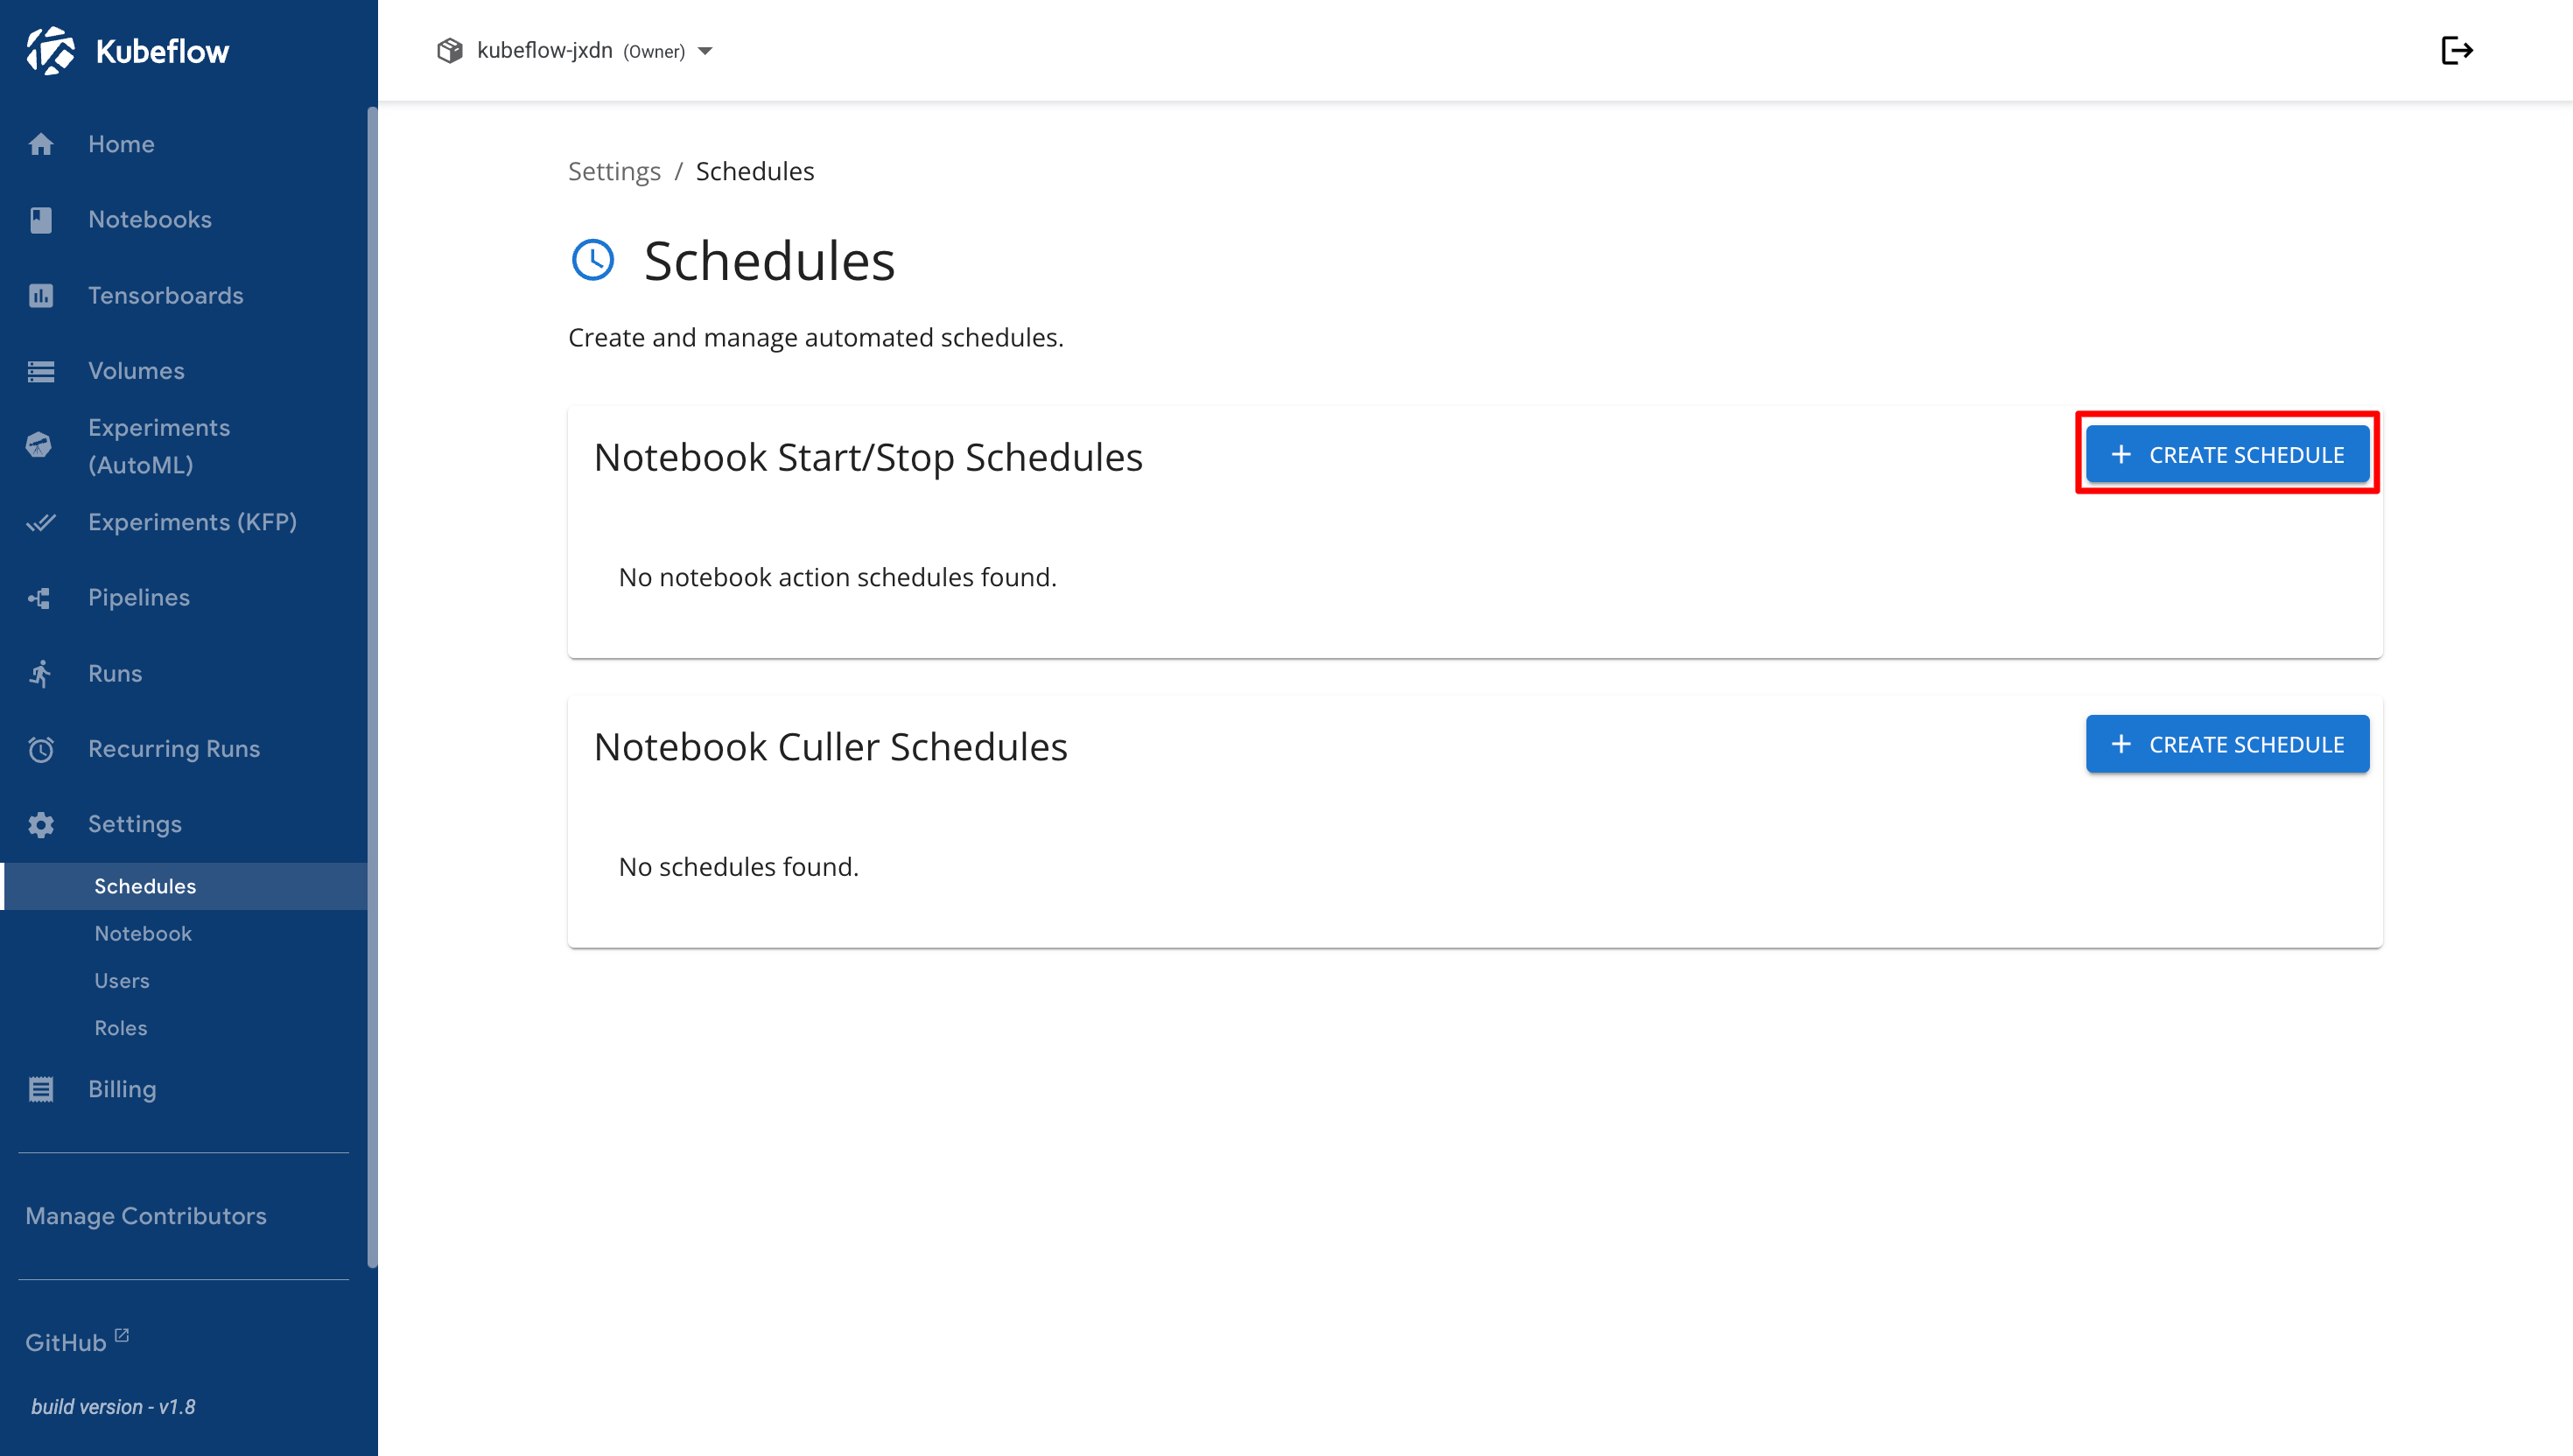
On the Notebook Start/Stop Schedules section, click **Create Schedule** to create a new notebook schedule.

<figure><img src="https://2882153758-files.gitbook.io/~/files/v0/b/gitbook-x-prod.appspot.com/o/spaces%2Fi9YWb69HFXLHYlXffReU%2Fuploads%2Fgit-blob-9938889cb03227c30c1a022a83e01bf4ebab4a1d%2Fimage.png?alt=media" alt=""><figcaption></figcaption></figure>

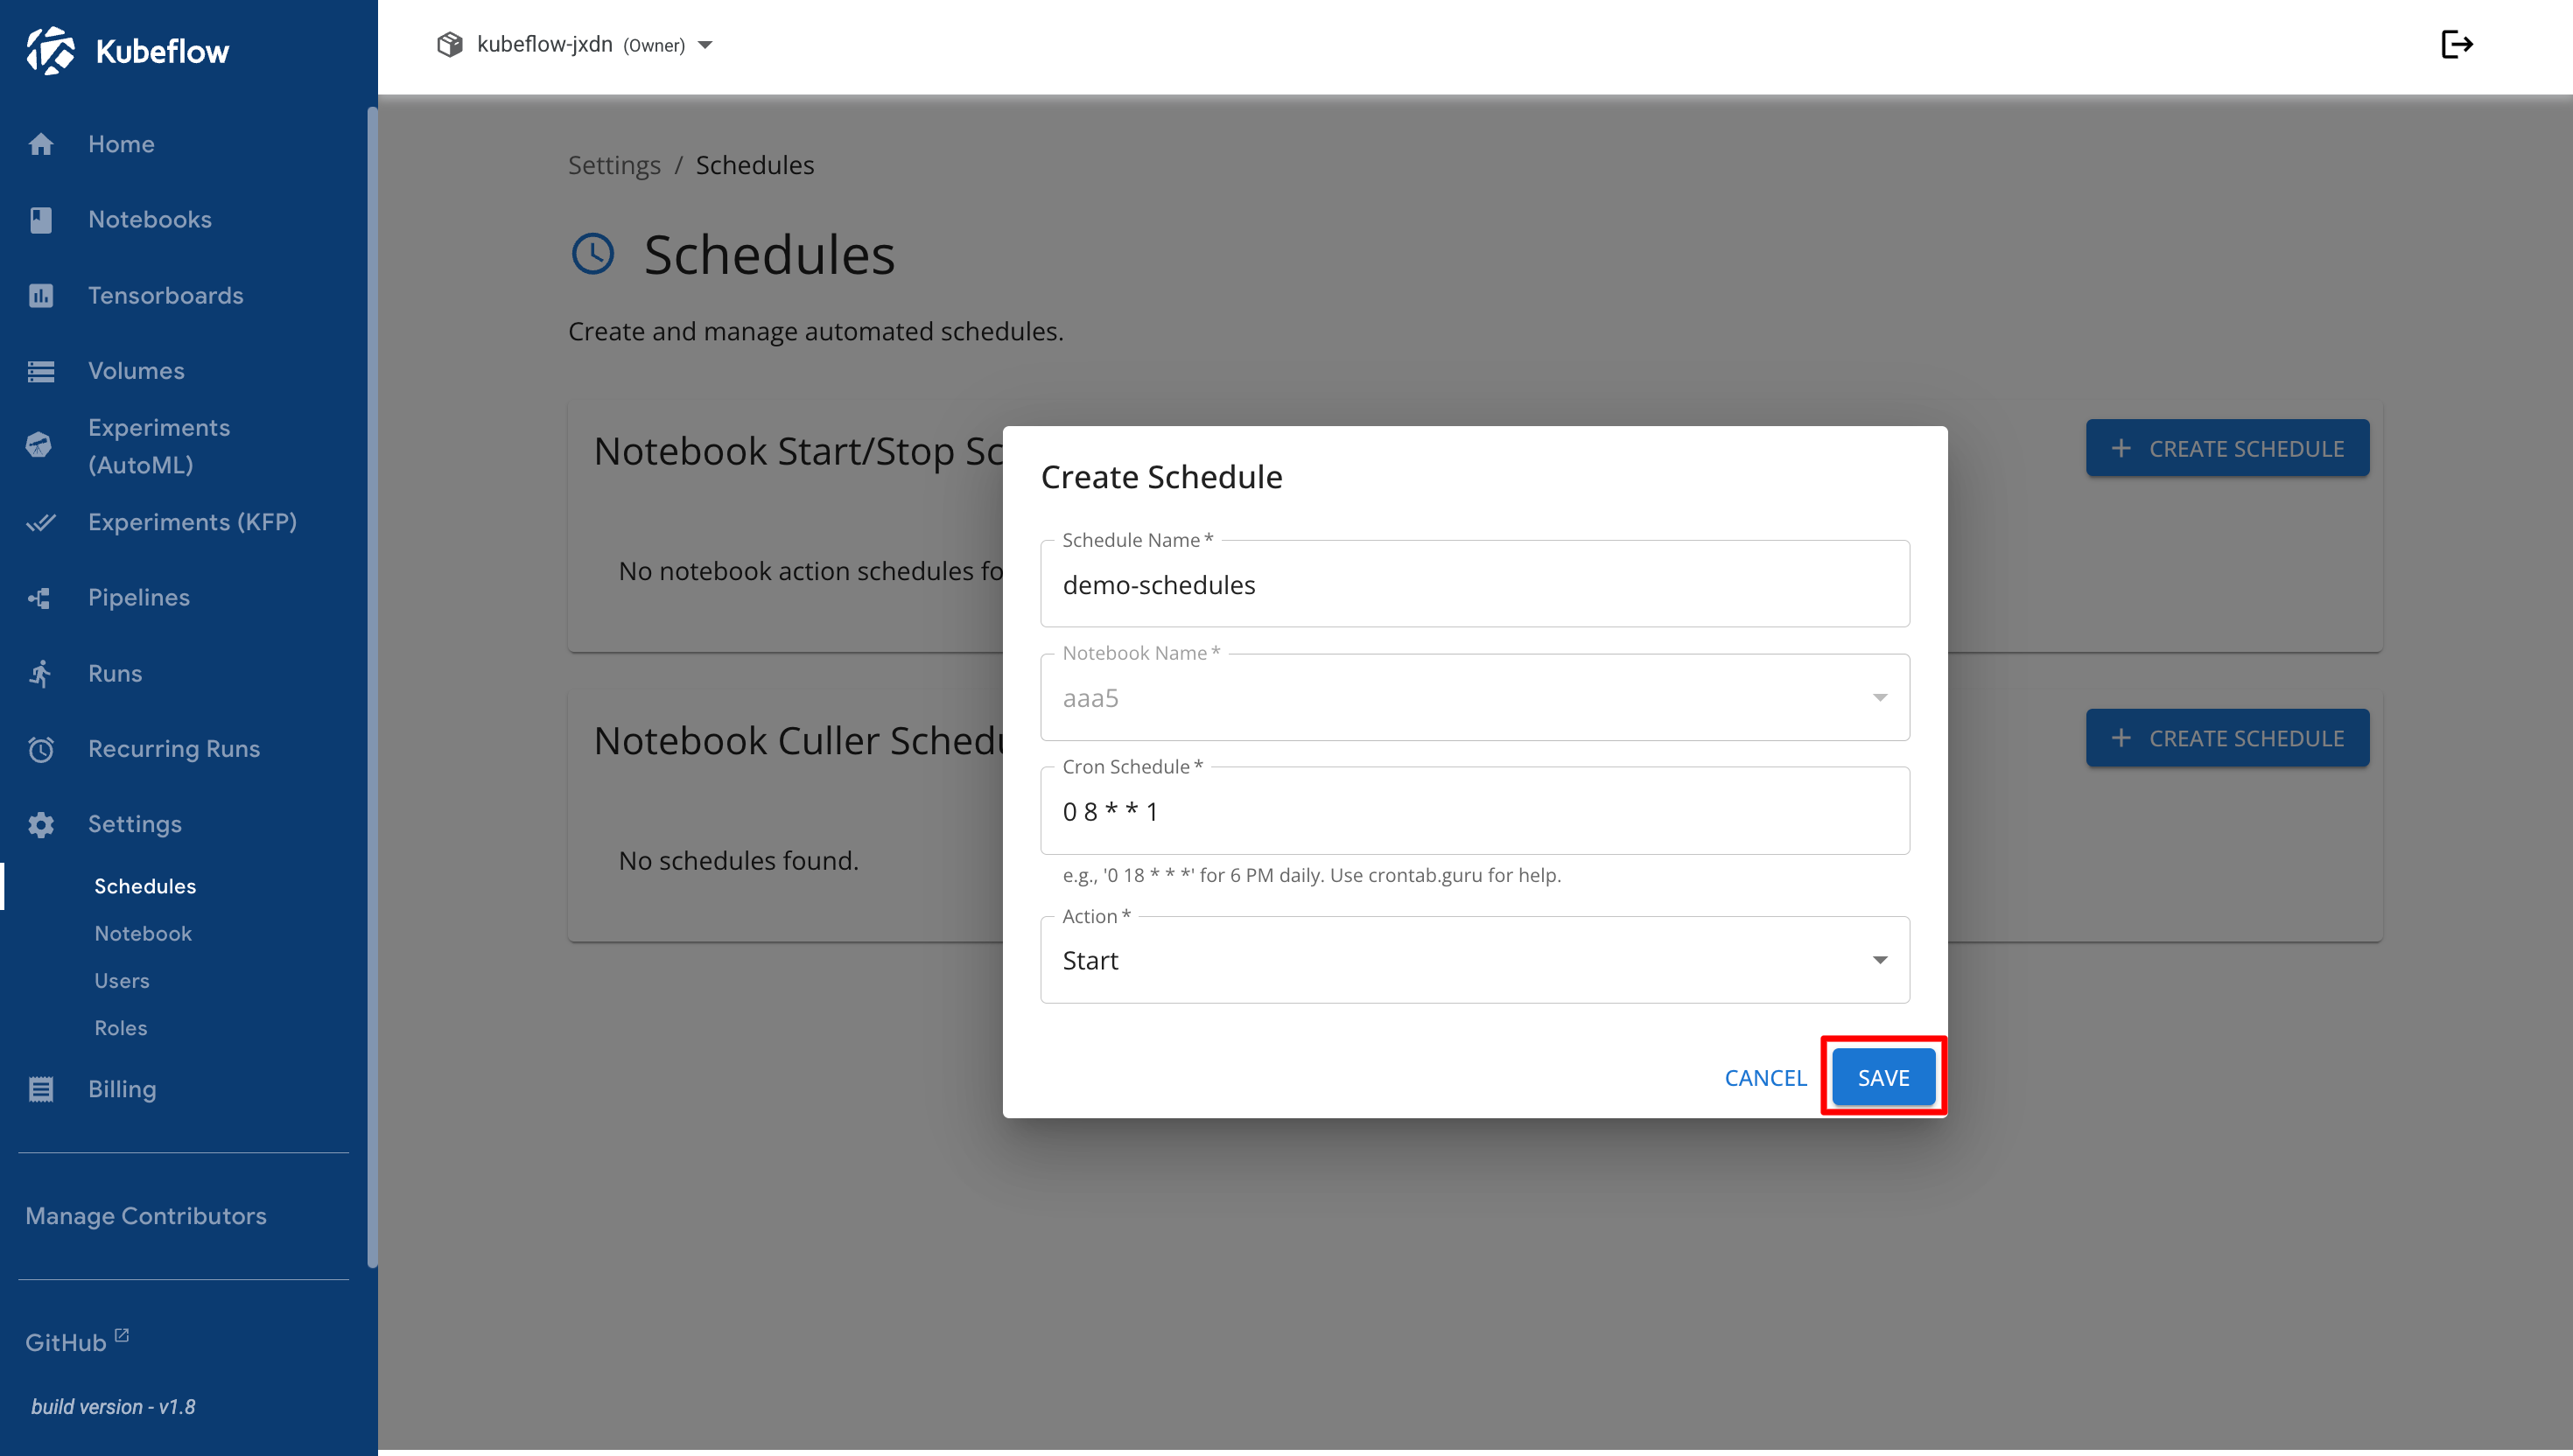
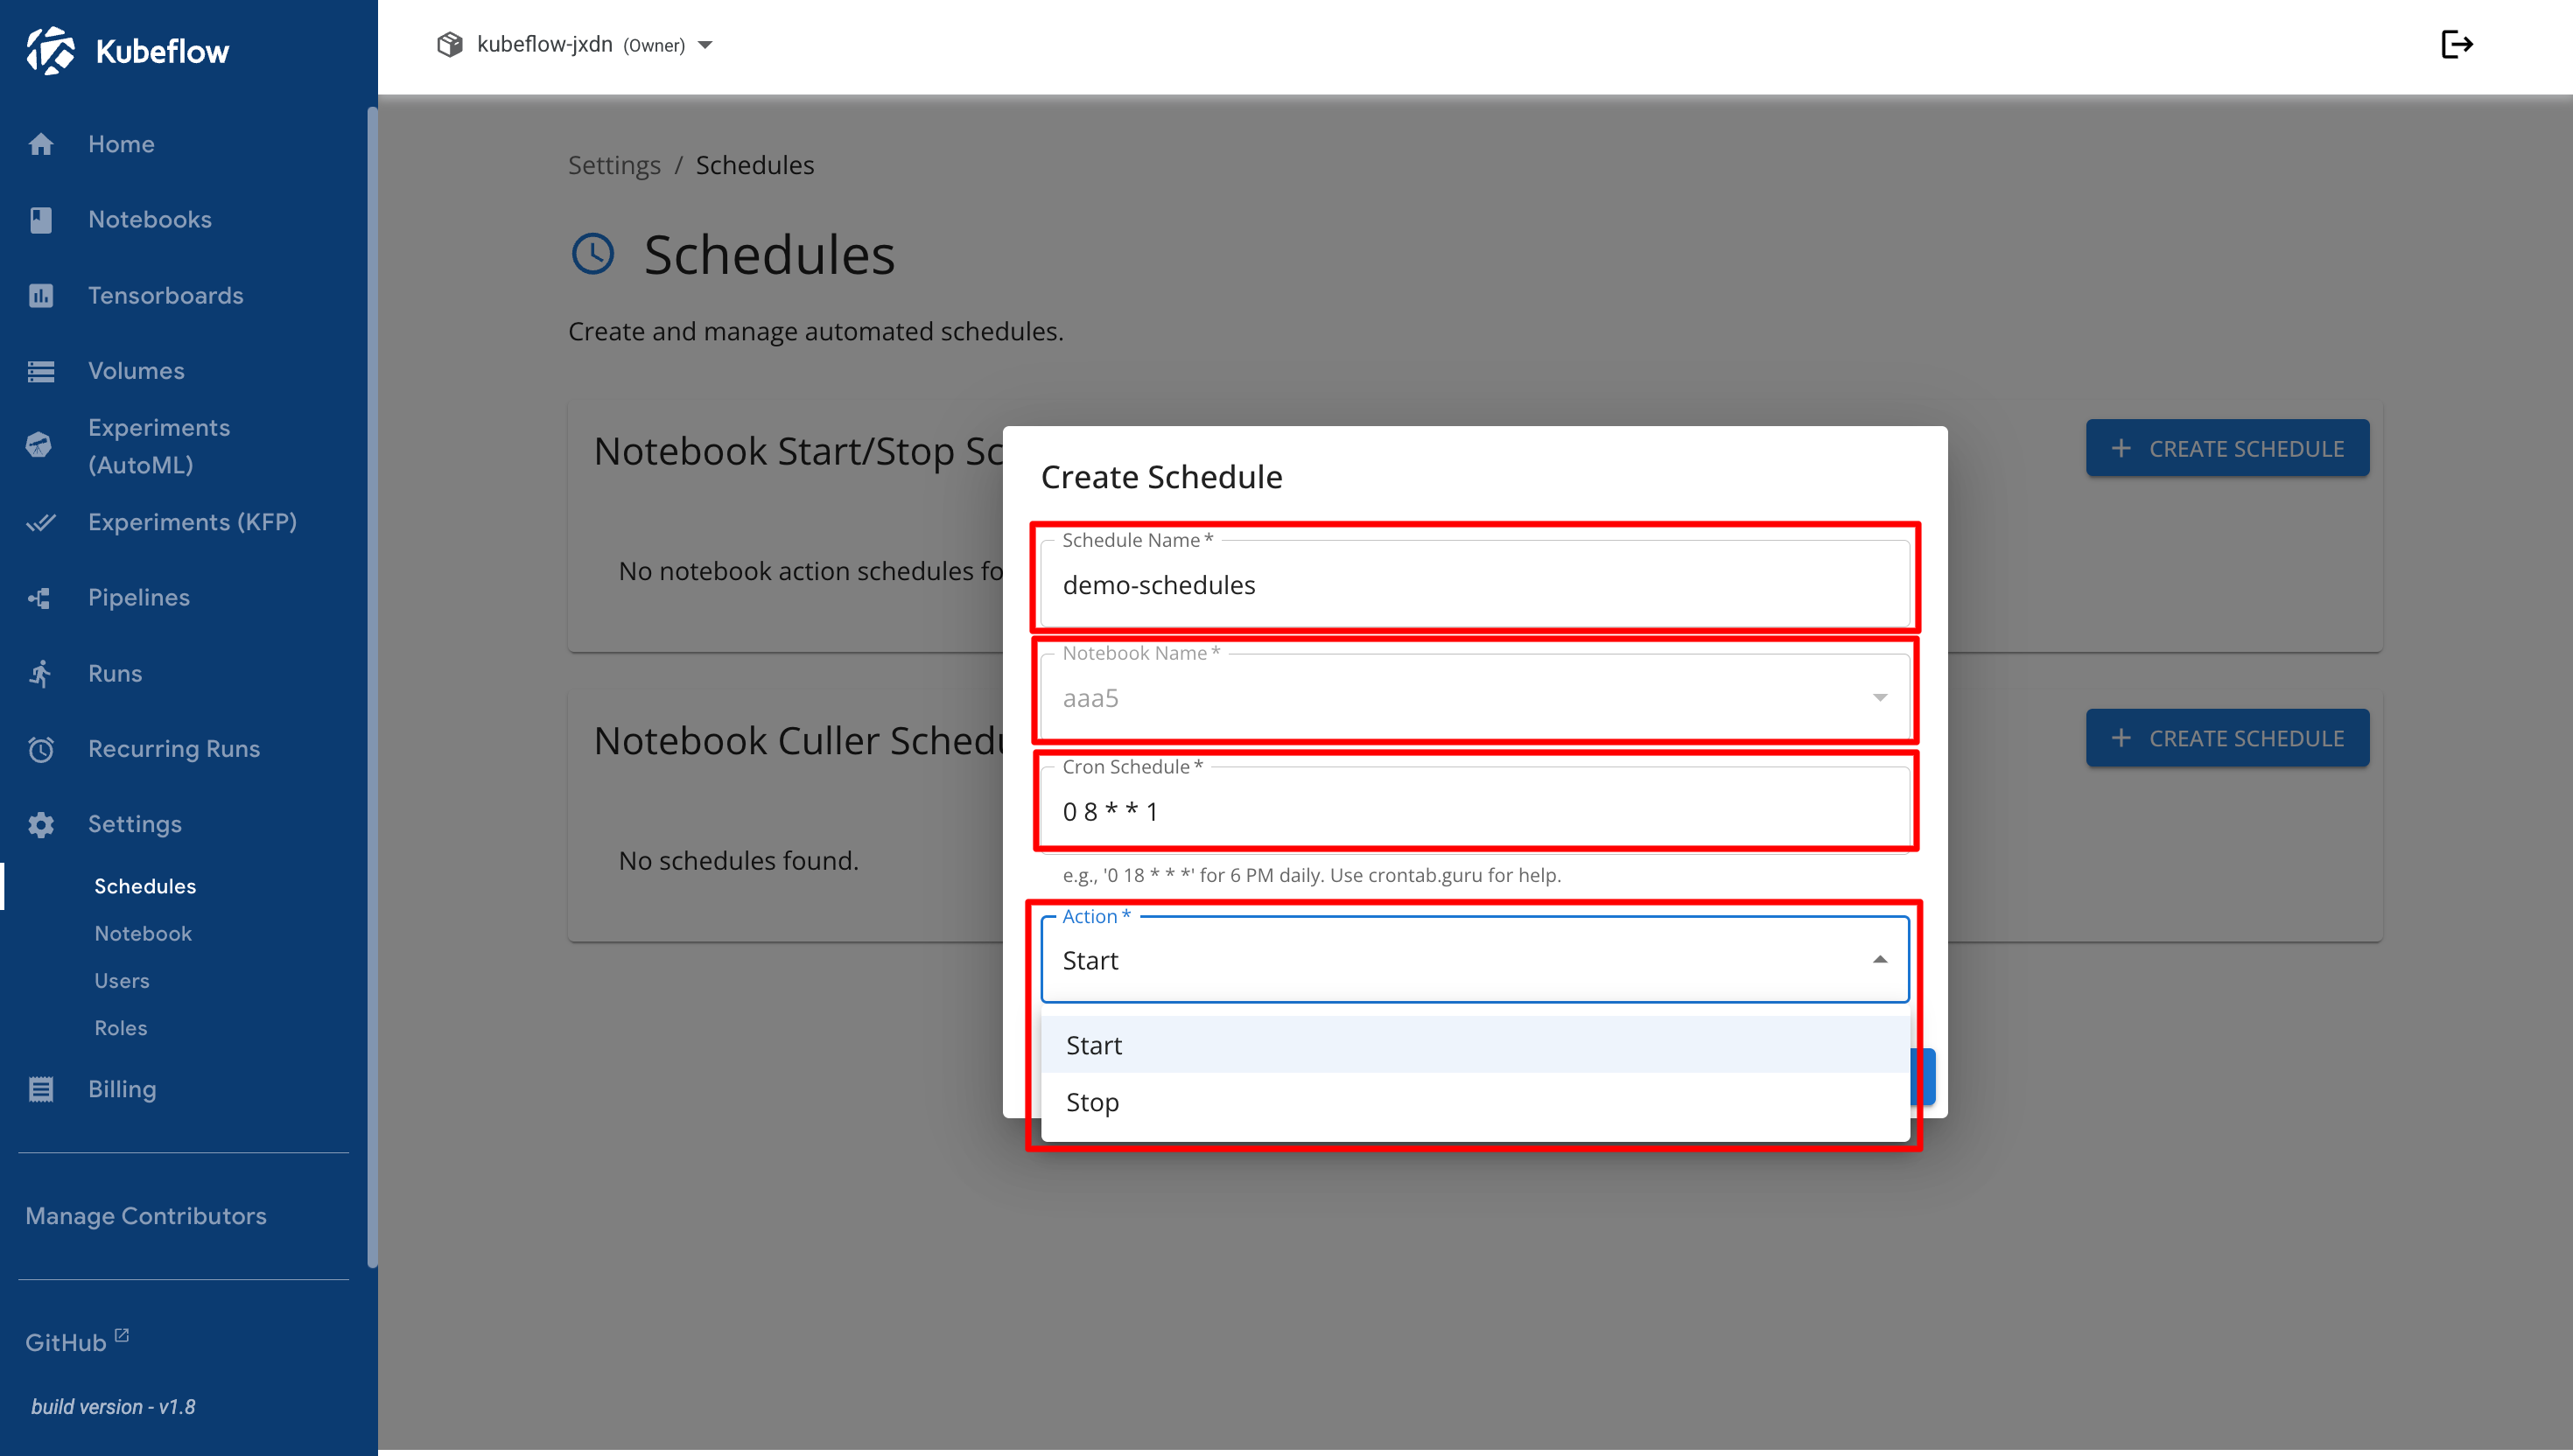
In the Create Schedule dialog, specify the schedule name, select the target notebook, enter the cron schedule, and choose the action to be performed.

<figure><img src="https://2882153758-files.gitbook.io/~/files/v0/b/gitbook-x-prod.appspot.com/o/spaces%2Fi9YWb69HFXLHYlXffReU%2Fuploads%2Fgit-blob-d7b8f28edcc696fdcfe64ed77659bb90cec5816a%2Fimage.png?alt=media" alt=""><figcaption></figcaption></figure>

After completing the required information, click **Save** to create the schedule.

<figure><img src="https://2882153758-files.gitbook.io/~/files/v0/b/gitbook-x-prod.appspot.com/o/spaces%2Fi9YWb69HFXLHYlXffReU%2Fuploads%2Fgit-blob-a93ced917e97c61163600792bddcf9d6935f2781%2Fimage.png?alt=media" alt=""><figcaption></figcaption></figure>

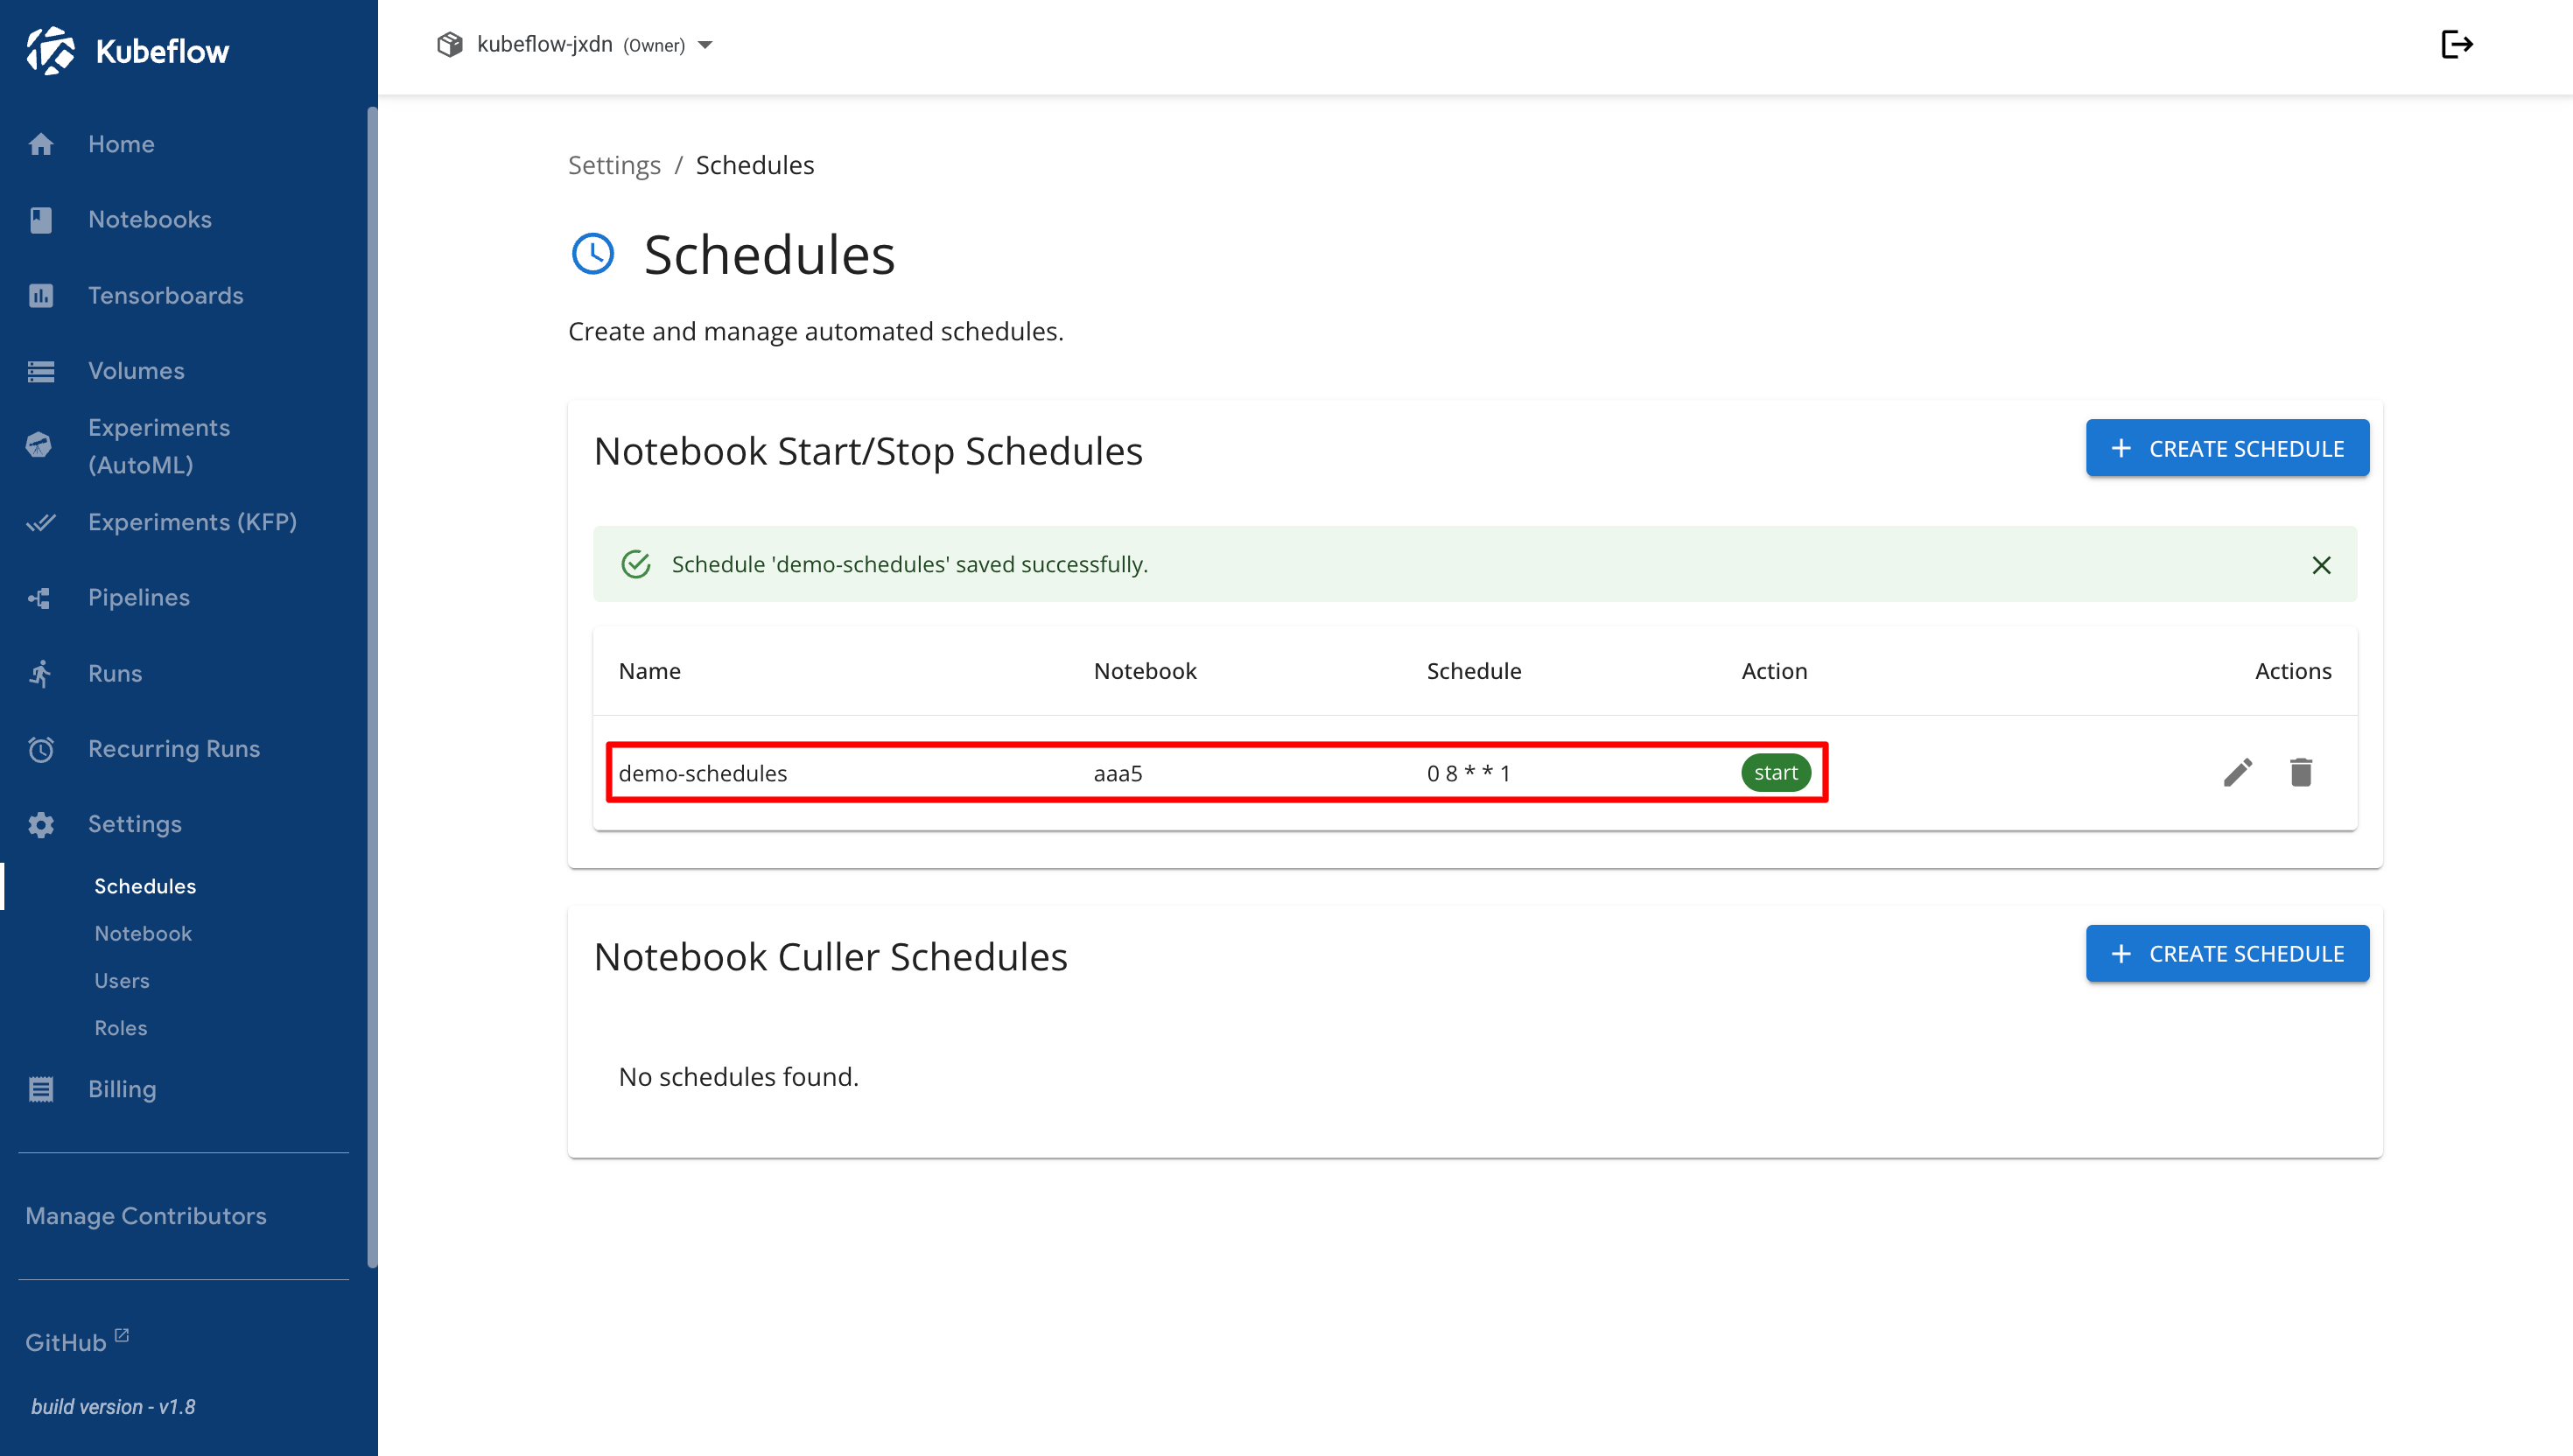
A success notification is displayed after the schedule is created. The new schedule will appear in the Notebook Start/Stop Schedules list.

<figure><img src="https://2882153758-files.gitbook.io/~/files/v0/b/gitbook-x-prod.appspot.com/o/spaces%2Fi9YWb69HFXLHYlXffReU%2Fuploads%2Fgit-blob-6db1fb15bce5d65362479df648a3a63c82faa1e7%2Fimage.png?alt=media" alt=""><figcaption></figcaption></figure>

## Modify Notebook Start/Stop Schedules

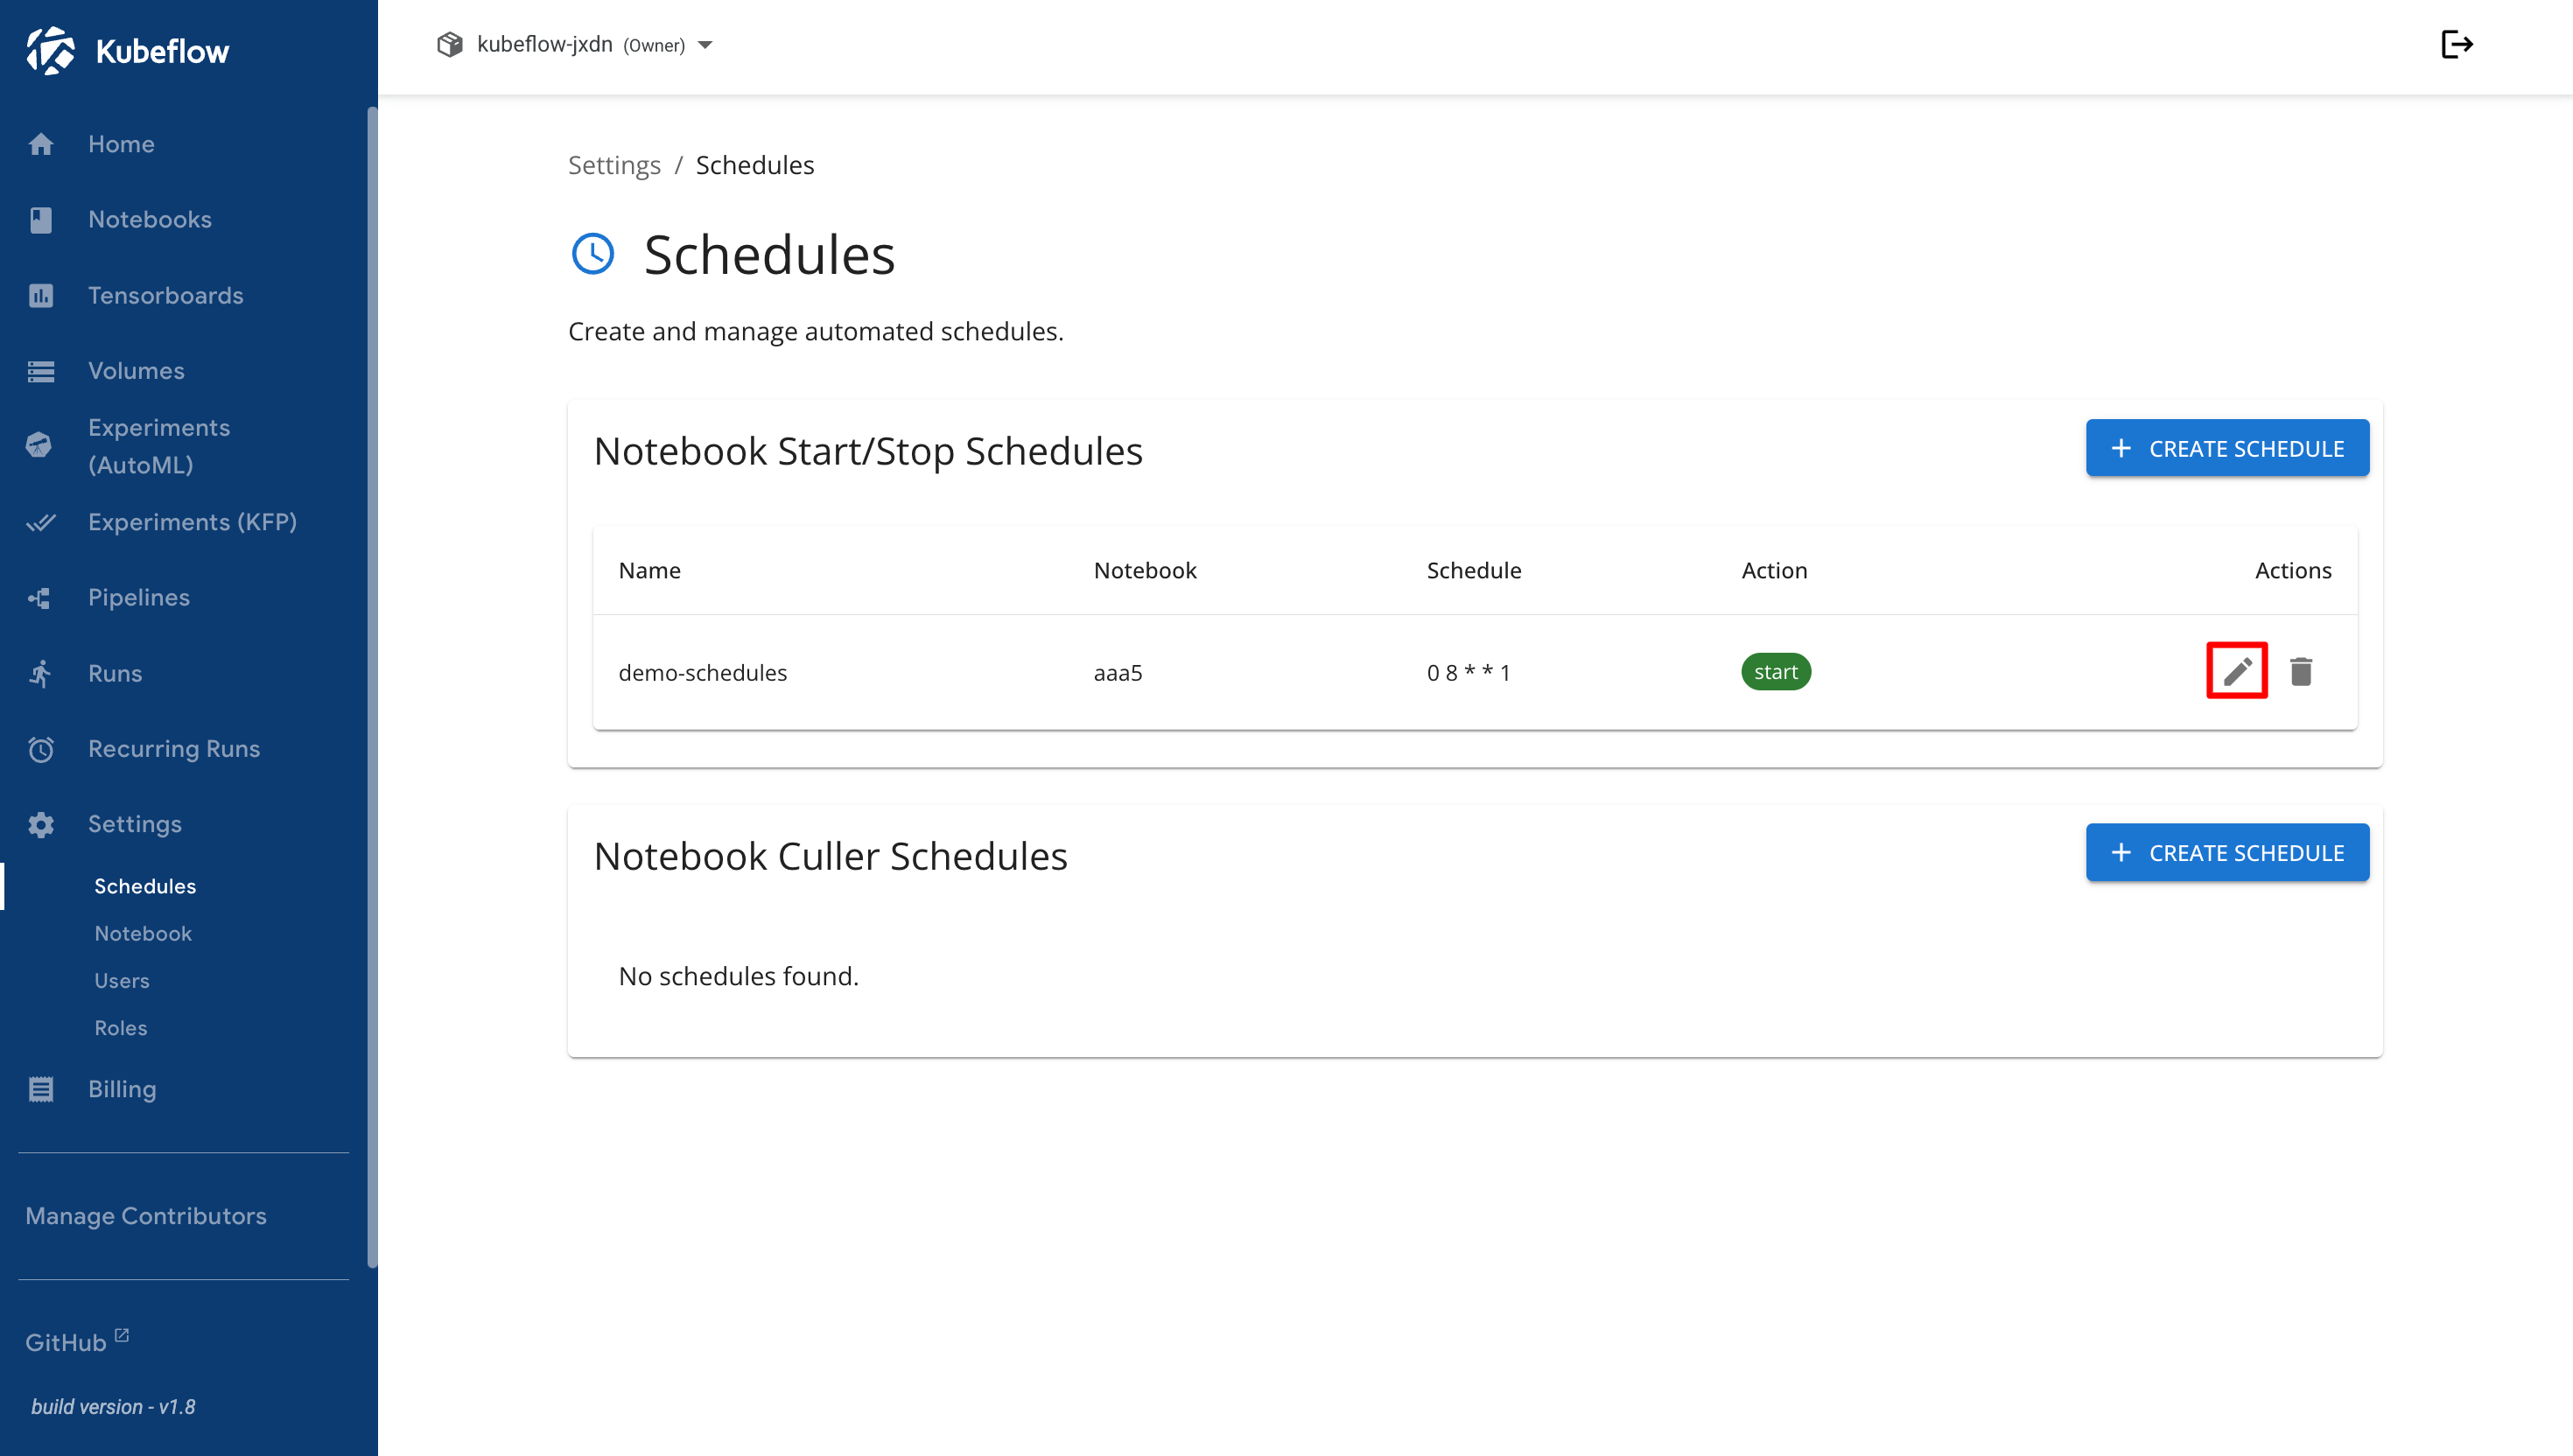
To modify an existing schedule, click the **Edit** icon in the Actions column.

<figure><img src="https://2882153758-files.gitbook.io/~/files/v0/b/gitbook-x-prod.appspot.com/o/spaces%2Fi9YWb69HFXLHYlXffReU%2Fuploads%2Fgit-blob-709bf3e9bca2c3a86fcb3df5ac6eb179cdbef705%2Fimage.png?alt=media" alt=""><figcaption></figcaption></figure>

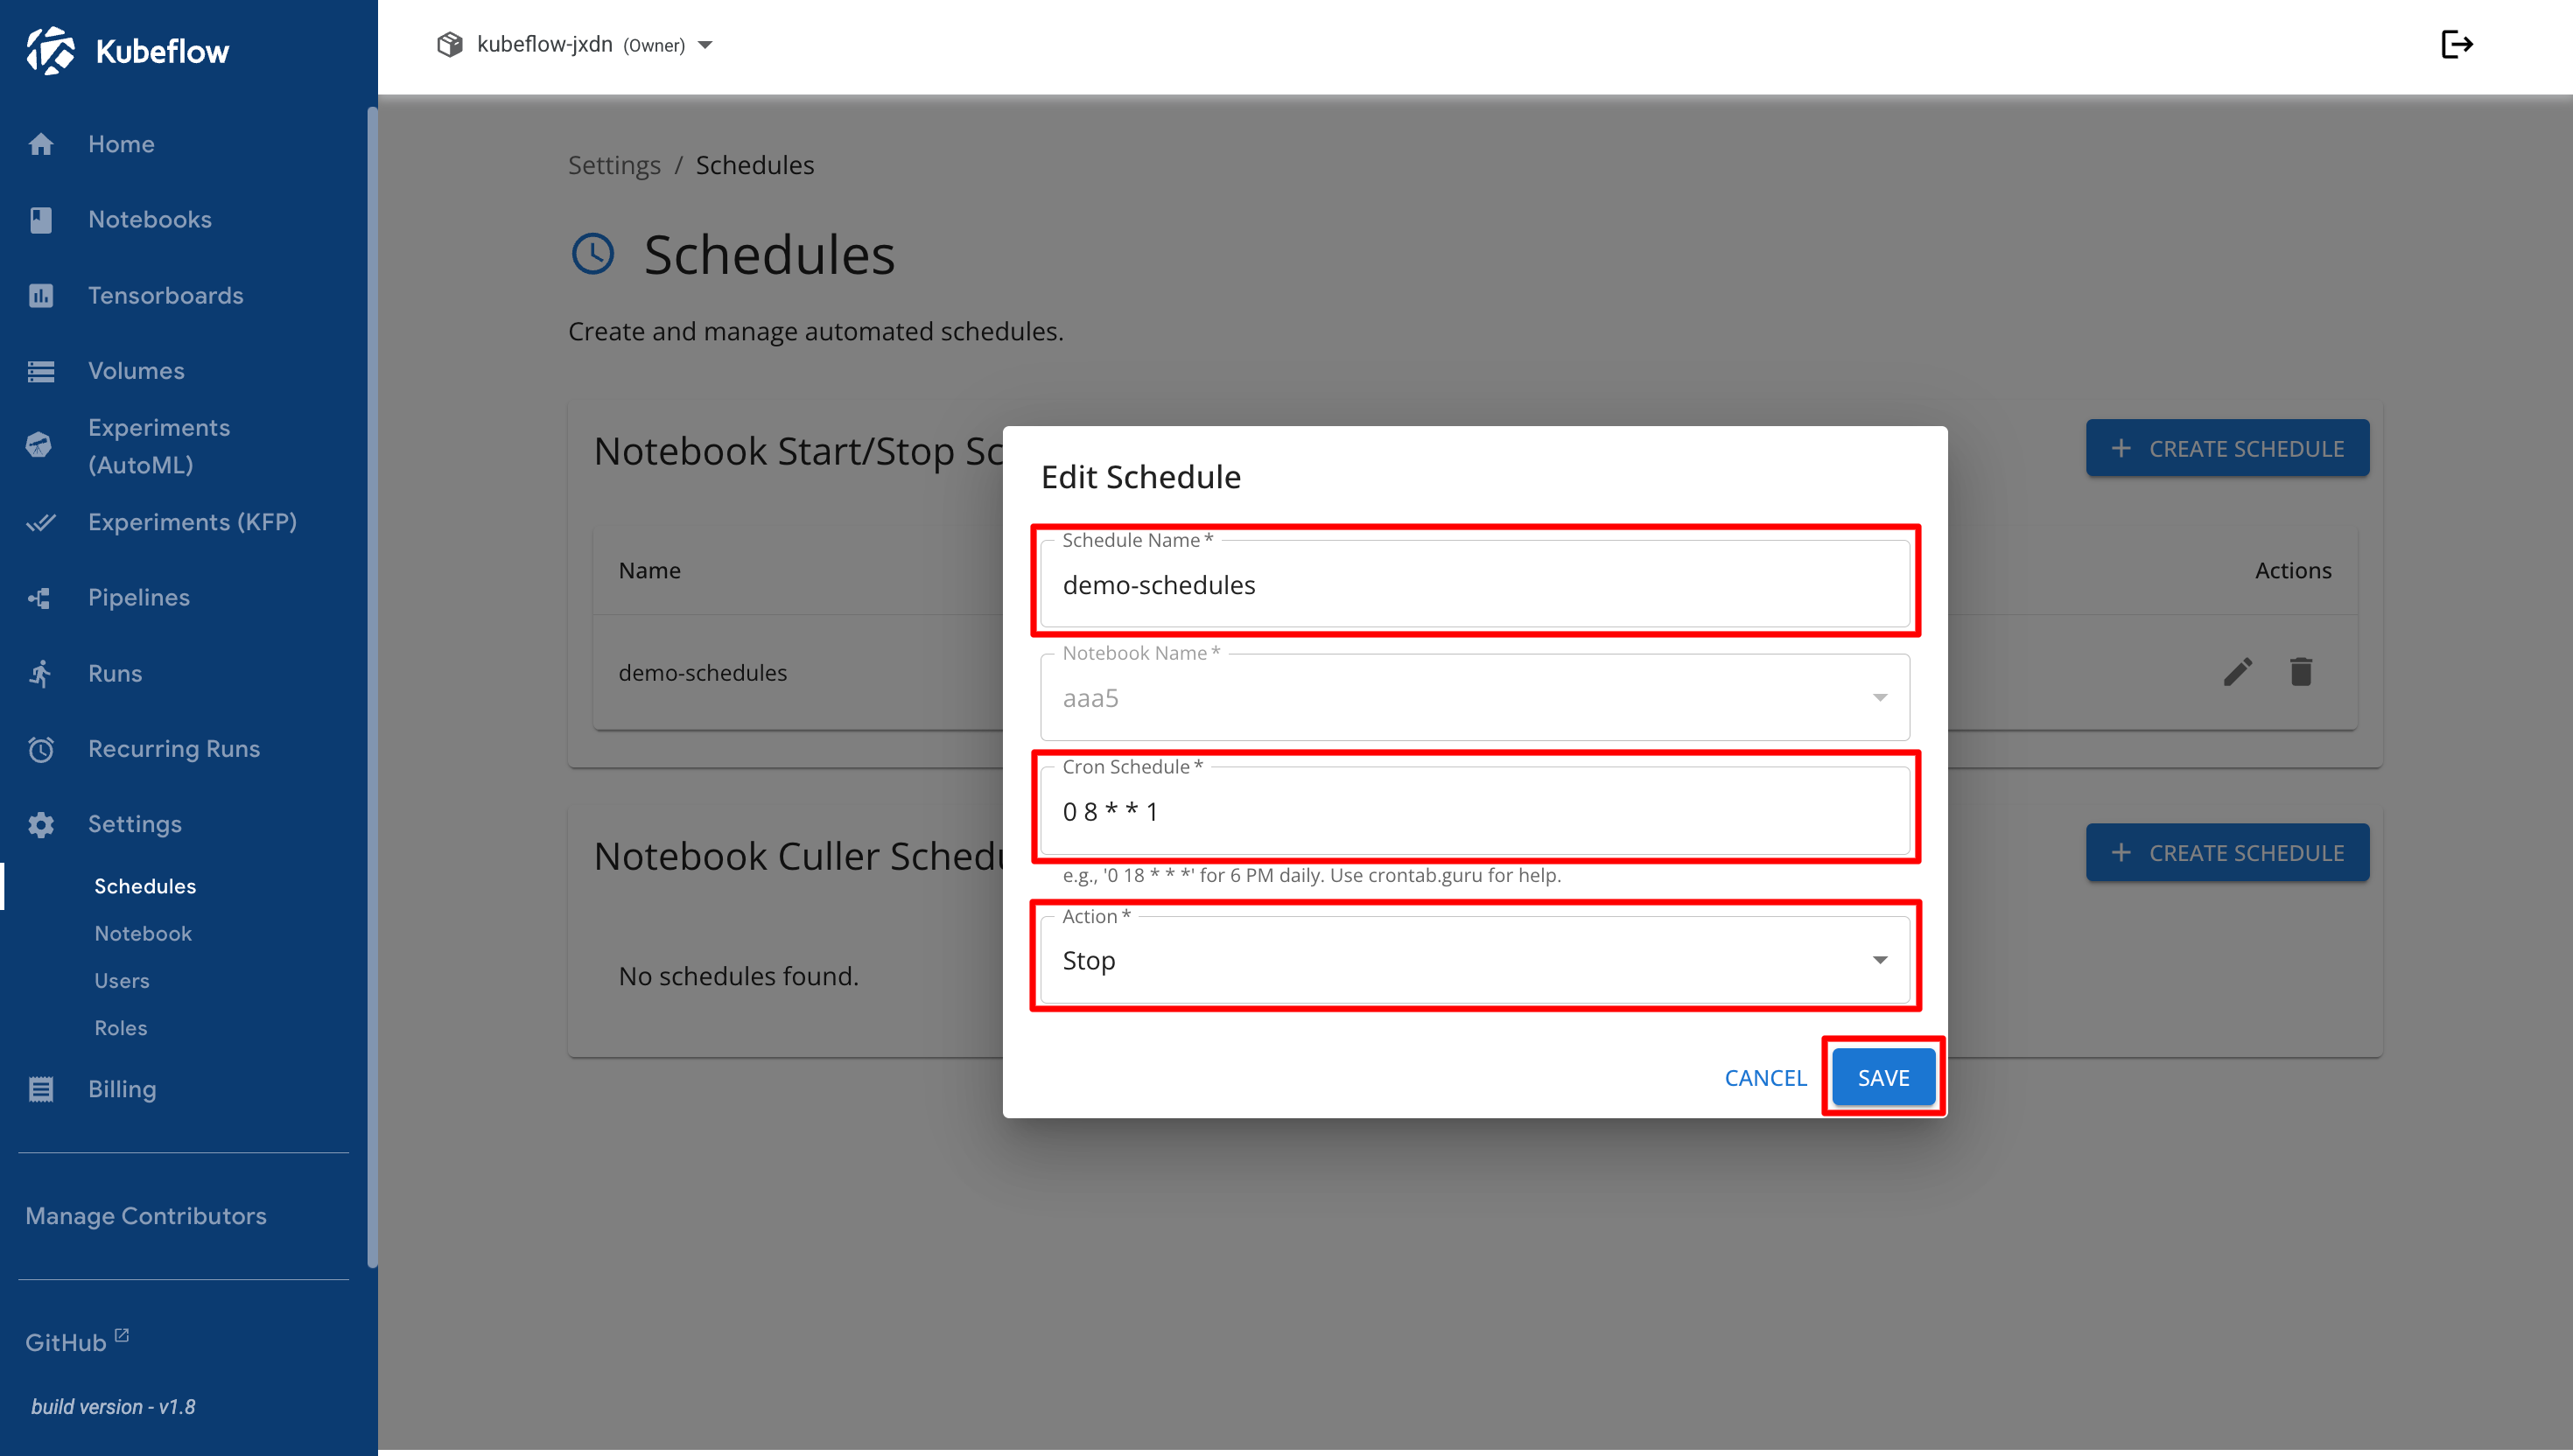
In the Edit Schedule dialog, update the schedule information as needed, then click **Save** to apply the changes.

<figure><img src="https://2882153758-files.gitbook.io/~/files/v0/b/gitbook-x-prod.appspot.com/o/spaces%2Fi9YWb69HFXLHYlXffReU%2Fuploads%2Fgit-blob-83b6bb981ce6627a84bb0b8d40955bec0e9009fc%2Fimage.png?alt=media" alt=""><figcaption></figcaption></figure>

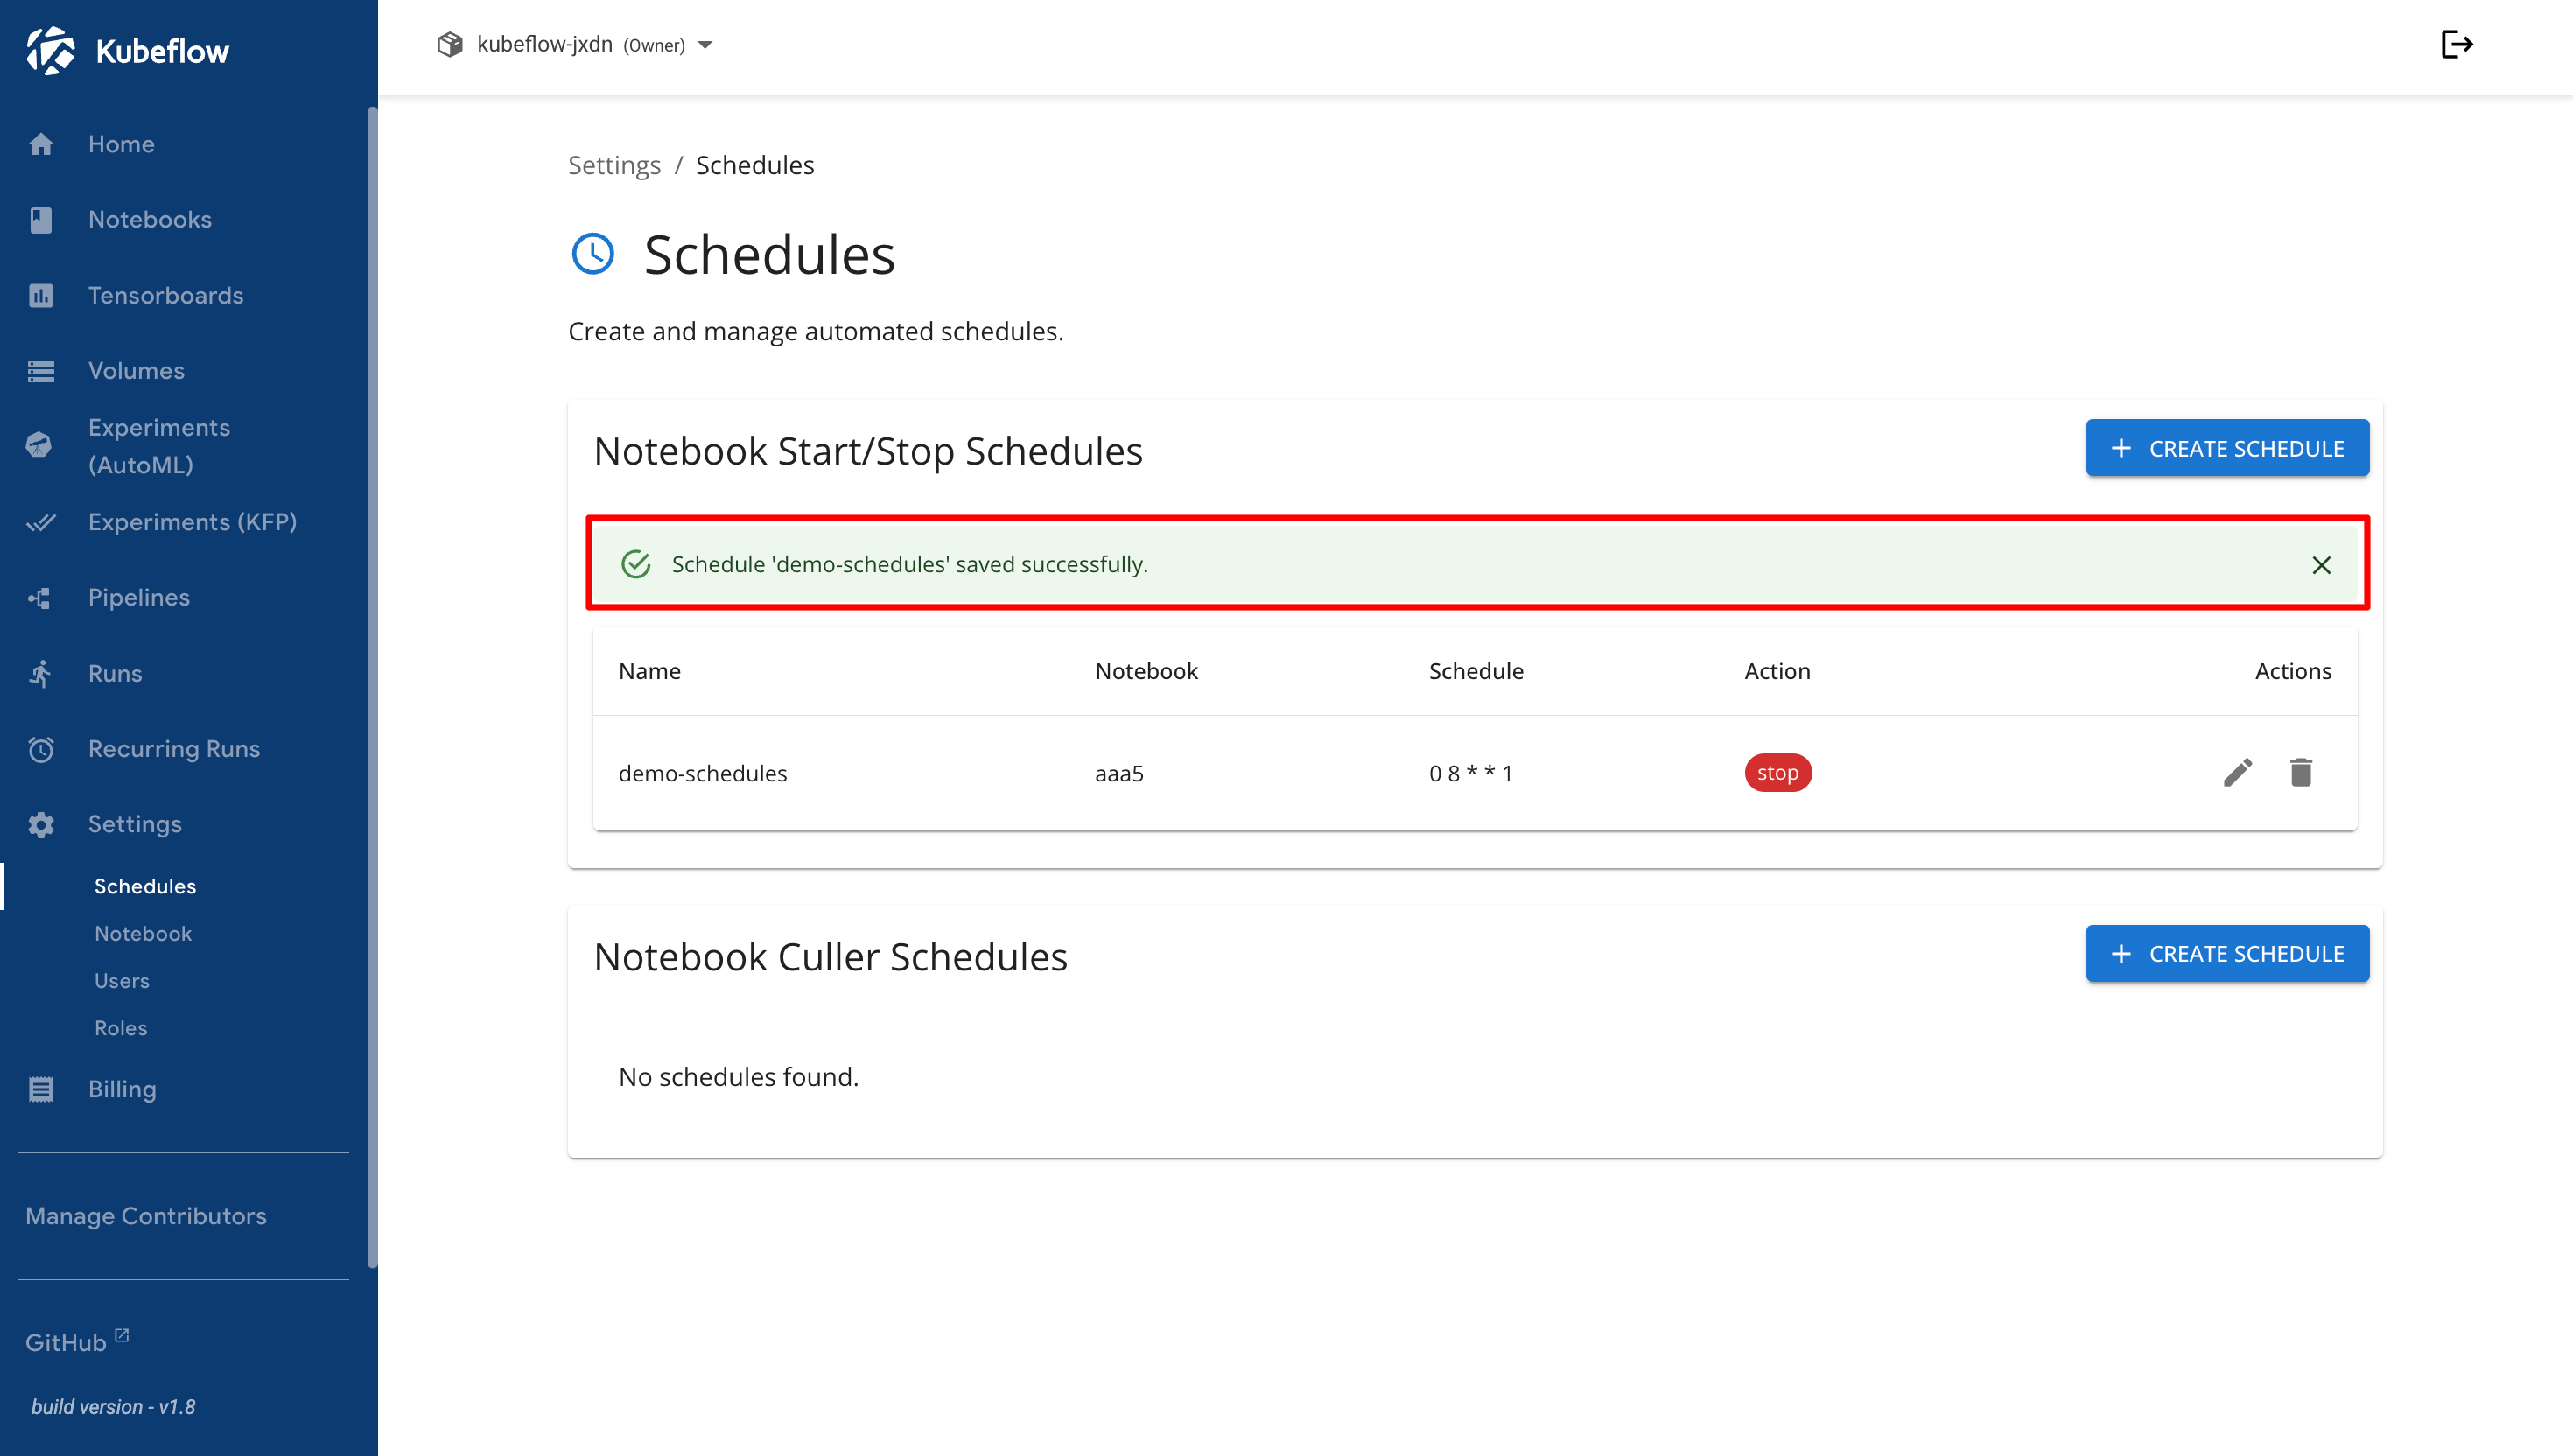
A success notification is displayed after the schedule has been updated successfully.

<figure><img src="https://2882153758-files.gitbook.io/~/files/v0/b/gitbook-x-prod.appspot.com/o/spaces%2Fi9YWb69HFXLHYlXffReU%2Fuploads%2Fgit-blob-11d4eacbf803fdc9969f5f03bf9079df1dab74e7%2Fimage.png?alt=media" alt=""><figcaption></figcaption></figure>

## Delete Notebook Start/Stop Schedules

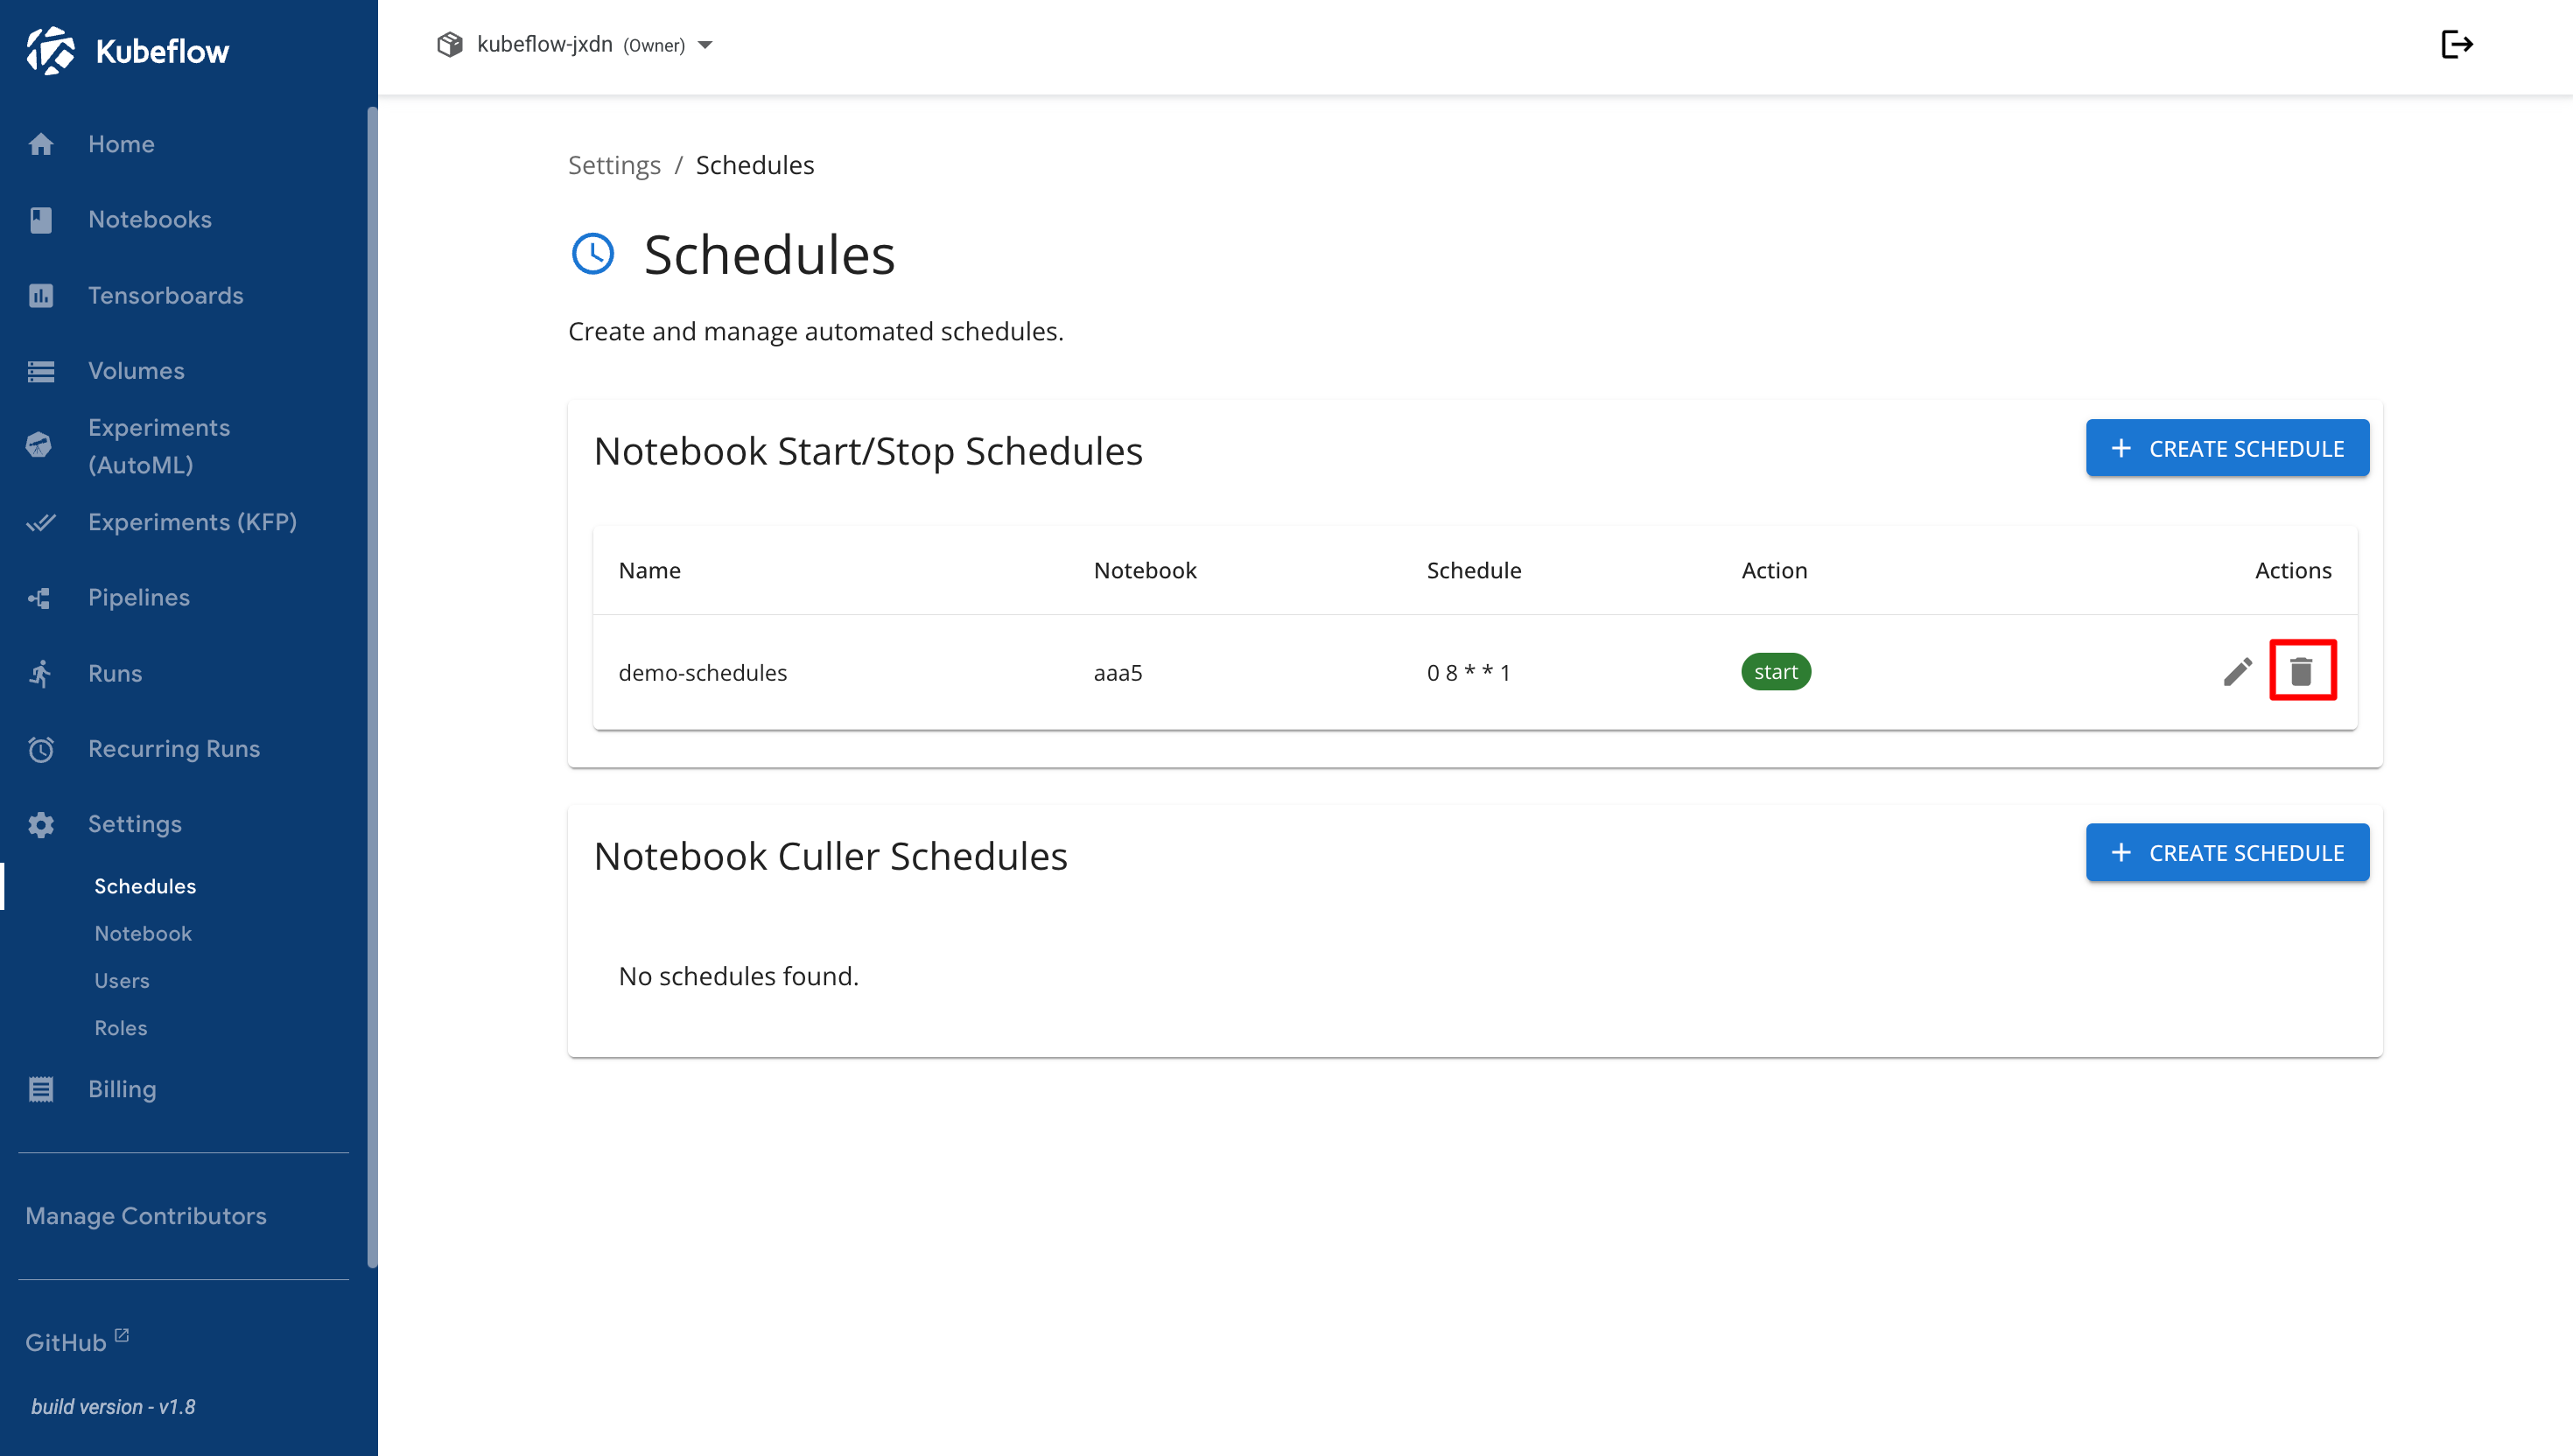
To remove a schedule, click the **Delete** icon in the Actions column.

<figure><img src="https://2882153758-files.gitbook.io/~/files/v0/b/gitbook-x-prod.appspot.com/o/spaces%2Fi9YWb69HFXLHYlXffReU%2Fuploads%2Fgit-blob-3e07c543b72c683012082f535569aee0c7229050%2Fimage.png?alt=media" alt=""><figcaption></figcaption></figure>

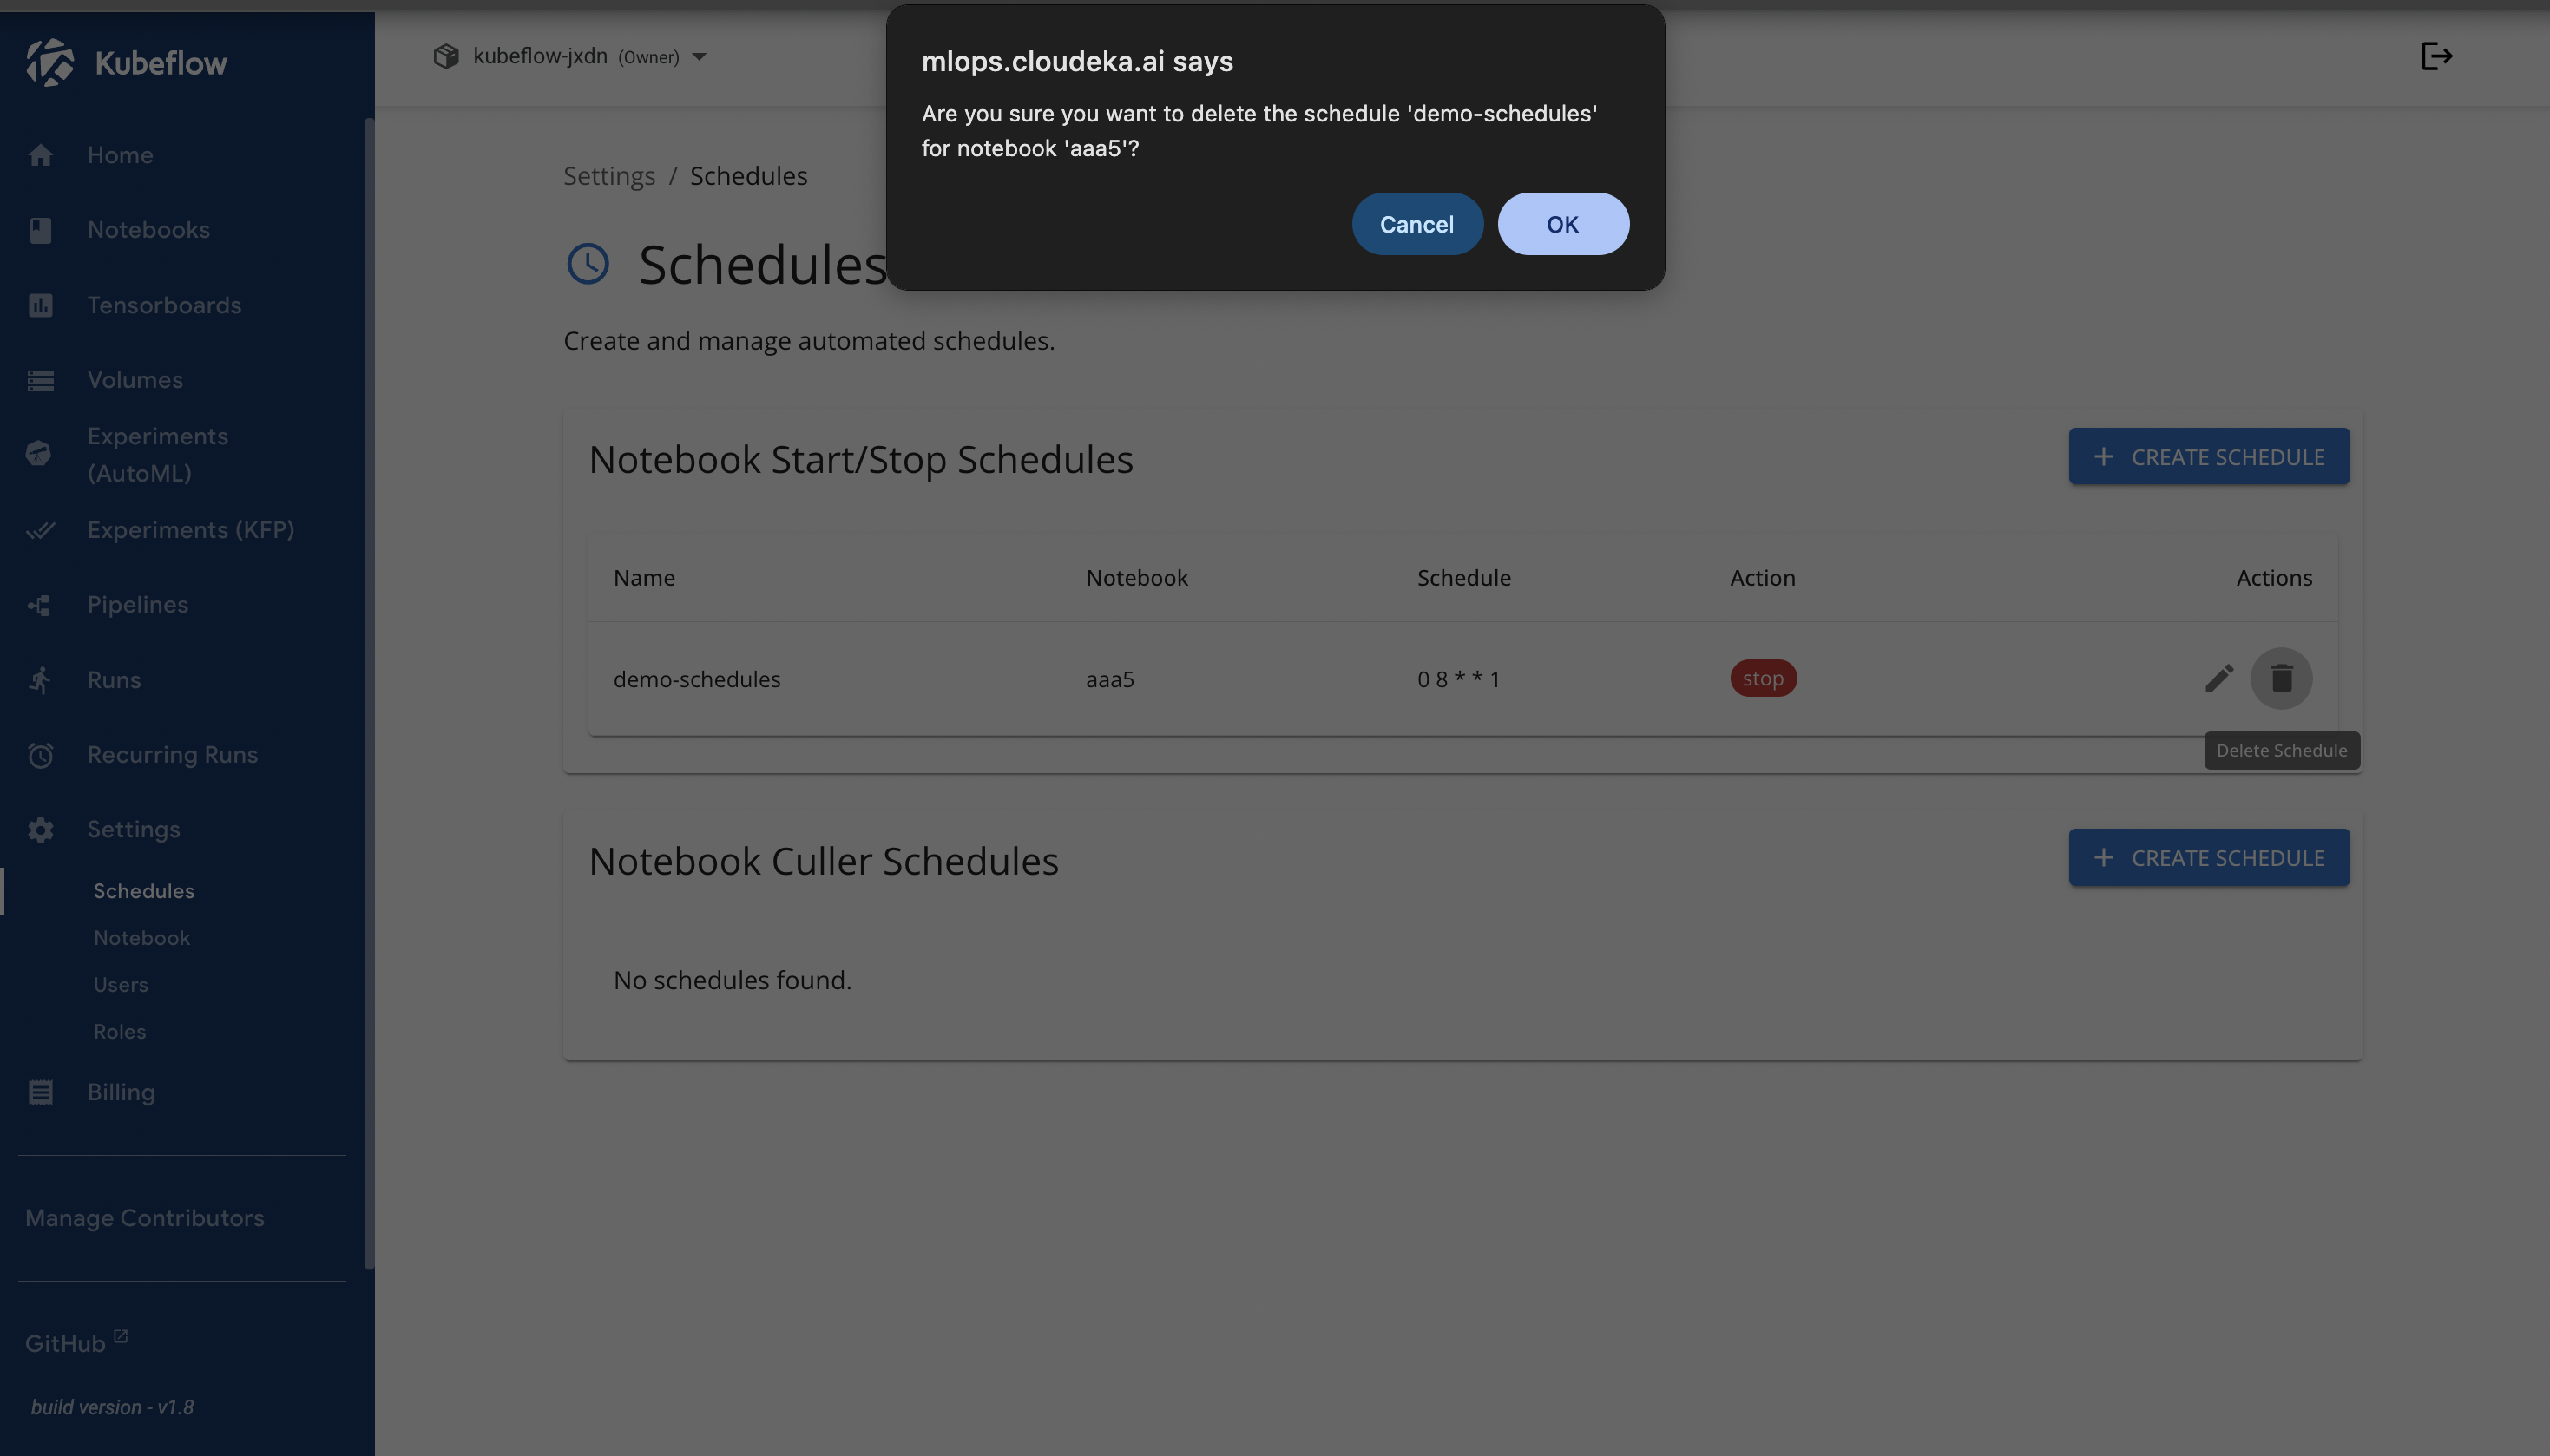
Review the confirmation message, then click **OK** to delete the selected schedule.

<figure><img src="https://2882153758-files.gitbook.io/~/files/v0/b/gitbook-x-prod.appspot.com/o/spaces%2Fi9YWb69HFXLHYlXffReU%2Fuploads%2Fgit-blob-662e5824a4166926c2d08bcb7a5c49c9a655b4bc%2Fimage.png?alt=media" alt=""><figcaption></figcaption></figure>

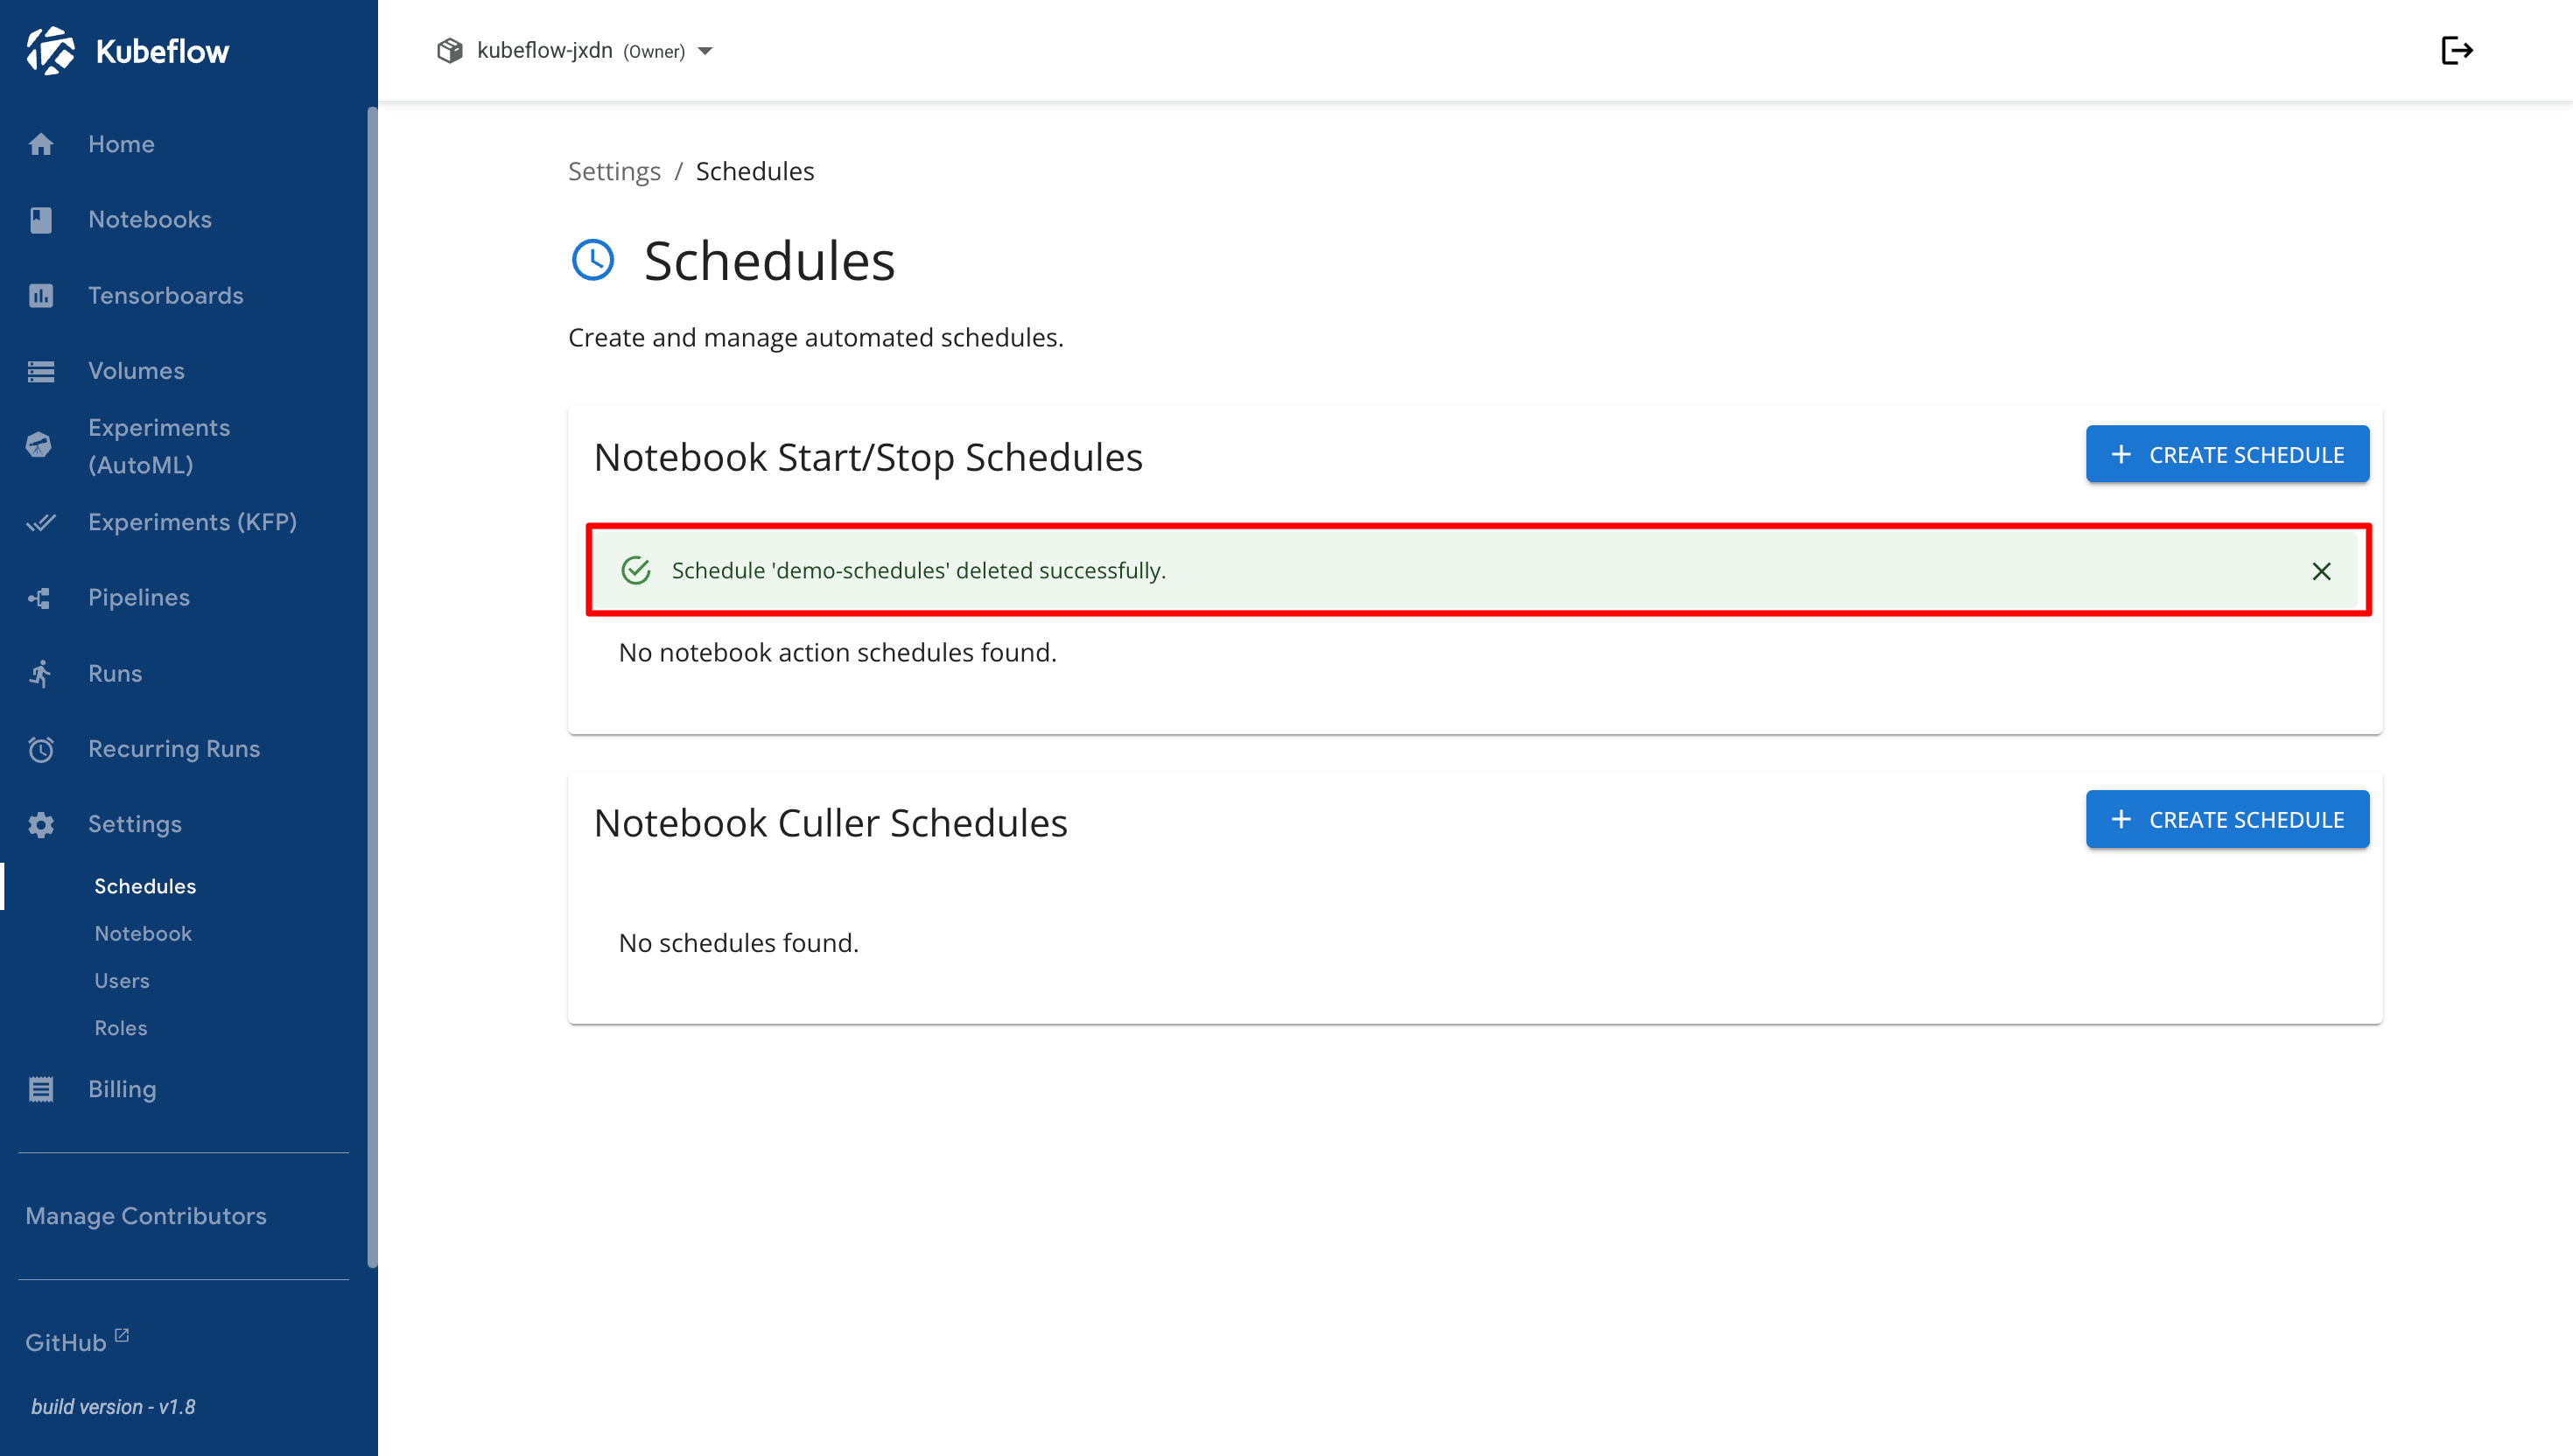
After the deletion process is completed, a notification is displayed to confirm that the schedule has been successfully removed.
<figure><img src="https://2882153758-files.gitbook.io/~/files/v0/b/gitbook-x-prod.appspot.com/o/spaces%2Fi9YWb69HFXLHYlXffReU%2Fuploads%2Fgit-blob-f15e749163e84d9d0ec39006d6f44dc532605743%2Fimage.png?alt=media" alt=""><figcaption></figcaption></figure>