> For the complete documentation index, see [llms.txt](https://docs.cloudeka.ai/llms.txt). Markdown versions of documentation pages are available by appending `.md` to page URLs; this page is available as [Markdown](https://docs.cloudeka.ai/guideline-for-individual/deka-claw/edit-deka-claw.md).
# Edit Deka Claw
The **Edit** feature is used to update or modify an existing instance configuration. On the **Instances** page, click the **Edit** icon on the instance you want to modify.
{% hint style="warning" %}
If the instance status shows “**Unauthorized**”, update the gateway token by editing the instance and aligning it with the token from Goclaw, then save the changes to restore and synchronize the connection.
{% endhint %}
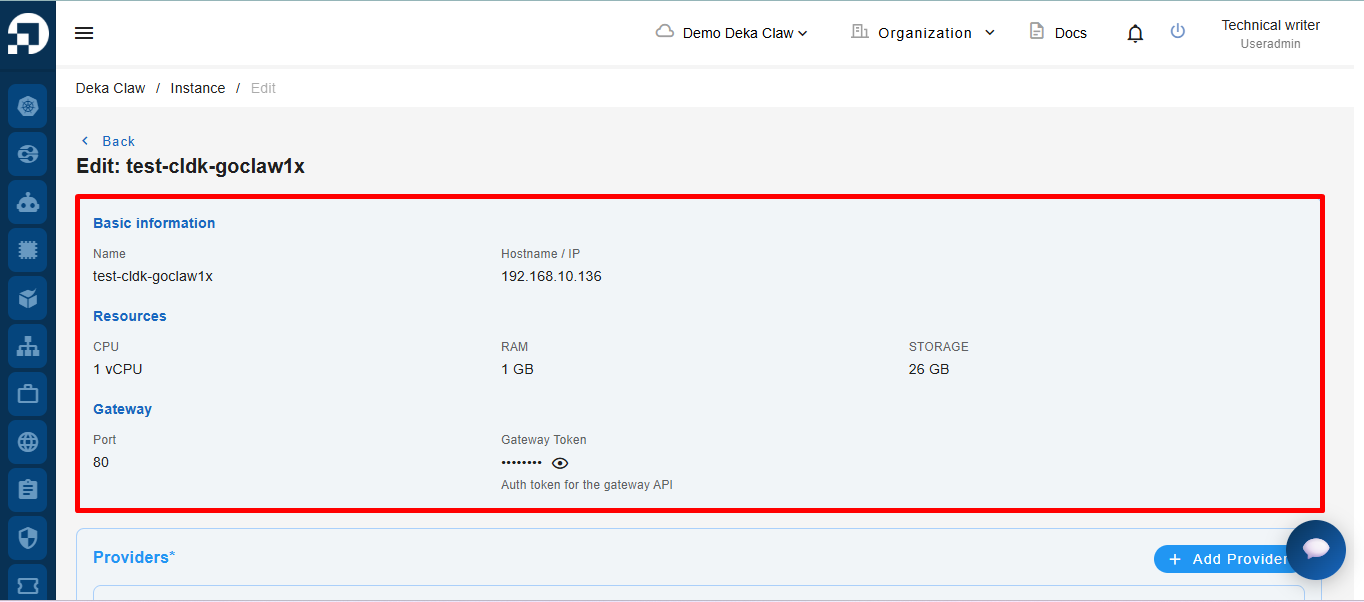
The system will display a form to modify the instance data.
## Basic Information
Update the instance configuration based on your requirements through the available configuration sections.
{% hint style="info" %}
This section contains basic instance information that is automatically generated by the system and cannot be modified.
{% endhint %}
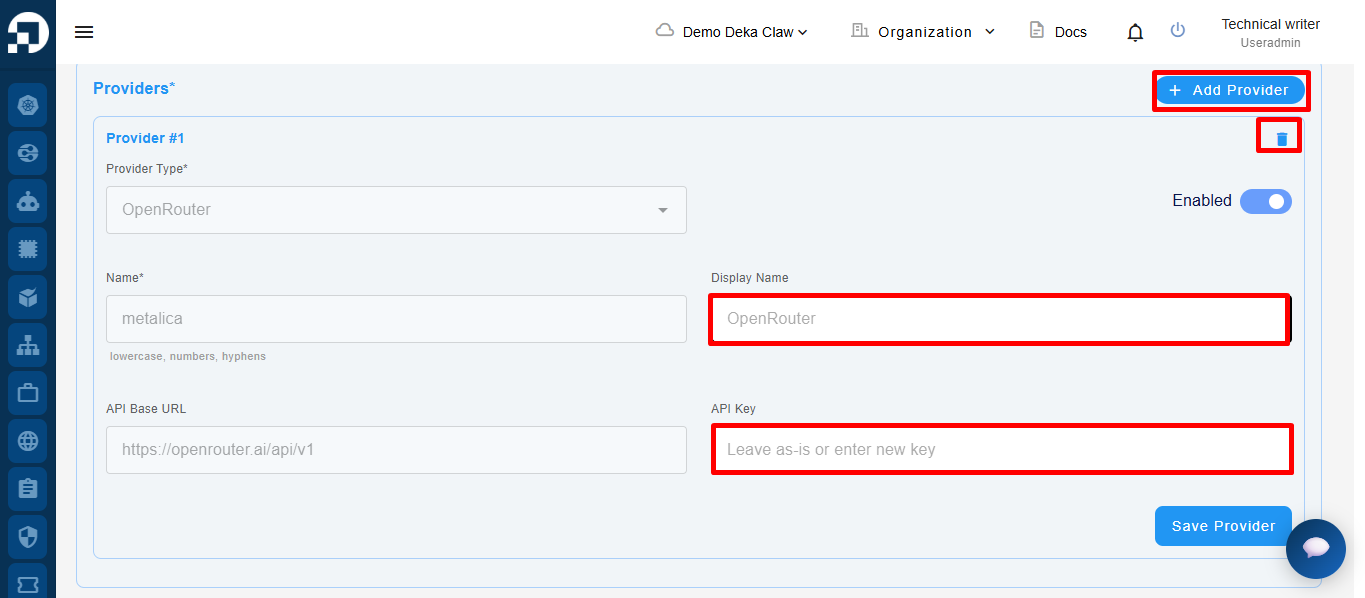
## Providers
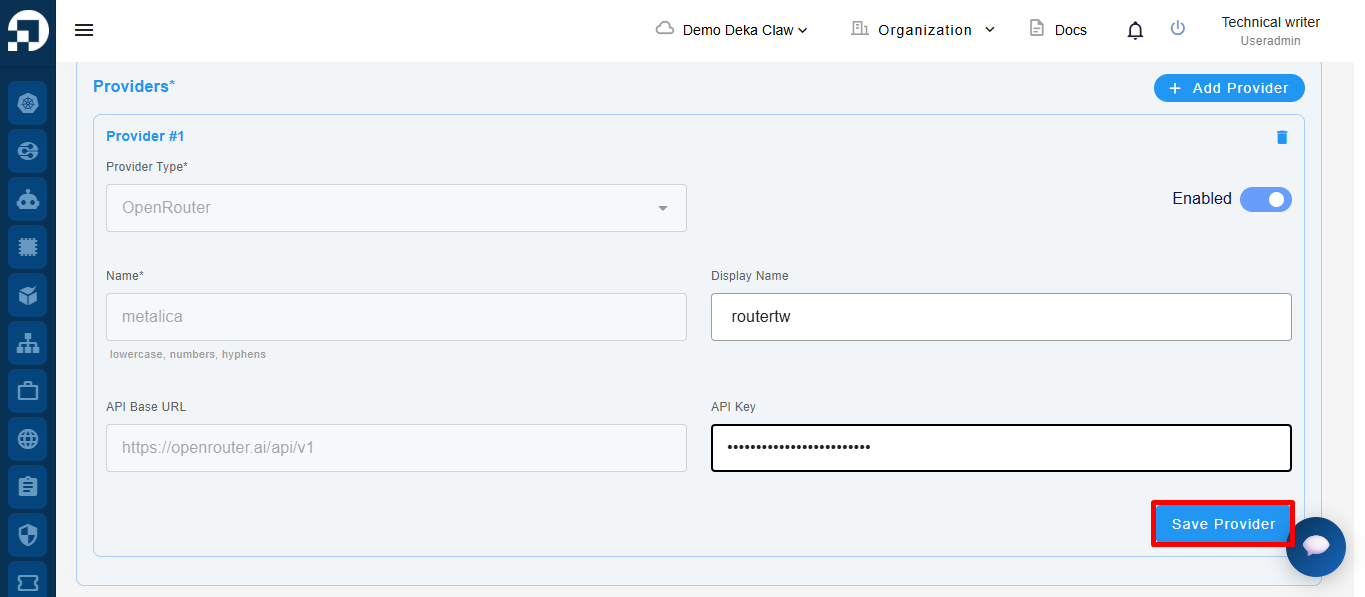
In this section, complete the provider configuration form as needed. If you want to add a new provider, click the **Add Provider** button, then fill in the provider details in the available form. If there are unused providers, click the **Delete** icon to remove them.
After completing the provider configuration, click the **Save Provider** button to save the changes.
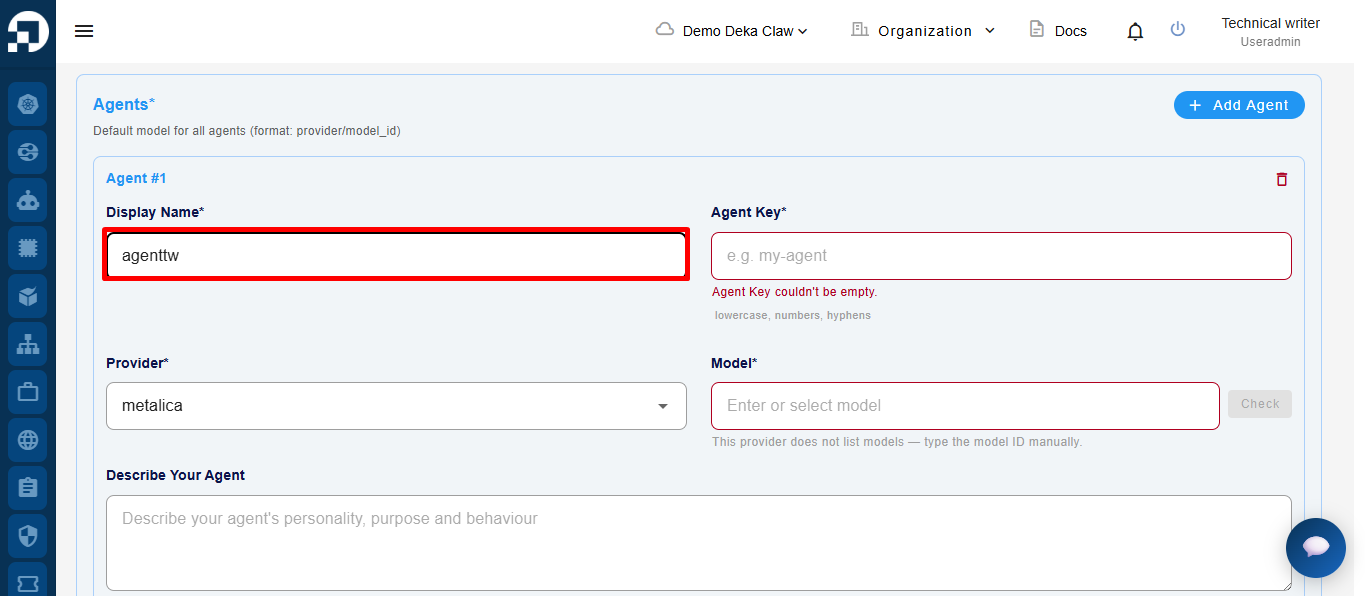
## Agents
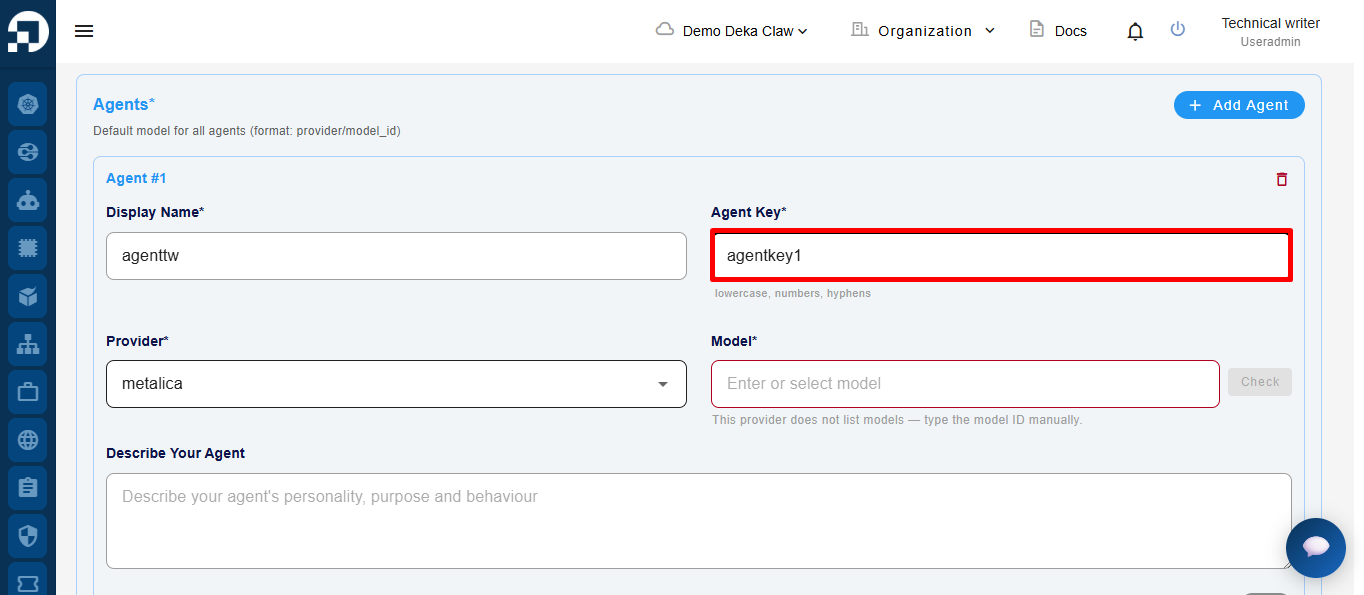
Fill in the **Display Name** field to define the agent’s visible name in the system.
Fill in the **Agent Key** field as a unique identifier using lowercase letters, numbers, or hyphens.
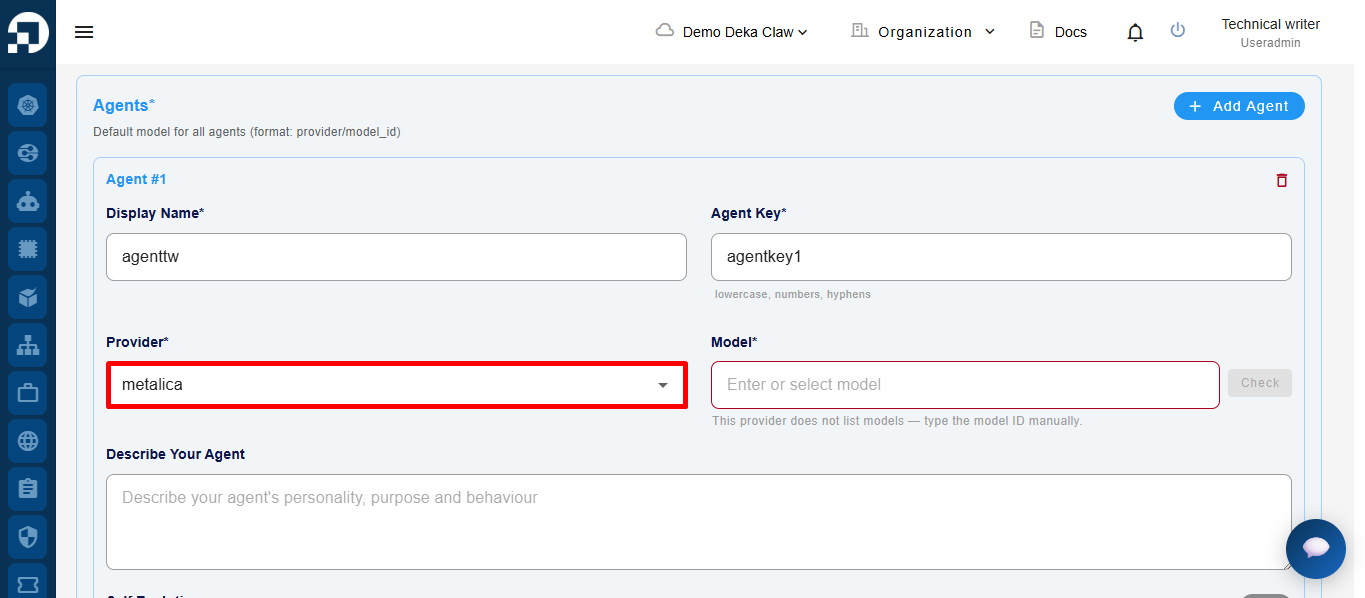
Select the **Provider** from the available dropdown list.
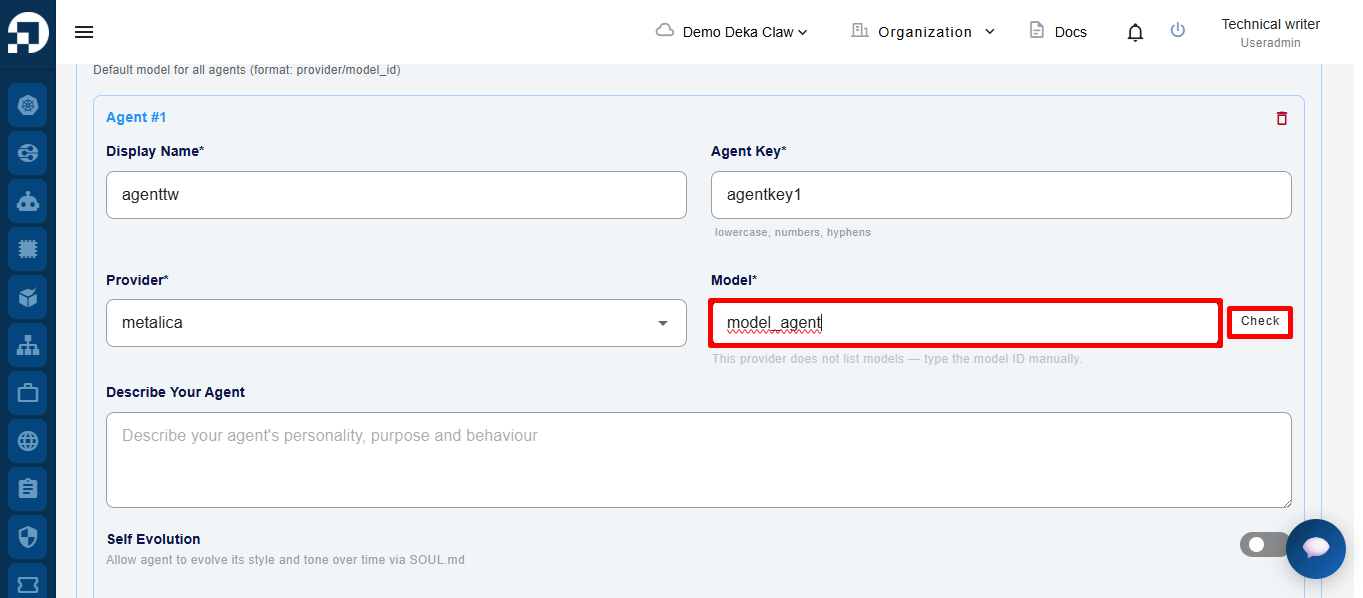
After selecting a **Provider**, the **Model** field will automatically appear. Enter or select the model you want to use in the **Model** field.
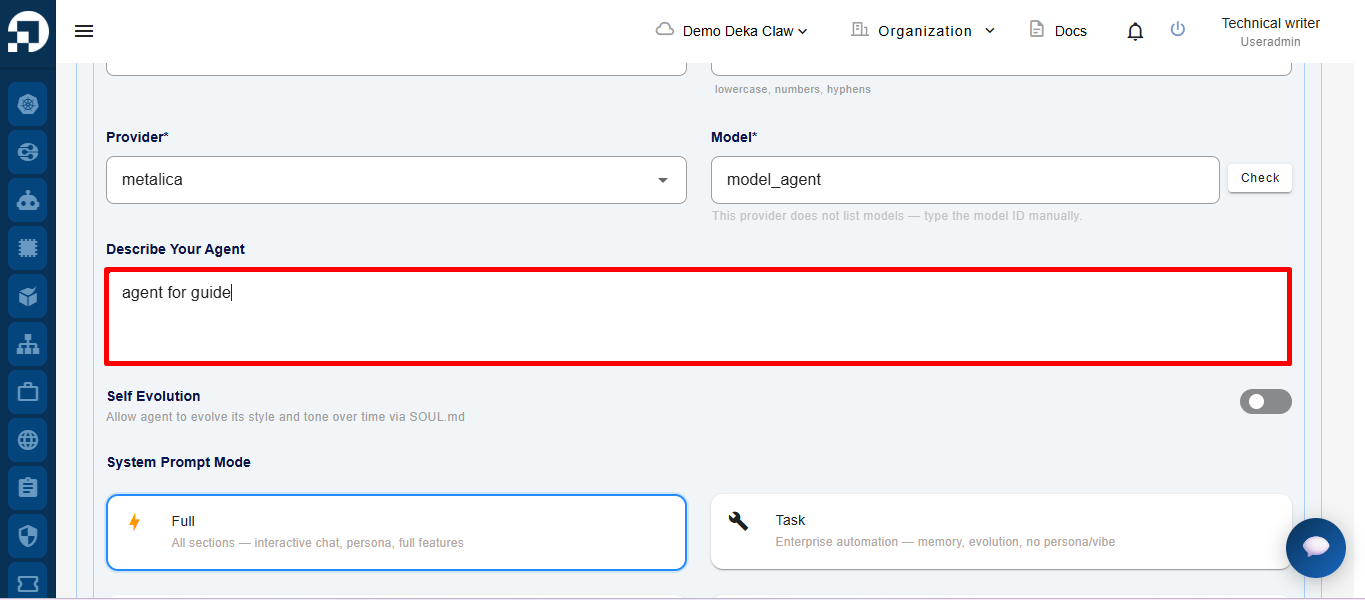
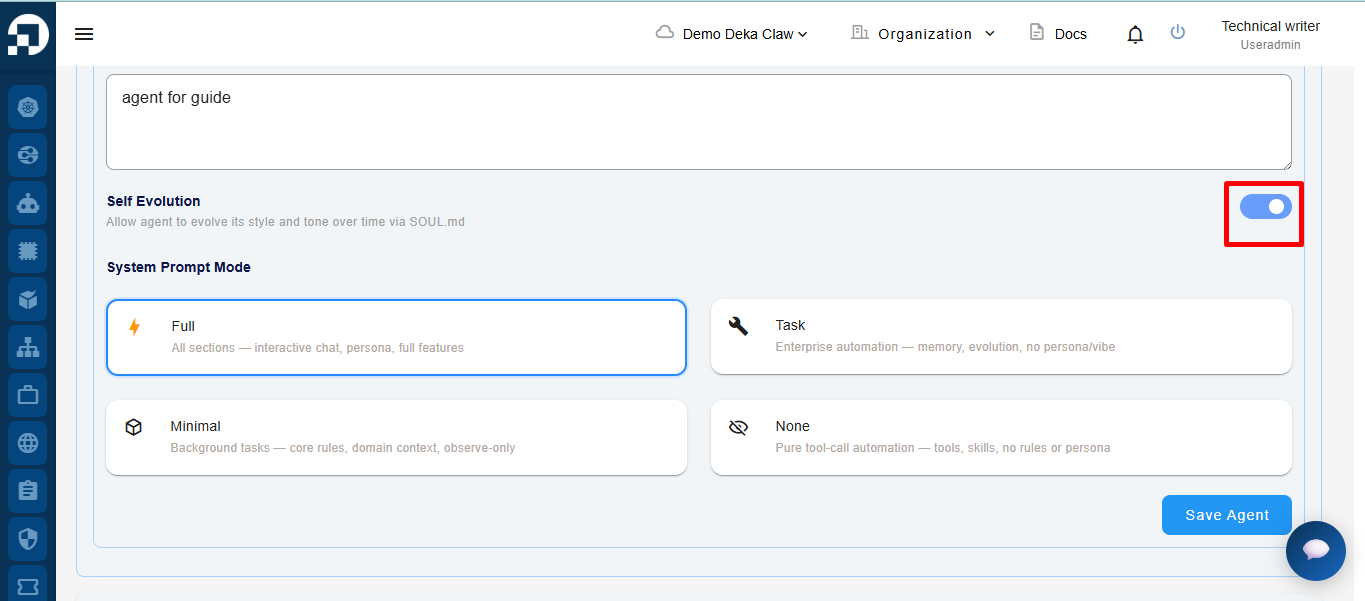
Fill in the **Describe Your Agent** field to define the agent’s personality, purpose, and behavior.
Enable the Self Evolution toggle if you want the system to automatically improve based on usage behavior
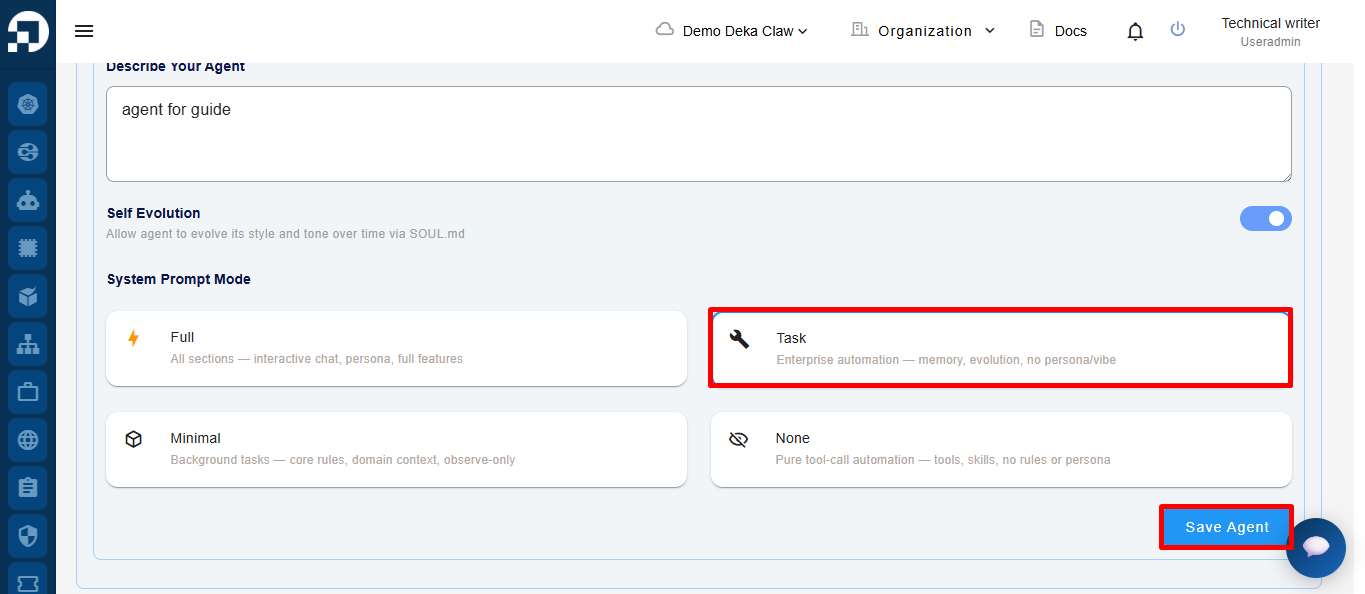
Select the System Prompt Mode from the available options. Then click the **Save Agent** button to save the configuration.
## Channels
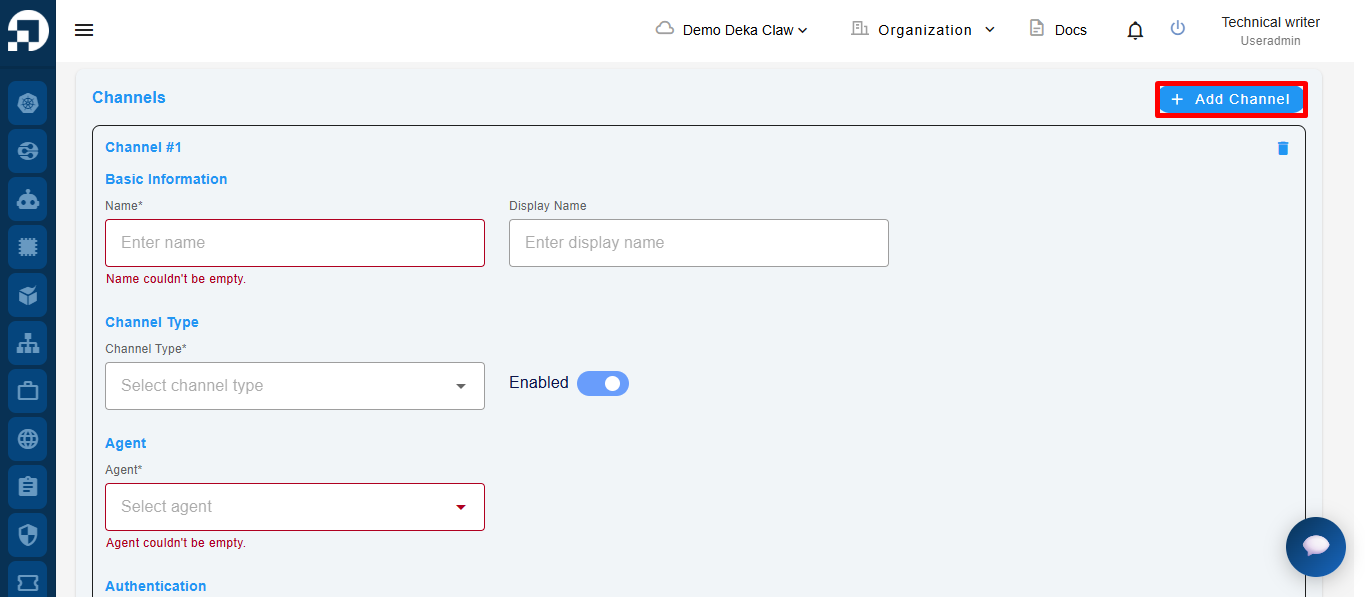
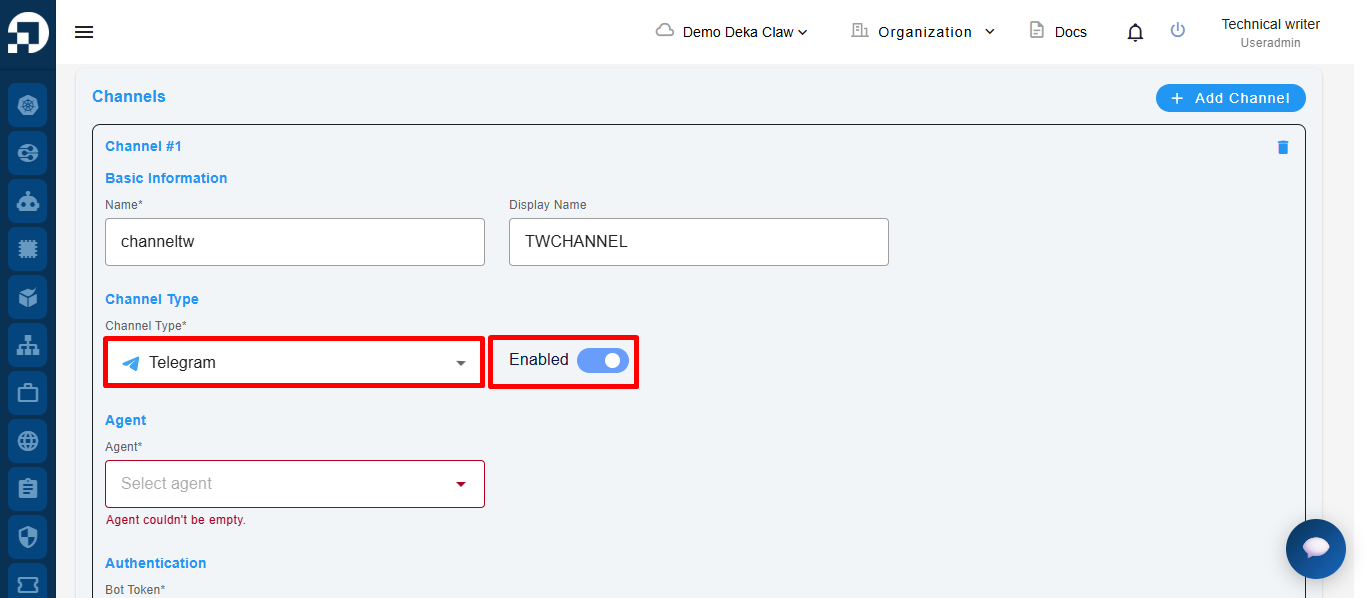
Click the **Add Channel** button to add a new channel that will be used as the bot communication media.
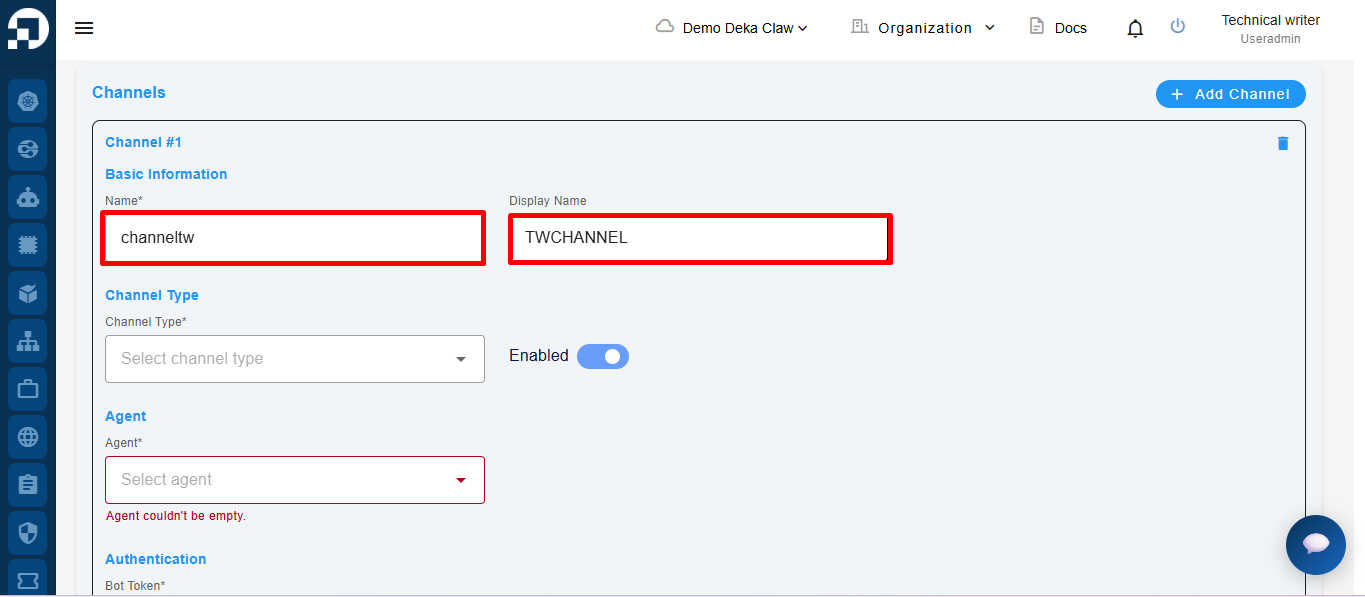
After the channel form appears, fill in the **Basic Information** section by entering the **Name** as the channel identifier in the system and the **Display Name** as the channel display name shown in the application.
Next, in the **Channel Type** section, select the channel type to be used, such as Telegram. Enable the **Enabled** toggle to activate the channel so it can be used by the bot.
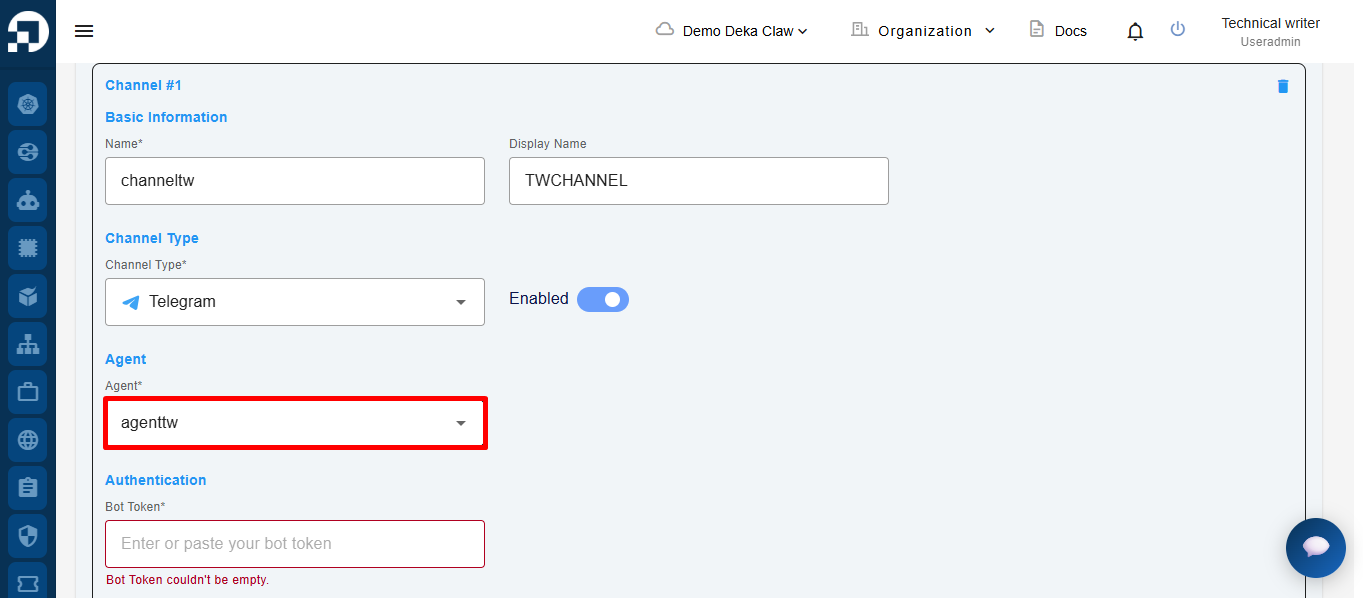
In the **Agent** section, select the agent that will be connected to the channel so the bot can execute functions and instructions based on the selected agent configuration.
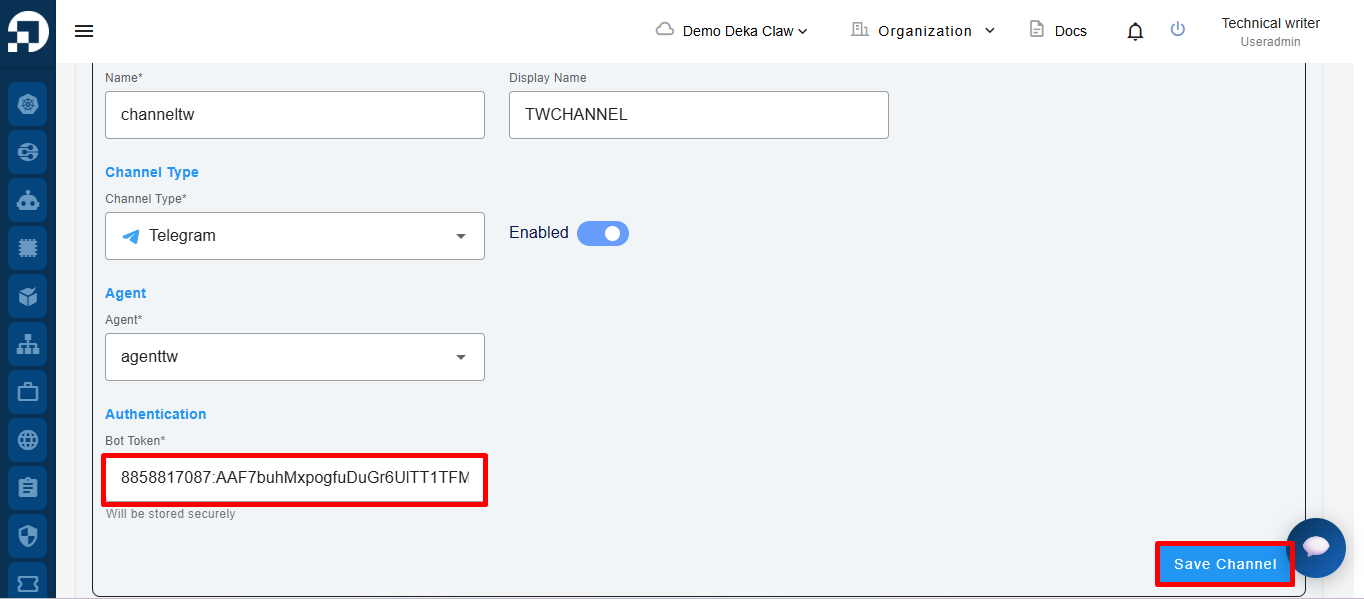
Then, in the **Authentication** section, enter the Telegram **Bot Token** obtained from @BotFather to connect the Telegram bot with the system. After all configurations have been completed, click the **Save Channel** button to save the channel configuration.