> For the complete documentation index, see [llms.txt](https://docs.cloudeka.ai/llms.txt). Markdown versions of documentation pages are available by appending `.md` to page URLs; this page is available as [Markdown](https://docs.cloudeka.ai/guideline-for-individual/deka-vpn/create-deka-vpn.md).

# Create Deka VPN

The Create VPN page is used to create a new VPN connection. After completing the process, the VPN will appear in the list table and can be managed further. To create a new VPN connection in the Service Portal AI, follow the steps below:

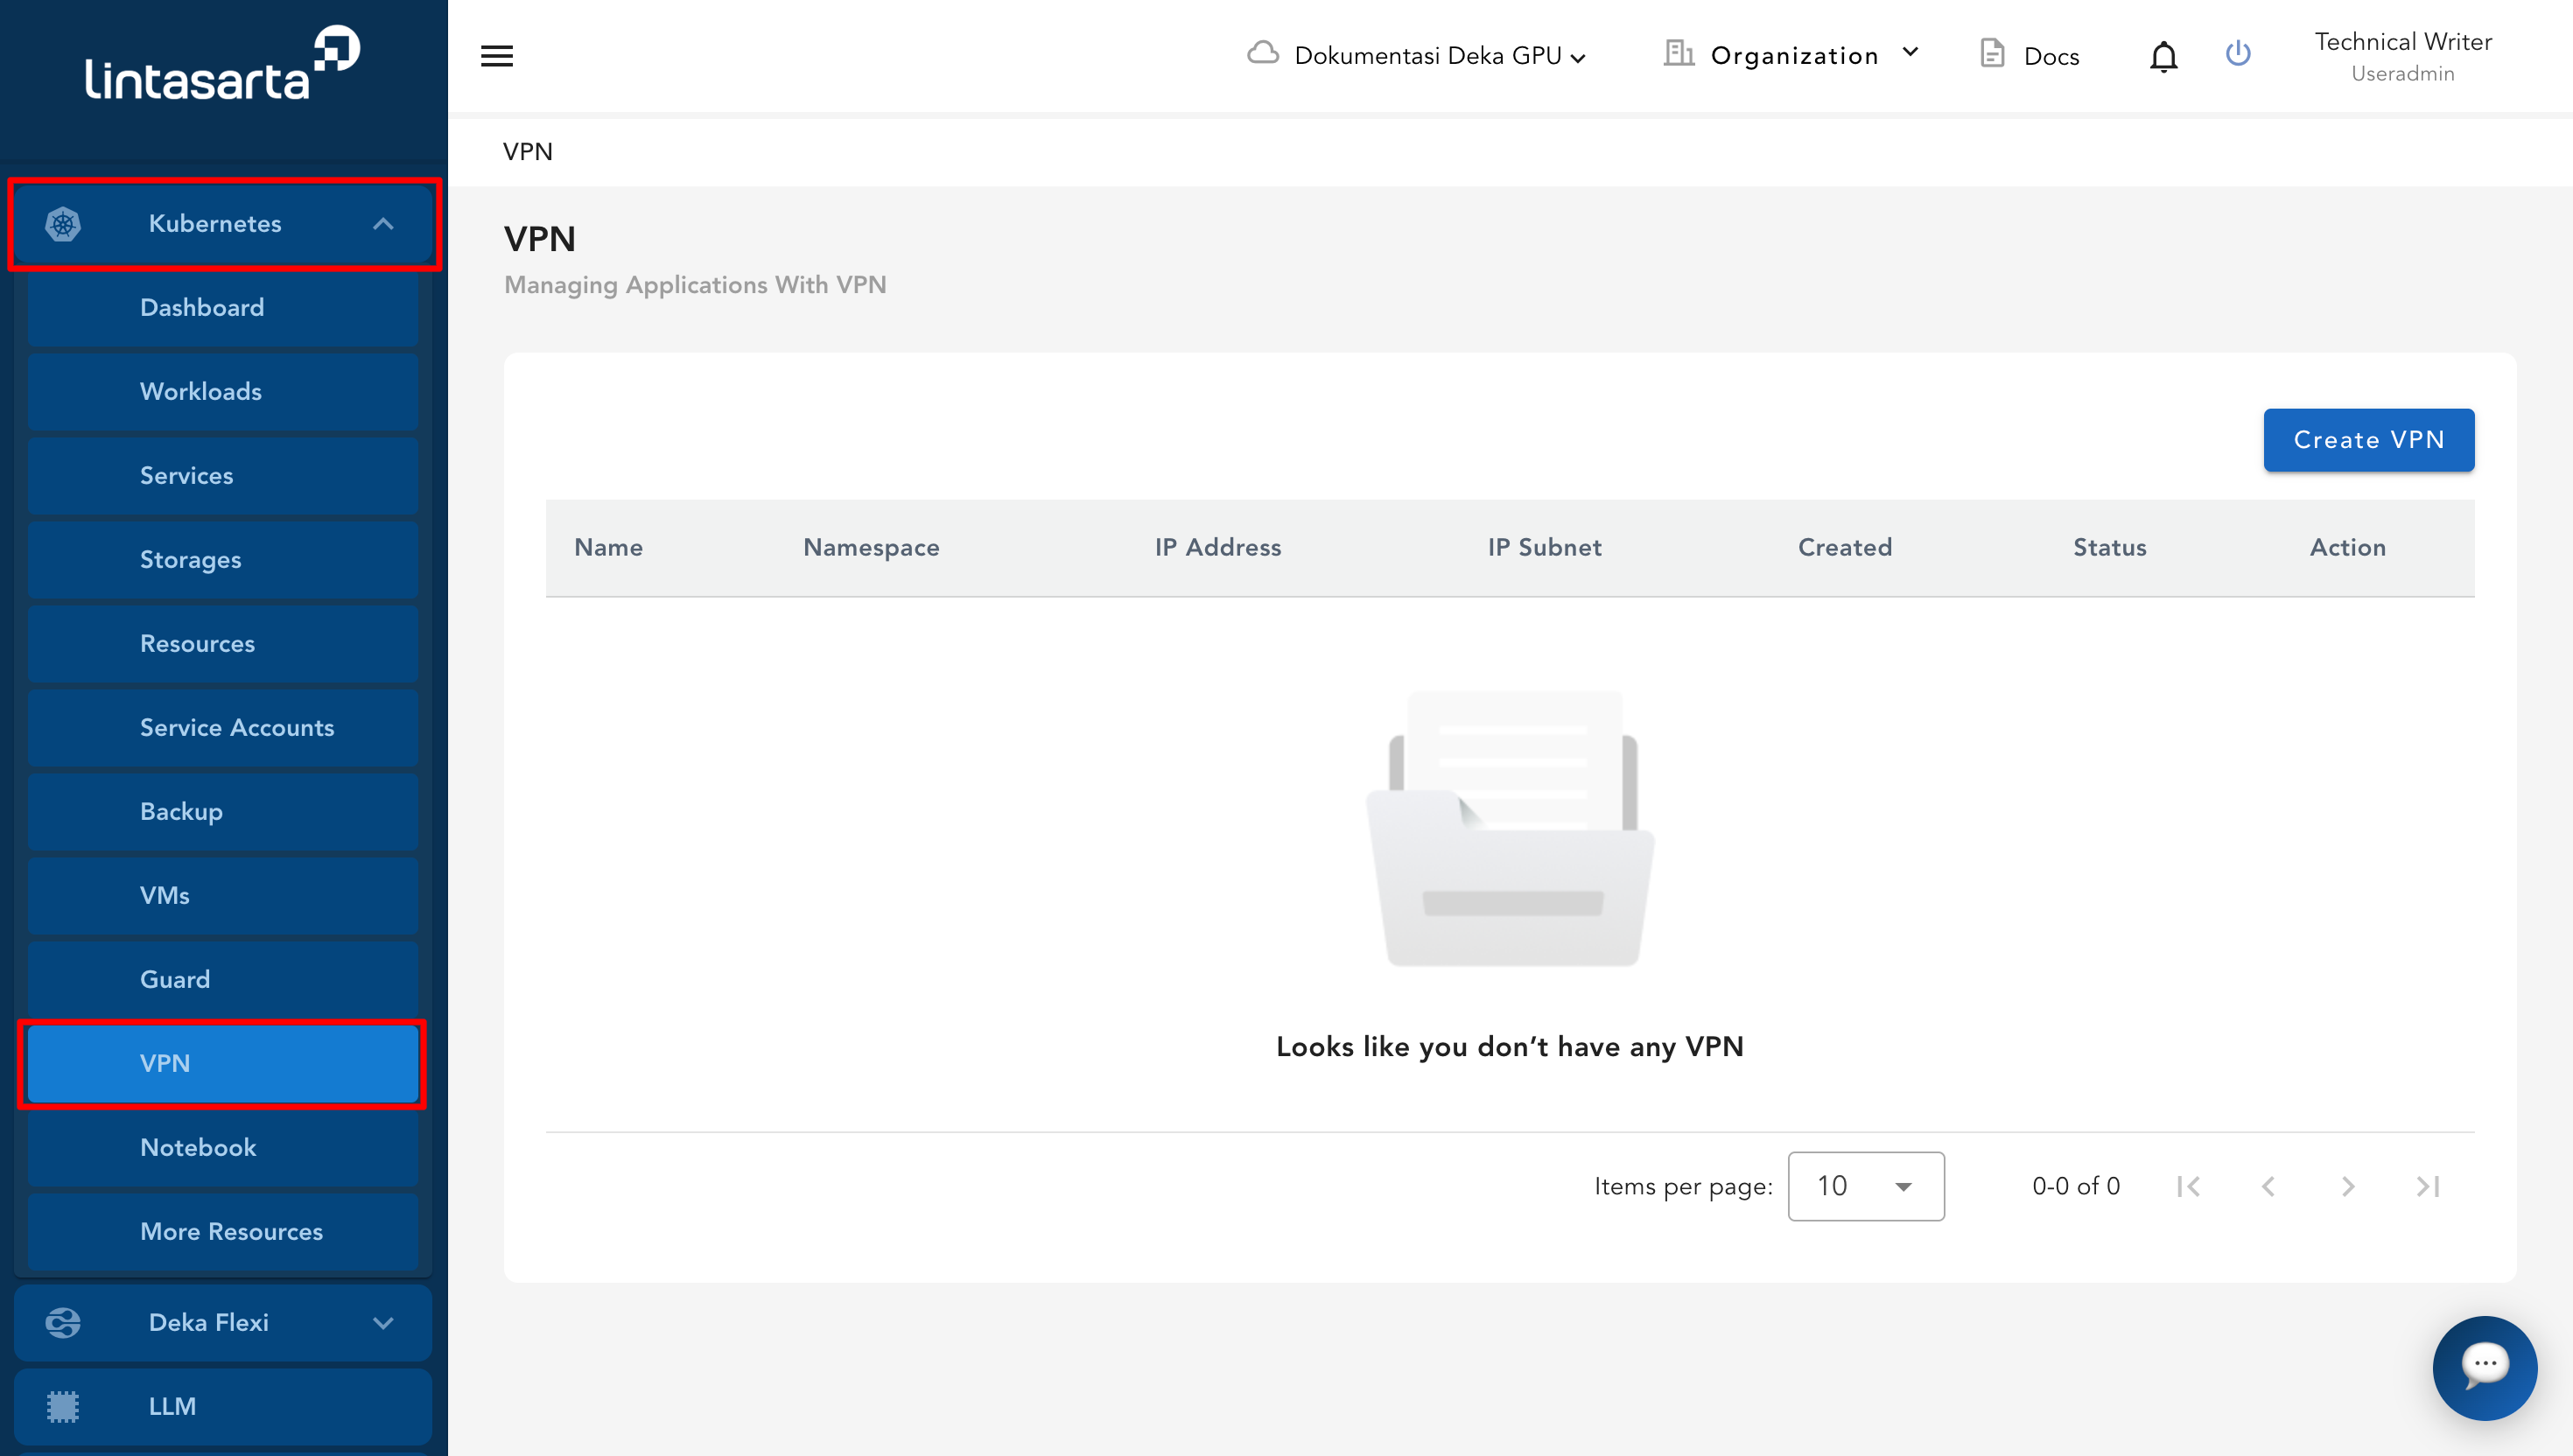
* Click the **Kubernetes** menu on the sidebar, then select the **VPN** menu to open the VPN management page.

<figure><img src="https://content.gitbook.com/content/dRGHNSPw8ps5rkLJZT3A/blobs/NZKMdokFbR7Wk9wYoDHJ/image.png" alt=""><figcaption></figcaption></figure>

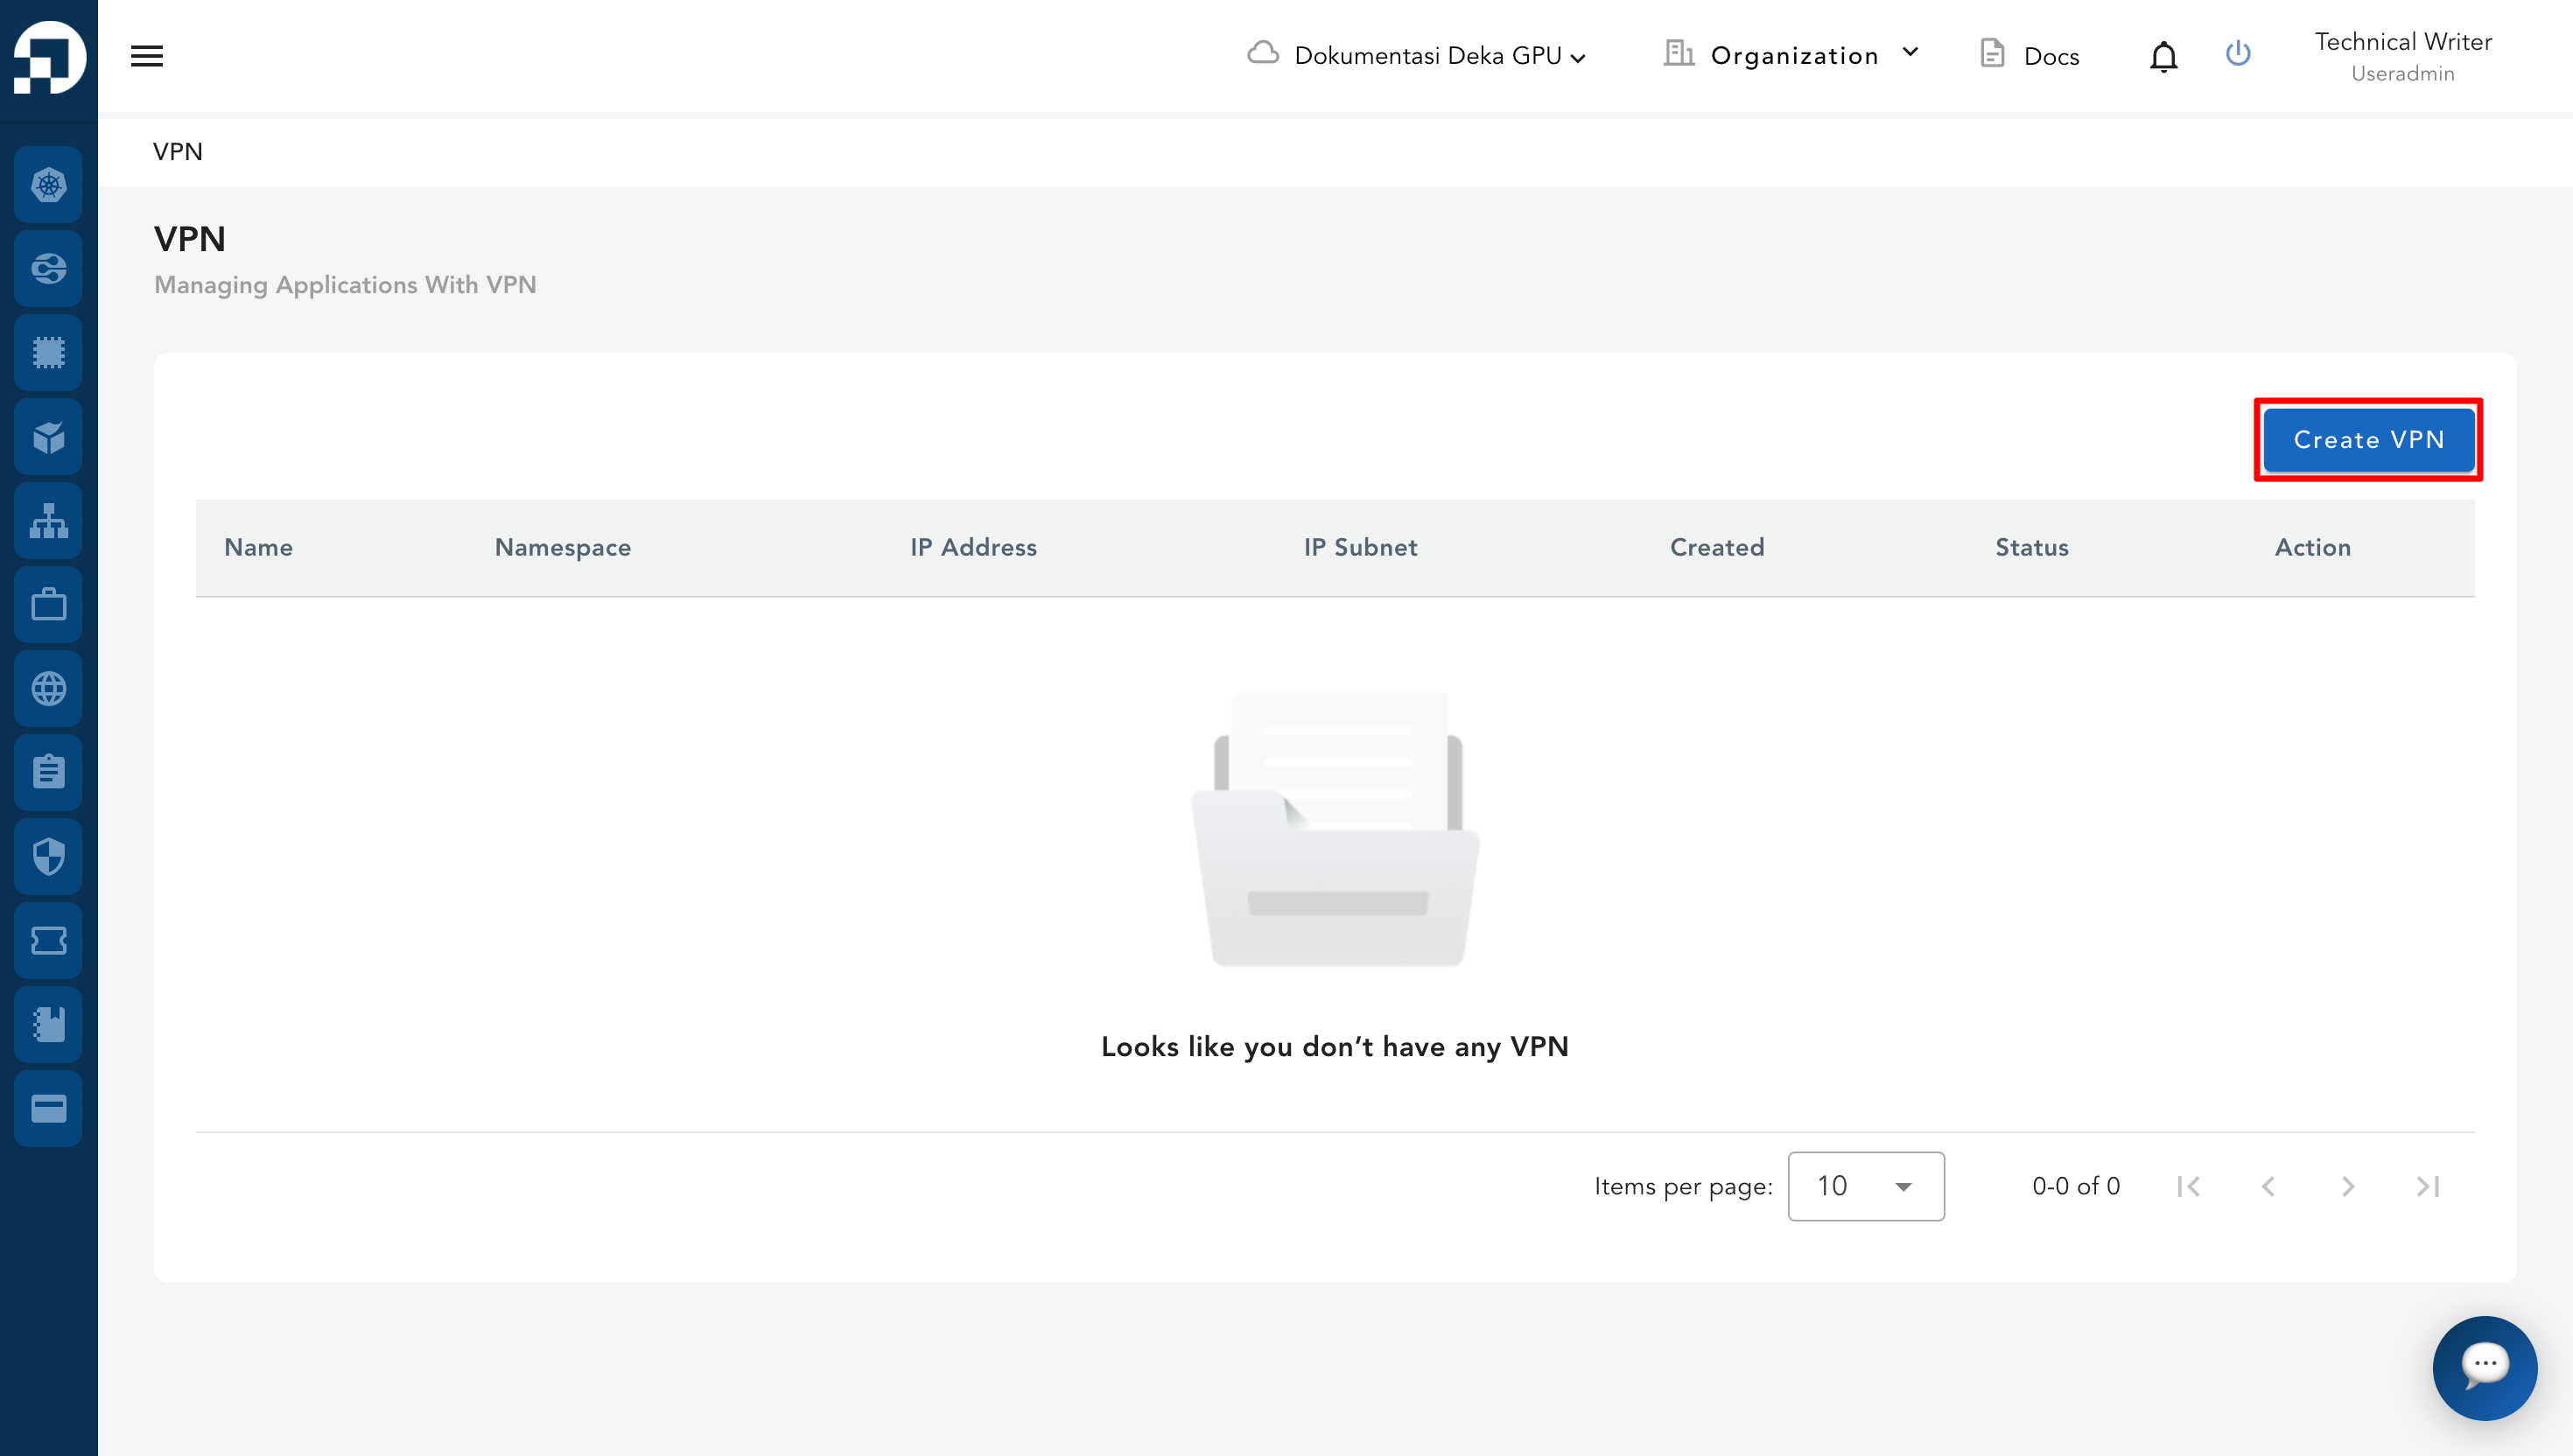
* Click the Create VPN button at the top right.

<figure><img src="https://content.gitbook.com/content/dRGHNSPw8ps5rkLJZT3A/blobs/X9JEiUT50Gb2HRootKIr/image.png" alt=""><figcaption></figcaption></figure>

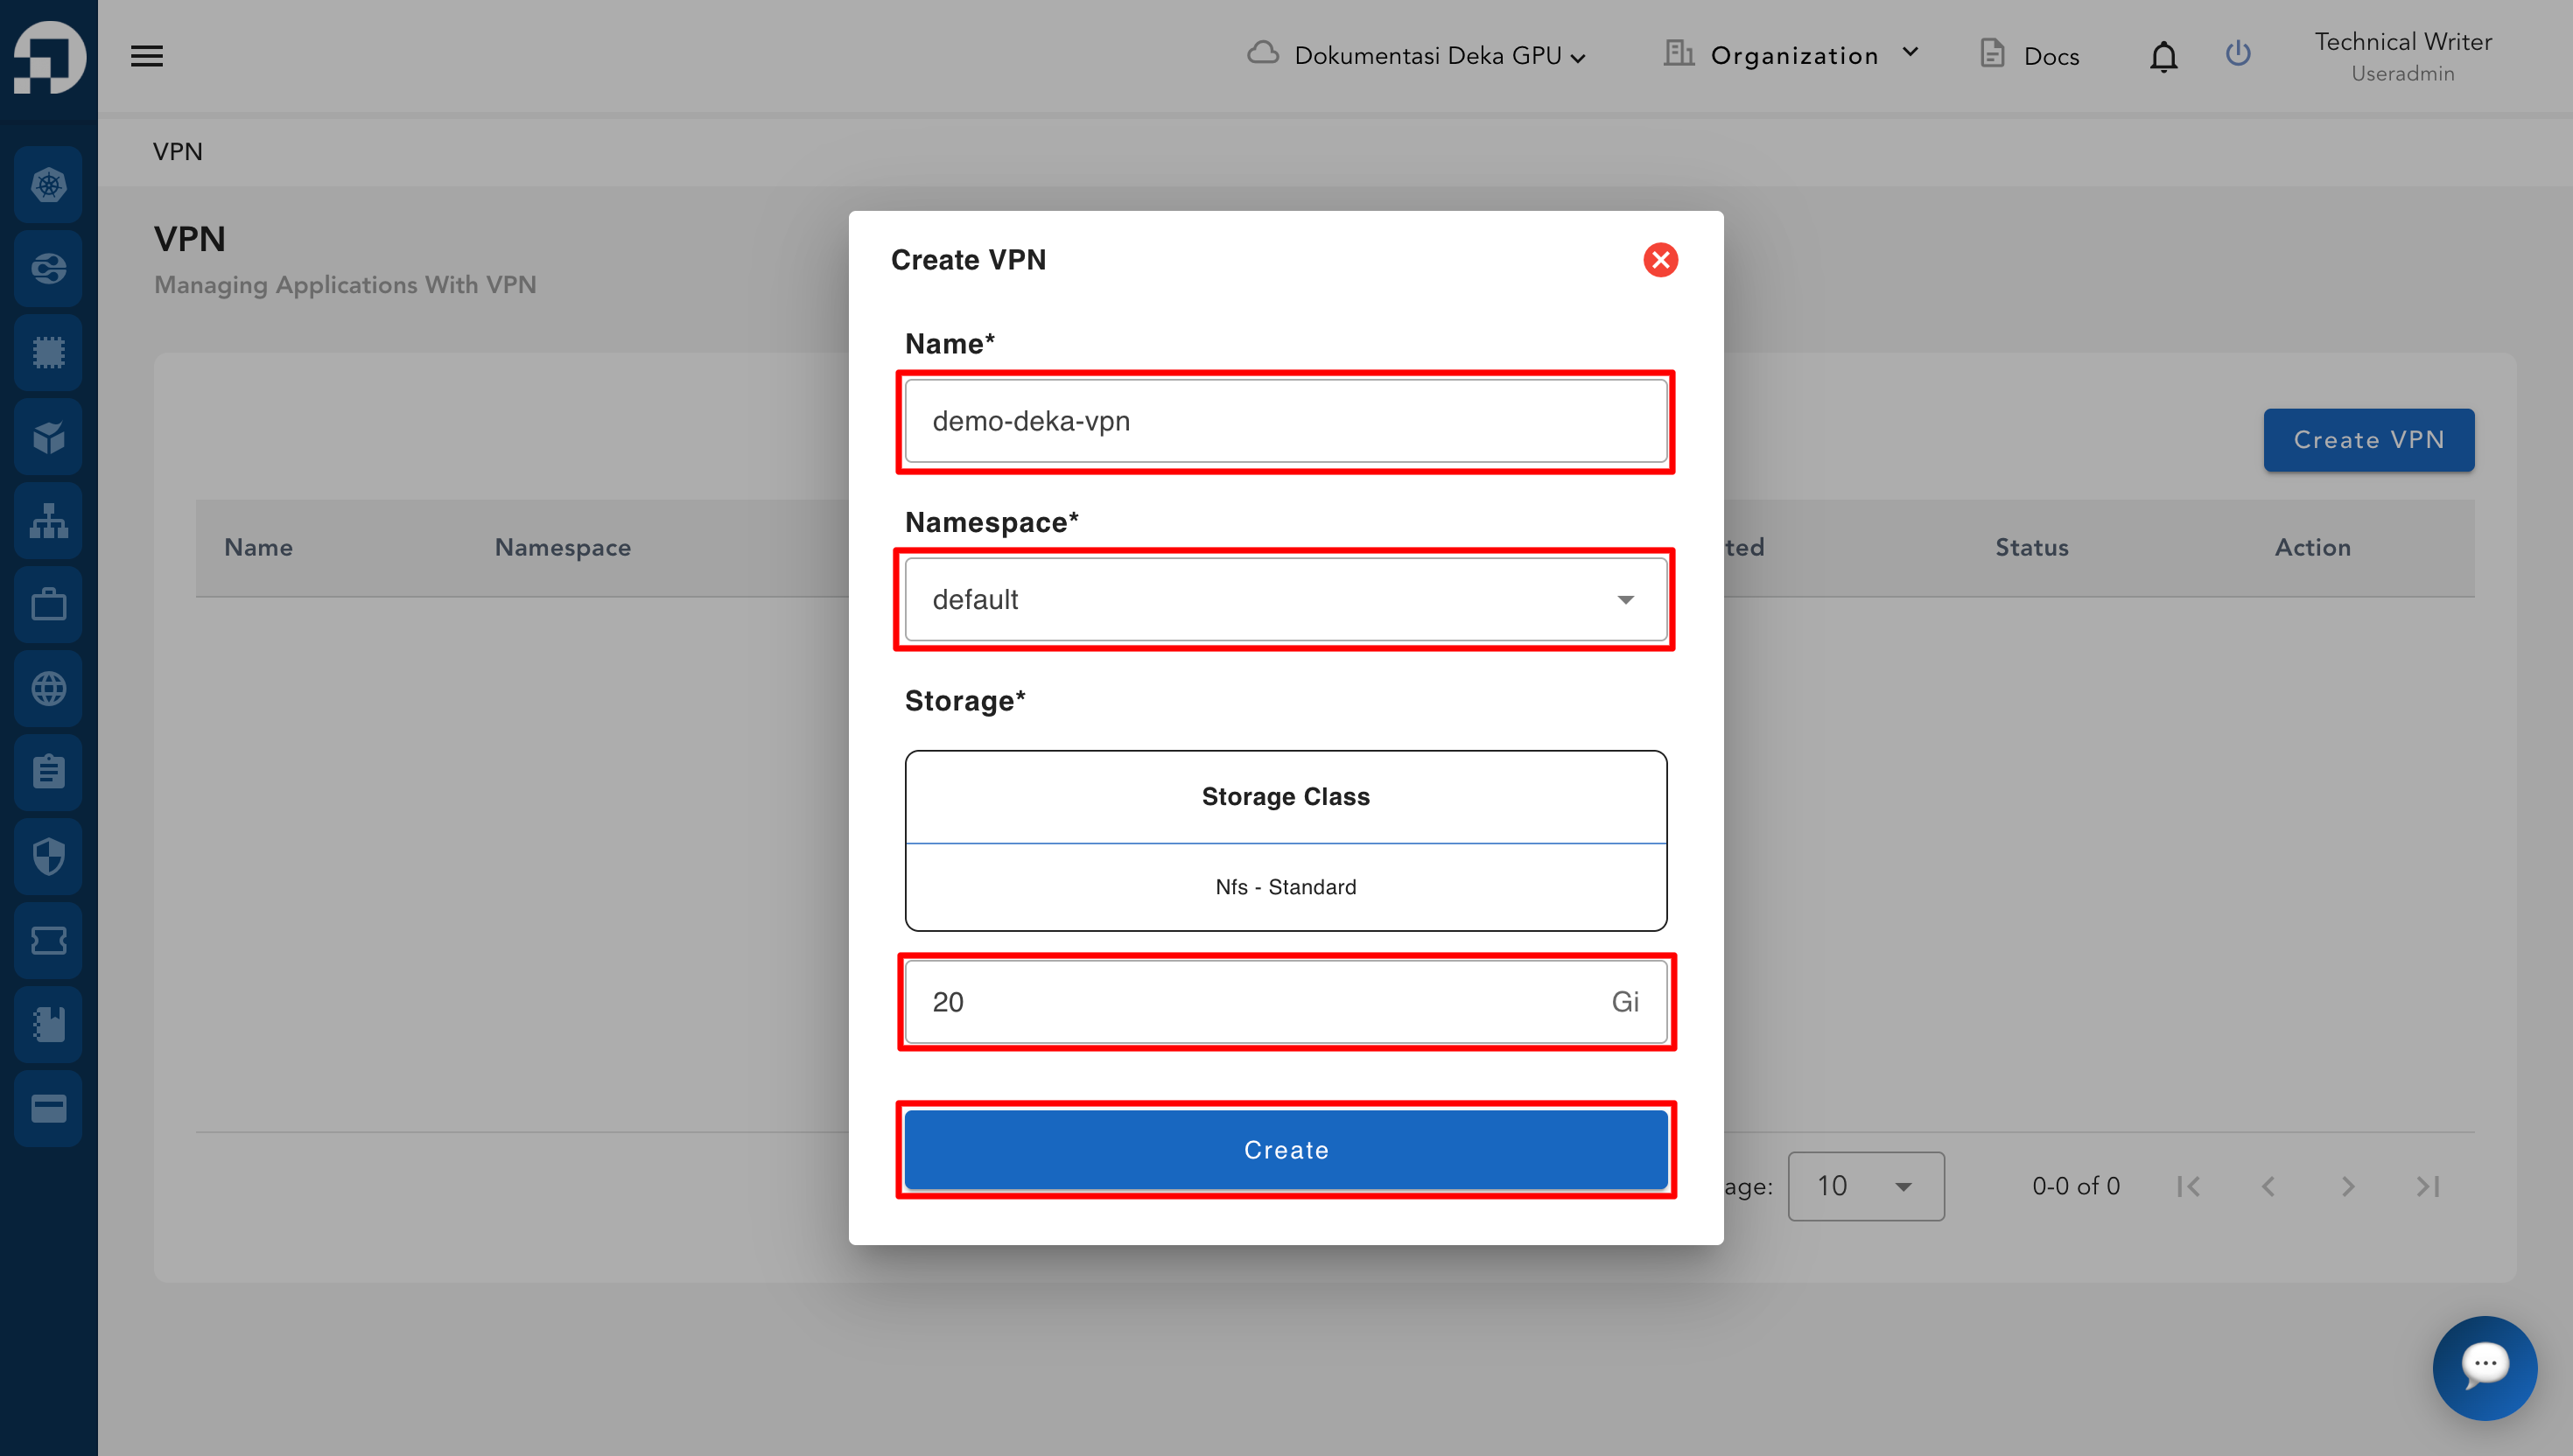
* A dialog box appears. Fill in the required information. Then, click **Create** to proceed.

<figure><img src="https://content.gitbook.com/content/dRGHNSPw8ps5rkLJZT3A/blobs/BQjQ6NRxrvIzSdYdwx9k/image.png" alt=""><figcaption></figcaption></figure>

<table><thead><tr><th width="140.66668701171875">Column</th><th>Description</th></tr></thead><tbody><tr><td>Name</td><td>This field is used by the app to define a unique name for the VPN. The name helps distinguish one VPN from another.</td></tr><tr><td>Namespace</td><td>This field specifies the namespace where the VPN will be created. For example, the app may use default if no other namespace is selected.</td></tr><tr><td>Storage</td><td>This field defines the amount of storage allocated for the VPN. Specify the required size (in Gi) based on your application needs.</td></tr></tbody></table>

* Once the process is complete, a notification appears stating, “**VPN has been successfully created.**”

<figure><img src="https://content.gitbook.com/content/dRGHNSPw8ps5rkLJZT3A/blobs/ka4JzSxwi2a1J0pcxkyd/image%20(4).png" alt=""><figcaption></figcaption></figure>

* The newly created VPN is then displayed in the VPN List Table, where its details can be viewed and managed further.
