> For the complete documentation index, see [llms.txt](https://docs.cloudeka.ai/llms.txt). Markdown versions of documentation pages are available by appending `.md` to page URLs; this page is available as [Markdown](https://docs.cloudeka.ai/deka-box/overview-deka-box/cors-settings.md).

# CORS Settings

This section explains the **CORS Settings** in the **Service Portal Cloudeka**. **CORS** (Cross-Origin Resource Sharing) allows web applications to access resources from a different domain than their original domain. It is an HTTP-based security mechanism that enables servers to control data requests originating from different domains. By default, browsers restrict cross-origin access for security reasons. CORS provides a secure and controlled way to allow exceptions to these restrictions. Using CORS, you can define whether a browser is allowed to access resources from another origin (domain, protocol, and port).

The following example illustrates how CORS works:\
Suppose you have a website at `https://www.technicalwriters.id/`, and you store static files such as images, videos, or PDFs in the Deka Box Service Portal AI at the following link `https://putri.basic.box.cloudeka.id/demo-deka-box/logo.png`. When the browser tries to access this file from the Cloudeka domain, it automatically blocks the request because the bucket denies access for security reasons. Therefore, you need to configure **CORS settings** on your bucket to allow cross-domain access from your website.

In the CORS Configuration on Service Portal Cloudeka, you can [Add CORS Configuration](#add-cors-configuration) and [Delete CORS Configuration](#delete-cors-configuration).

## Add CORS Configuration

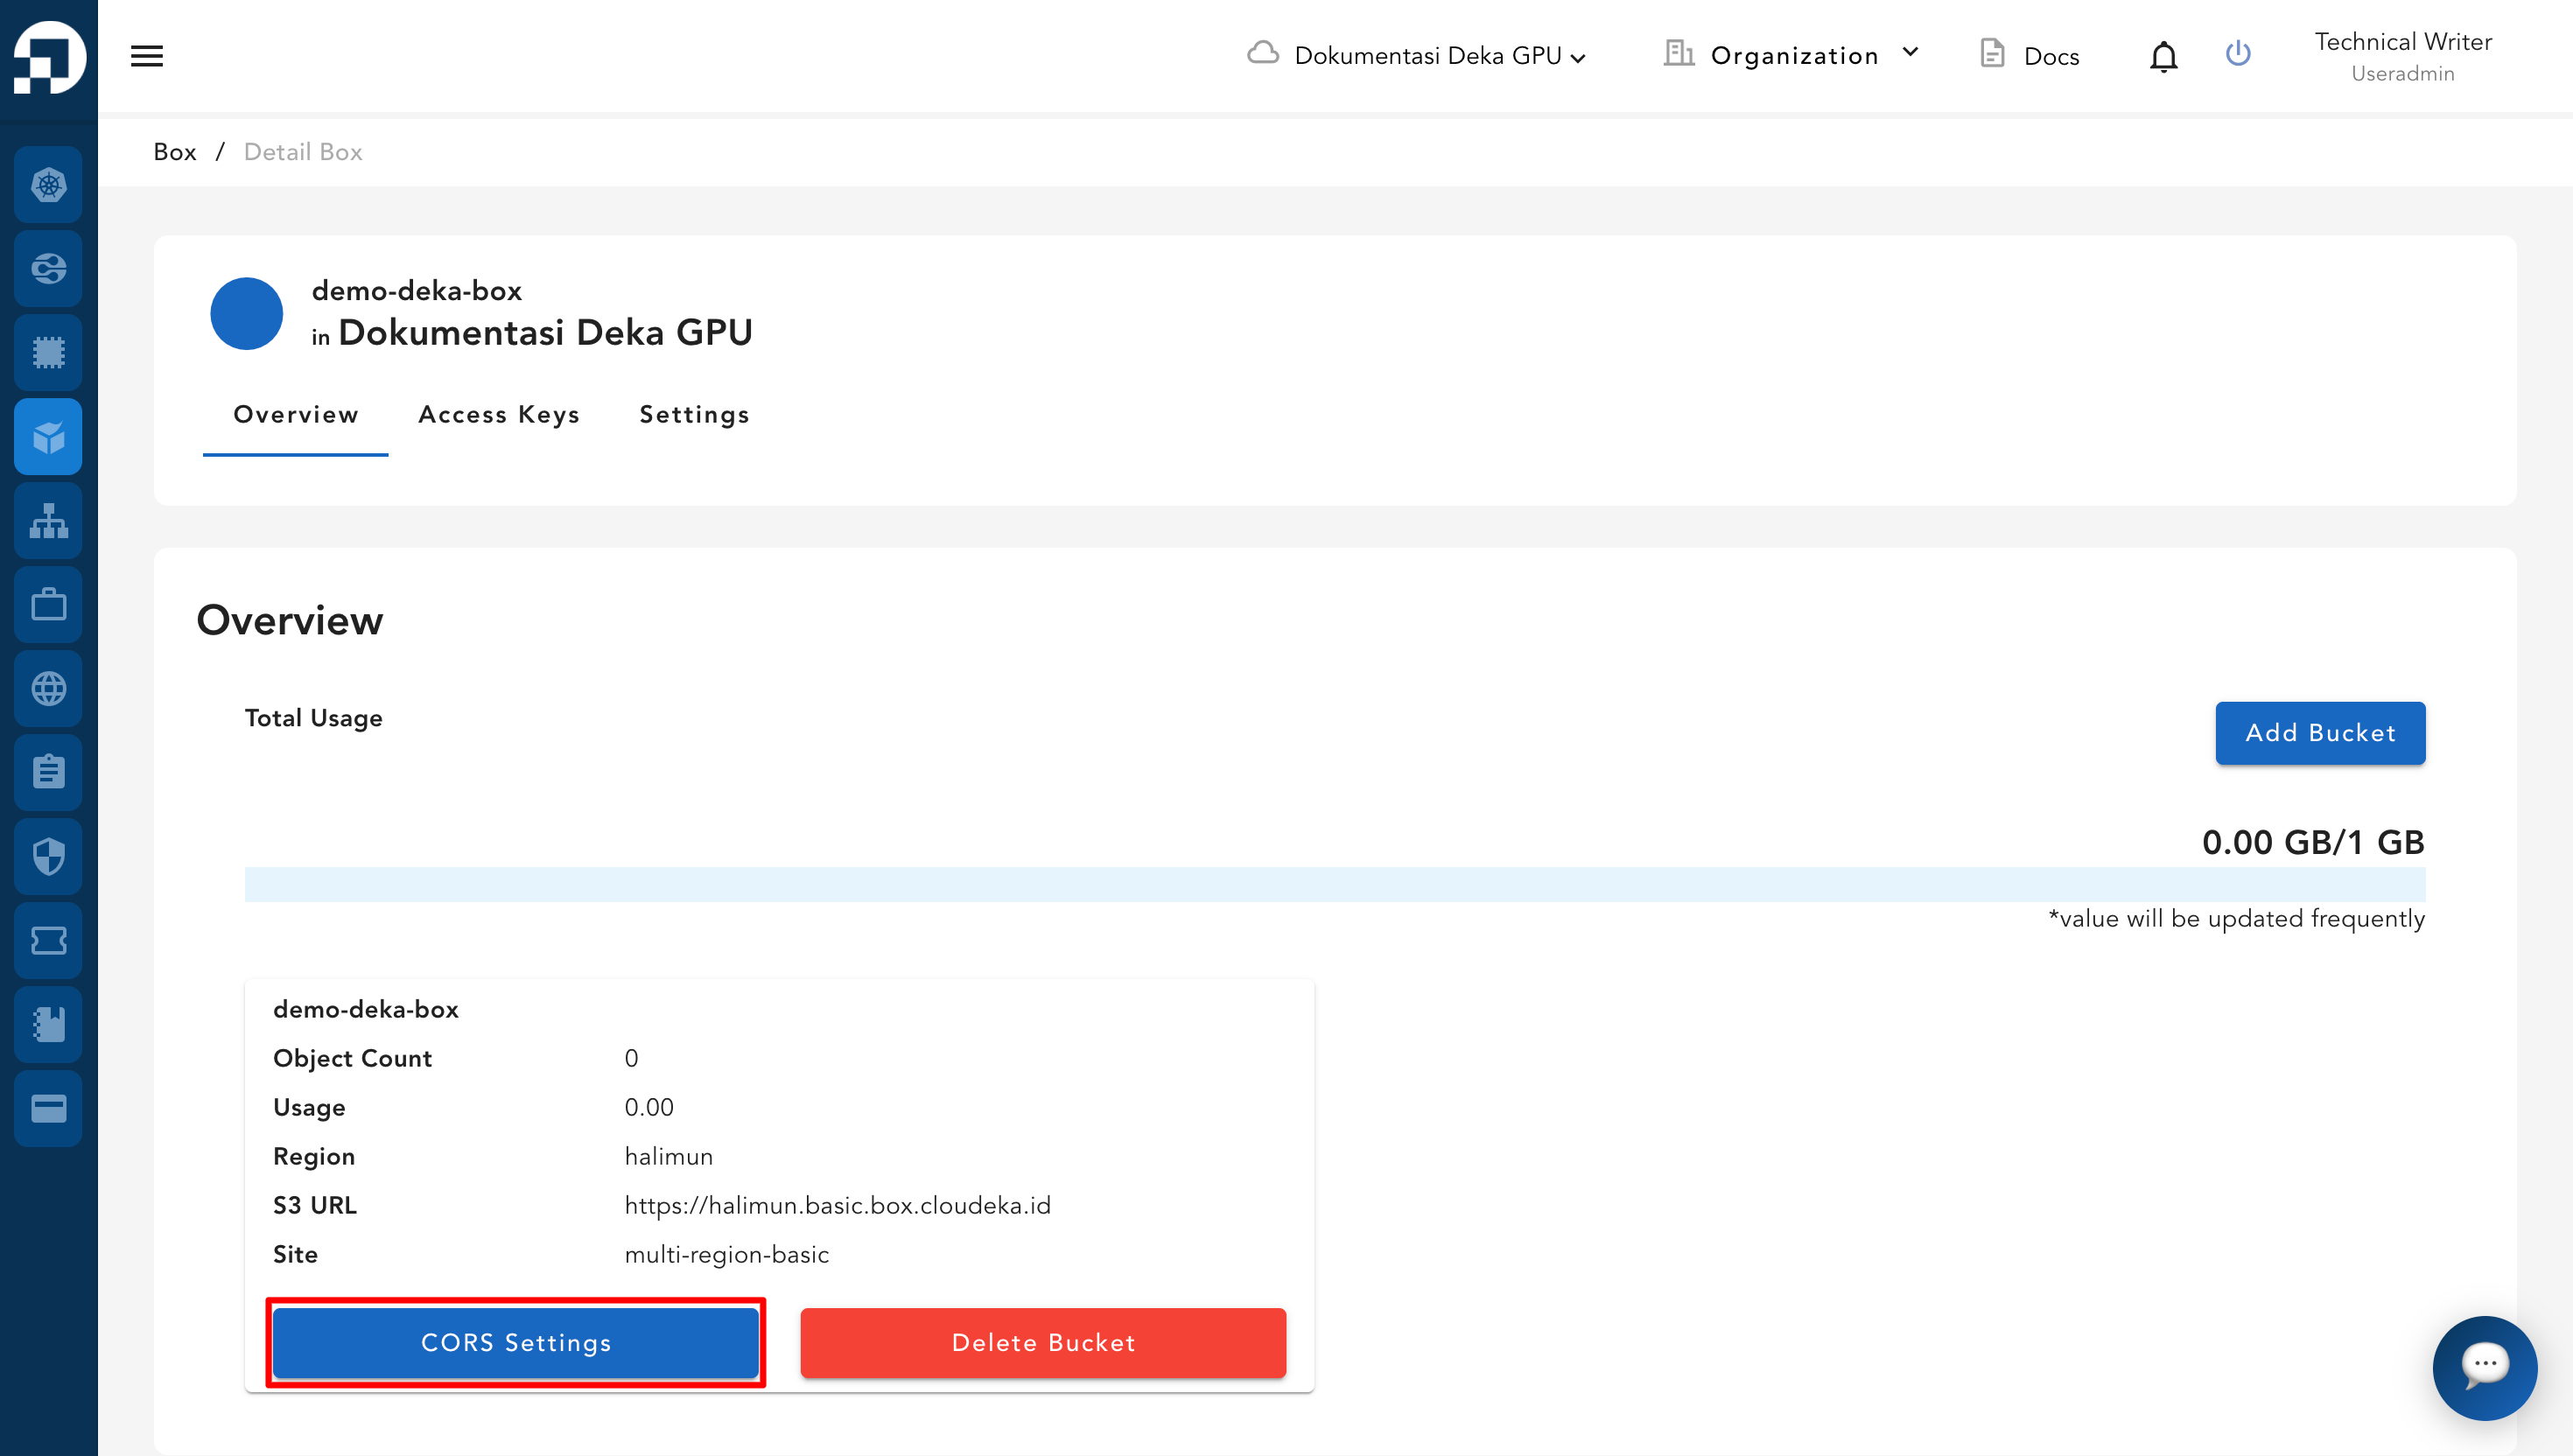
To add CORS configuration to Deka Box via the Service Portal Cloudeka. On the Overview Tab in Deka Box Details page click the CORS Settings button.

<figure><img src="/files/tcOUE7sMsIPg33fmejSi" alt=""><figcaption></figcaption></figure>

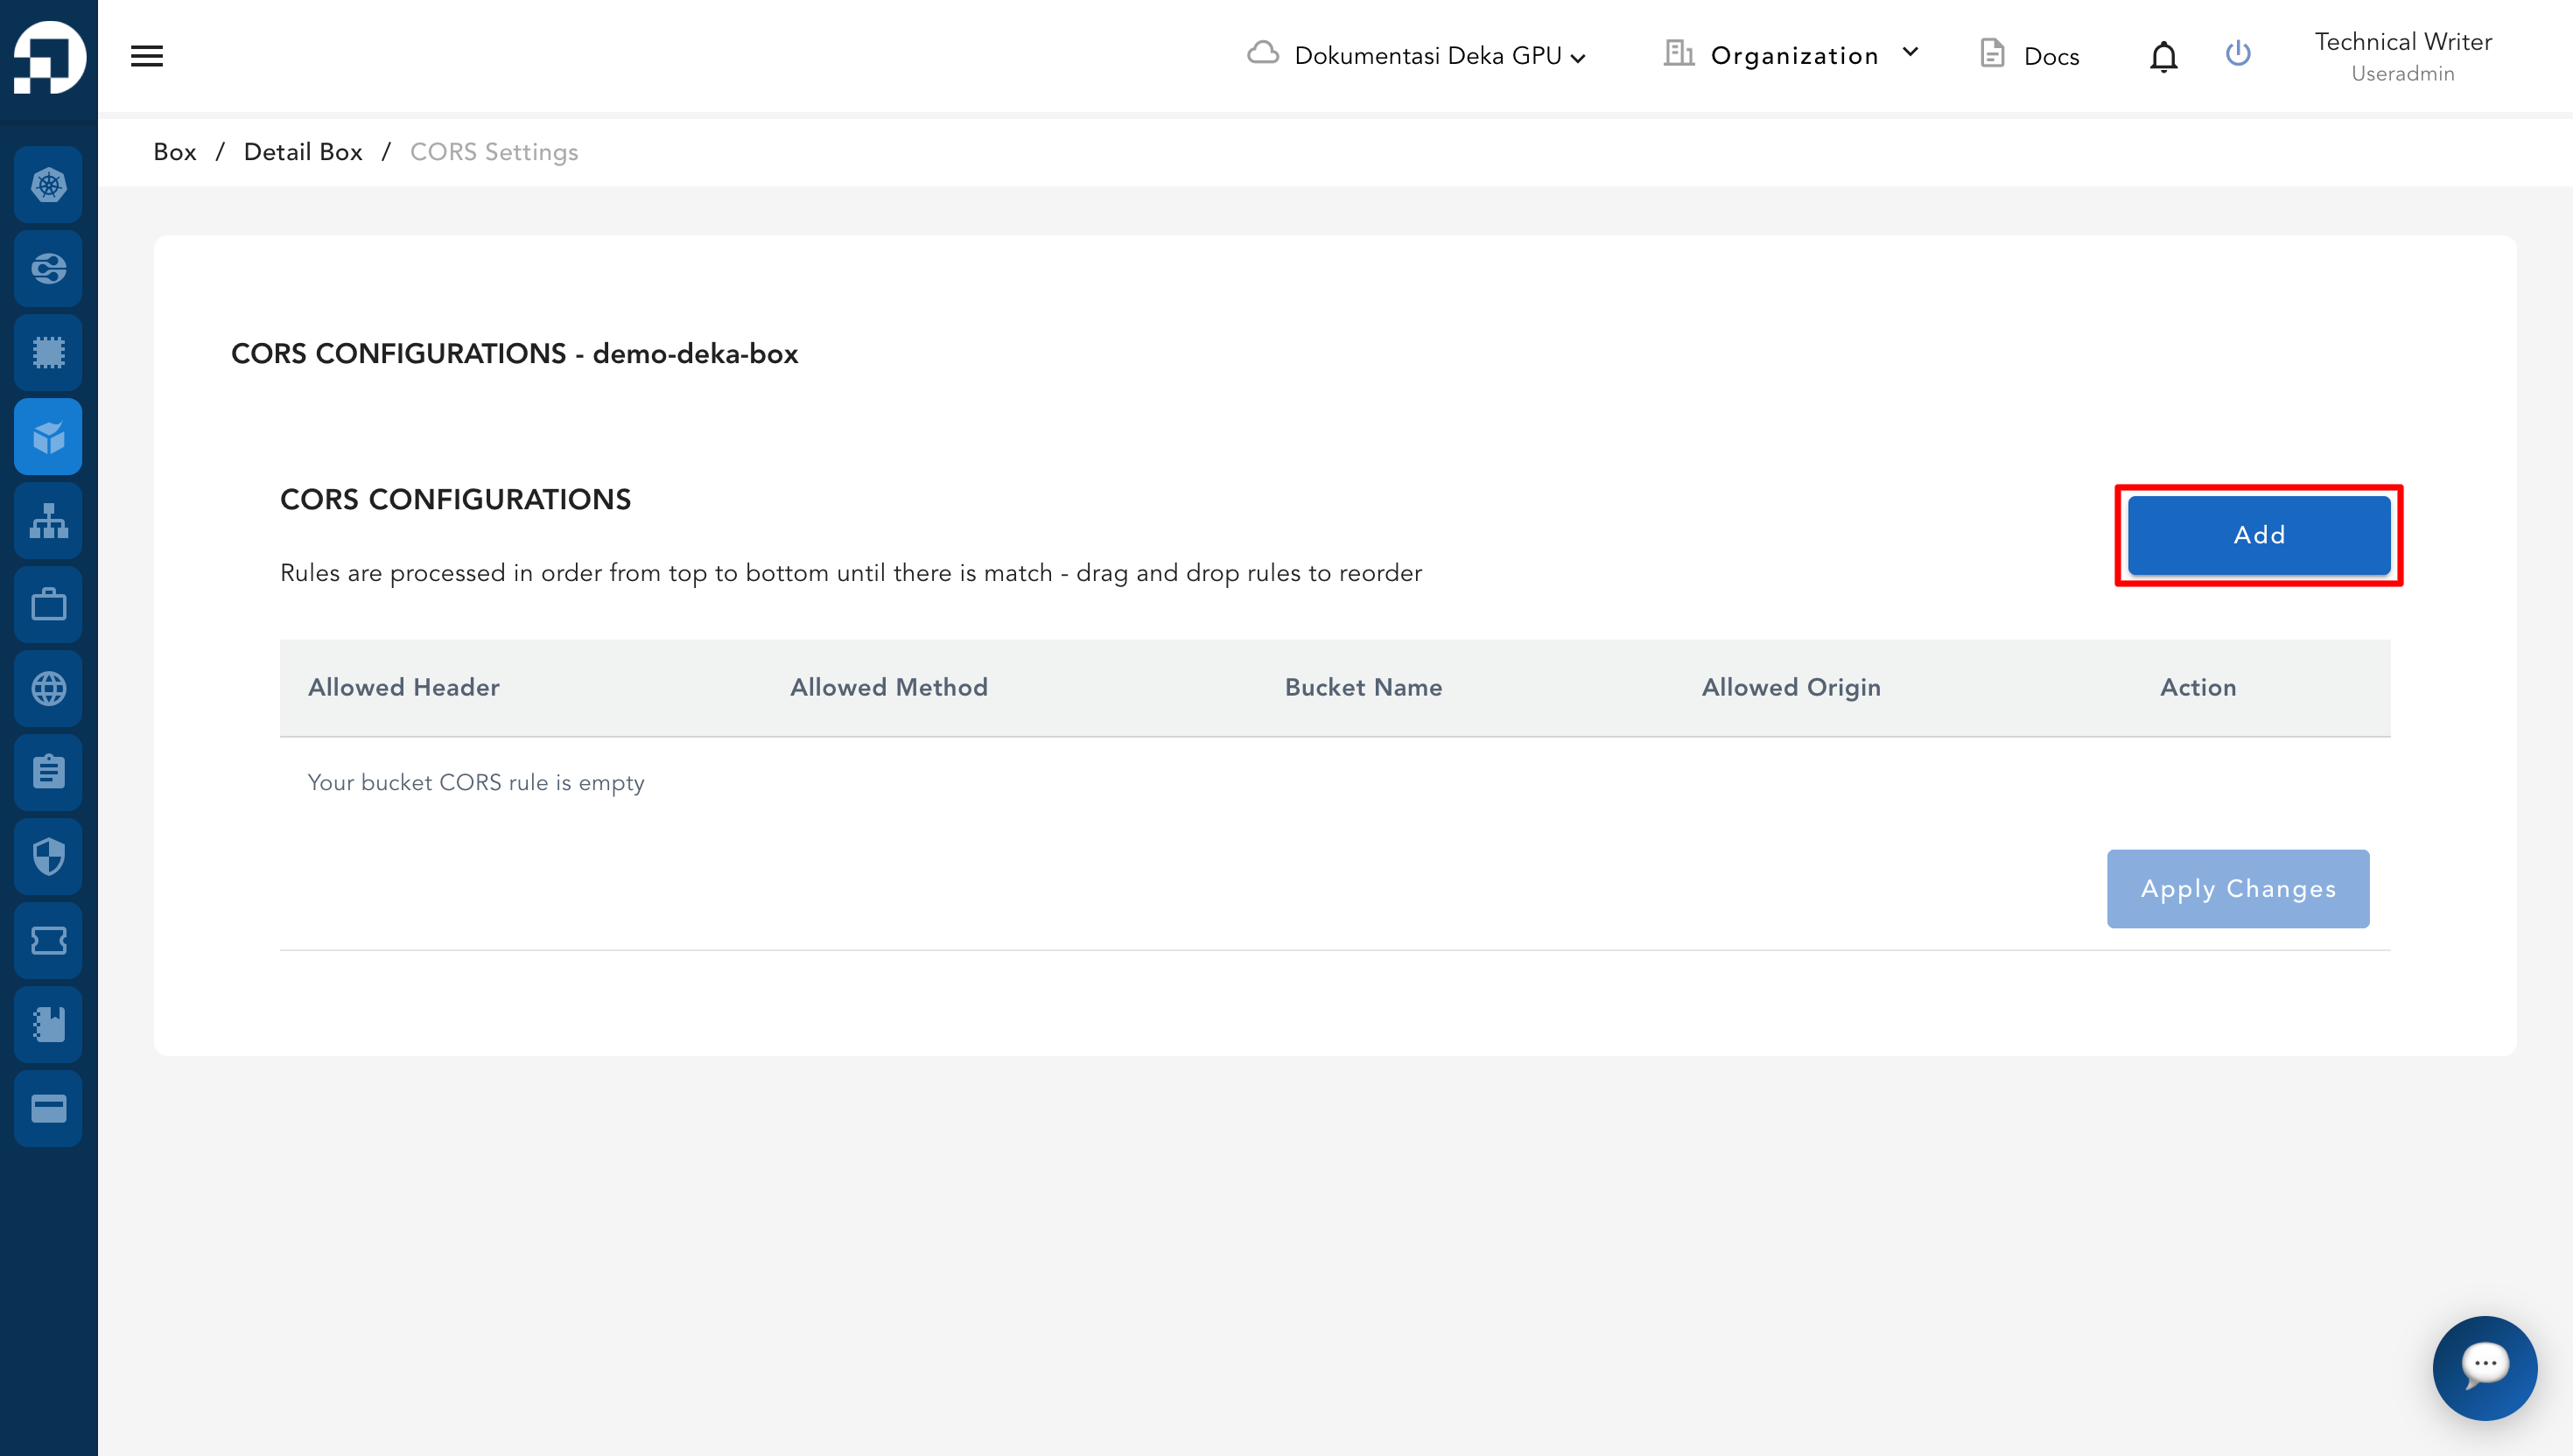
The Cors Configuration page appears, click the Add button.

<figure><img src="/files/94iSfIMtT6U1FHRYh8OV" alt=""><figcaption></figcaption></figure>

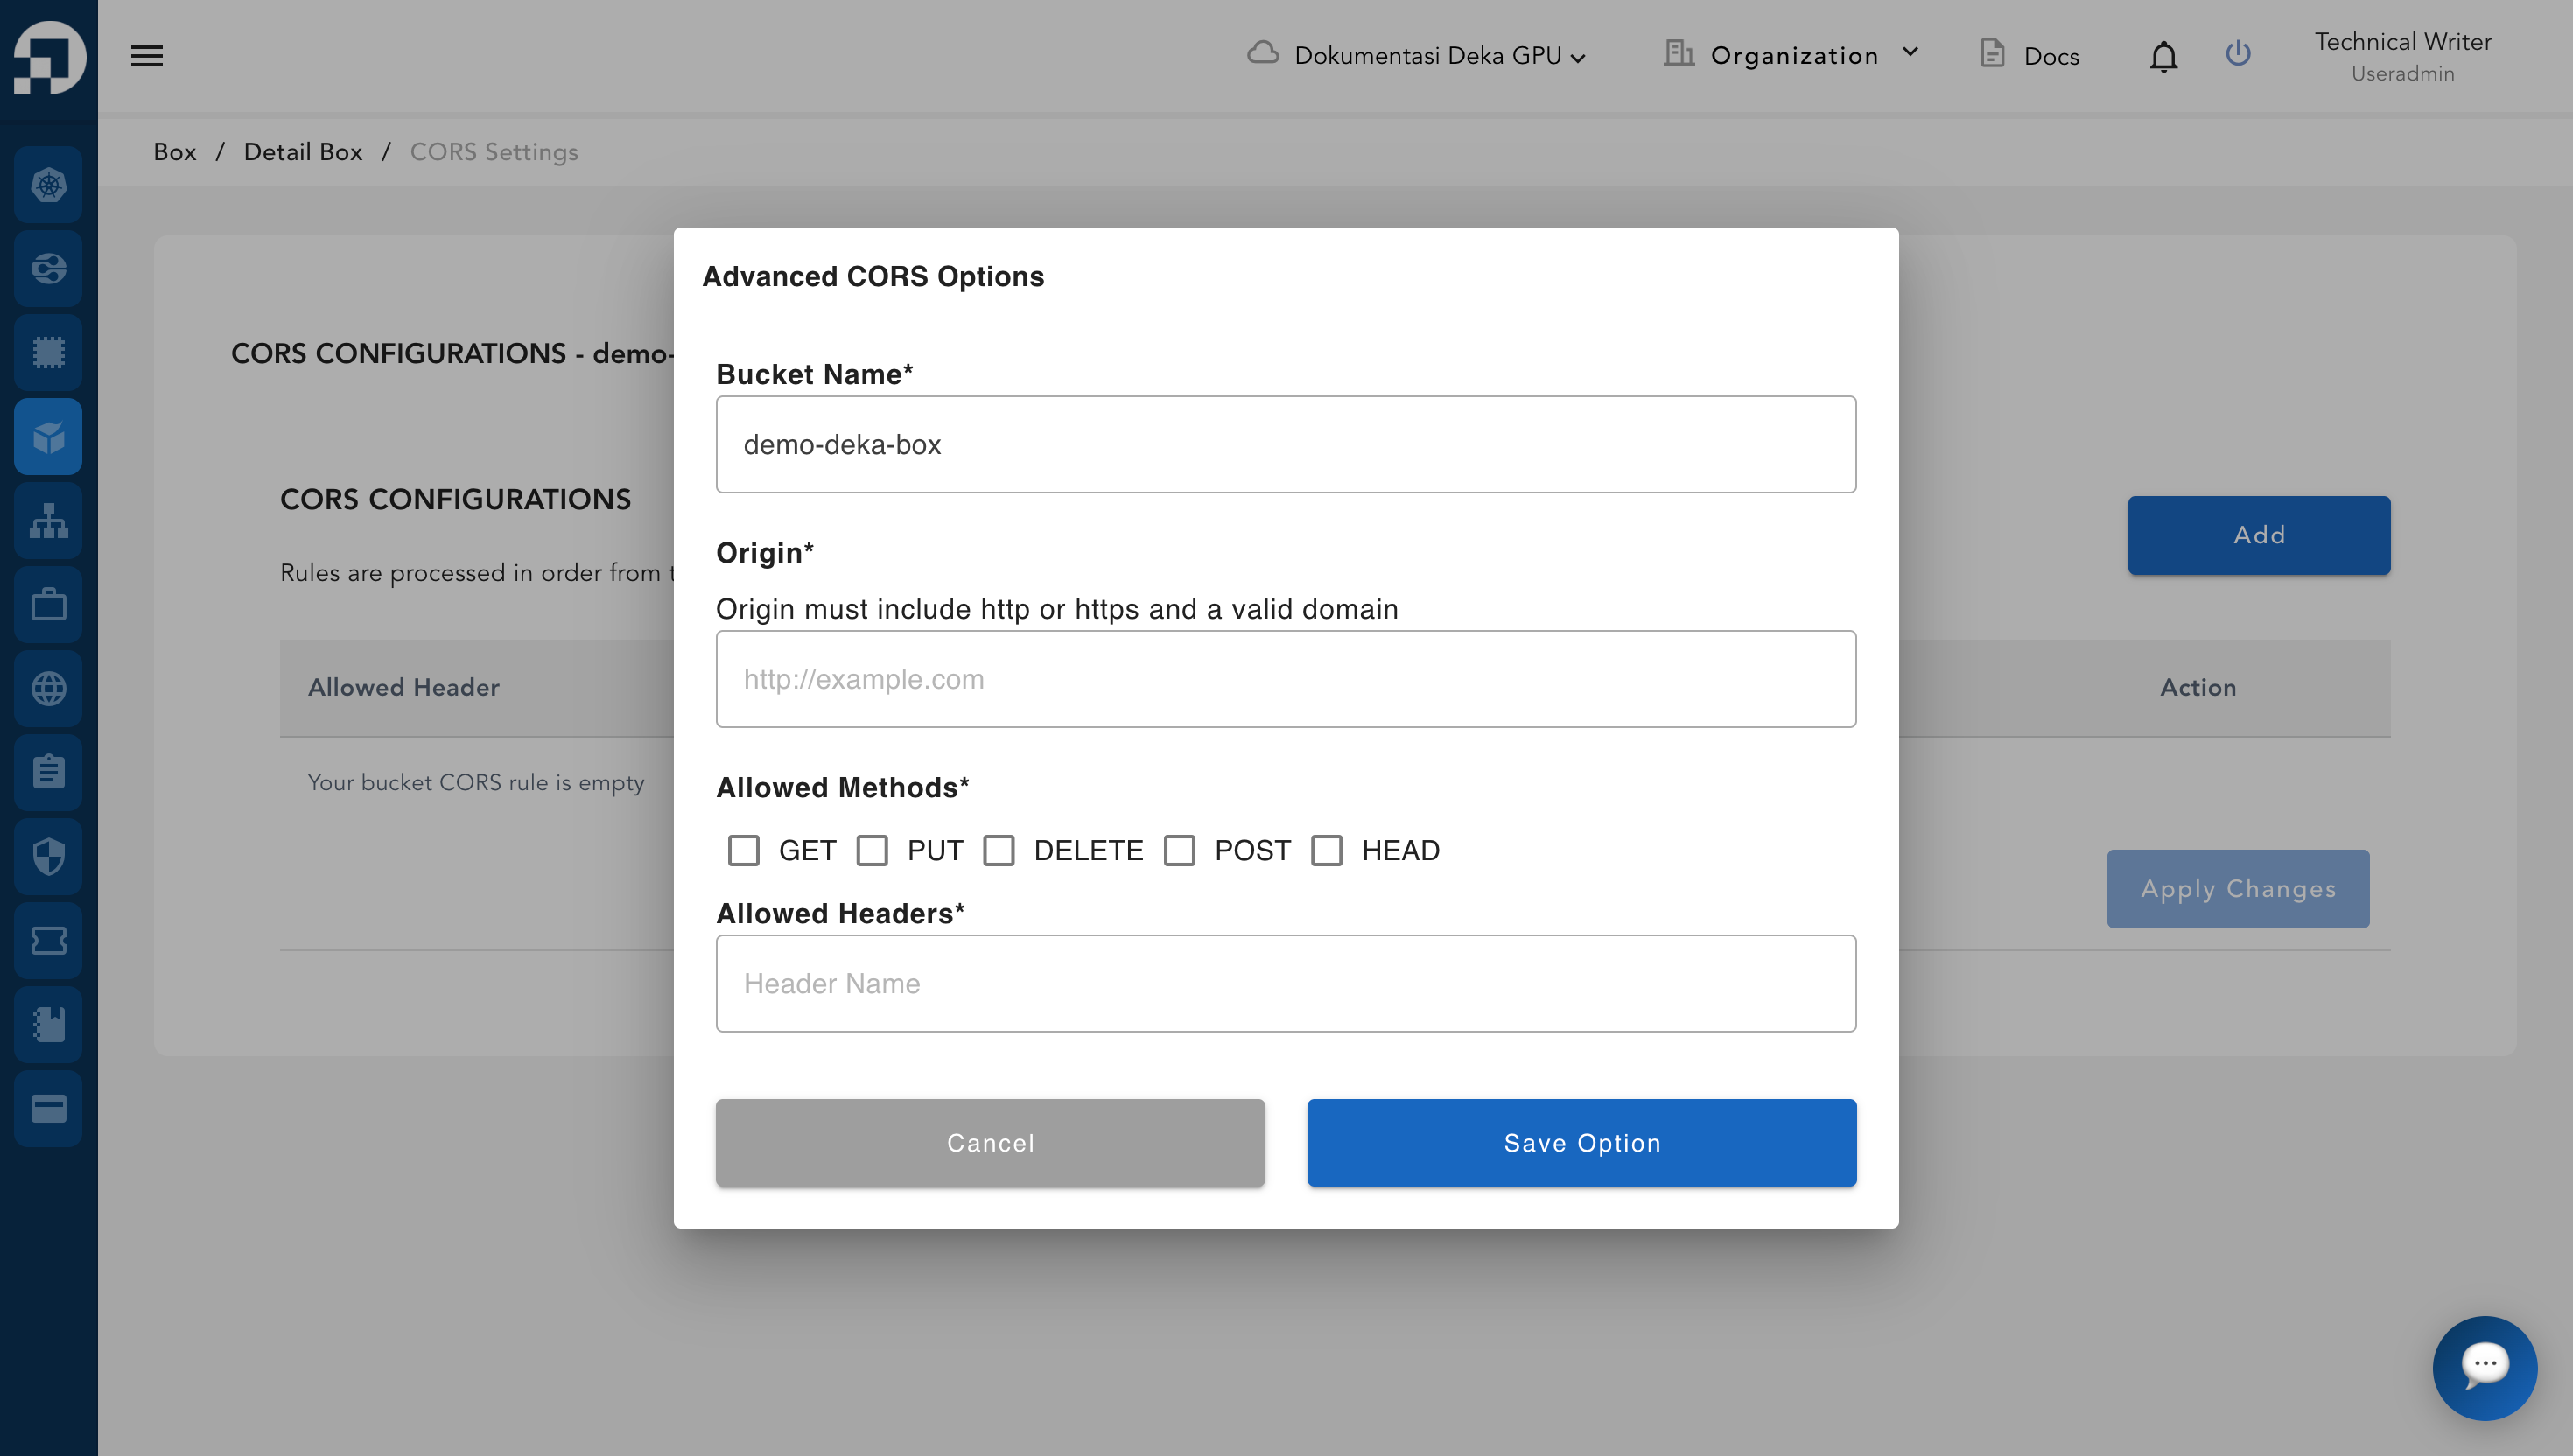
The Advanced CORS Options window appears, fill in the available columns. After filling in all the available columns, press the Save Option button.

<figure><img src="/files/HTurA7Sr3ZieSyJgBzRV" alt=""><figcaption></figcaption></figure>

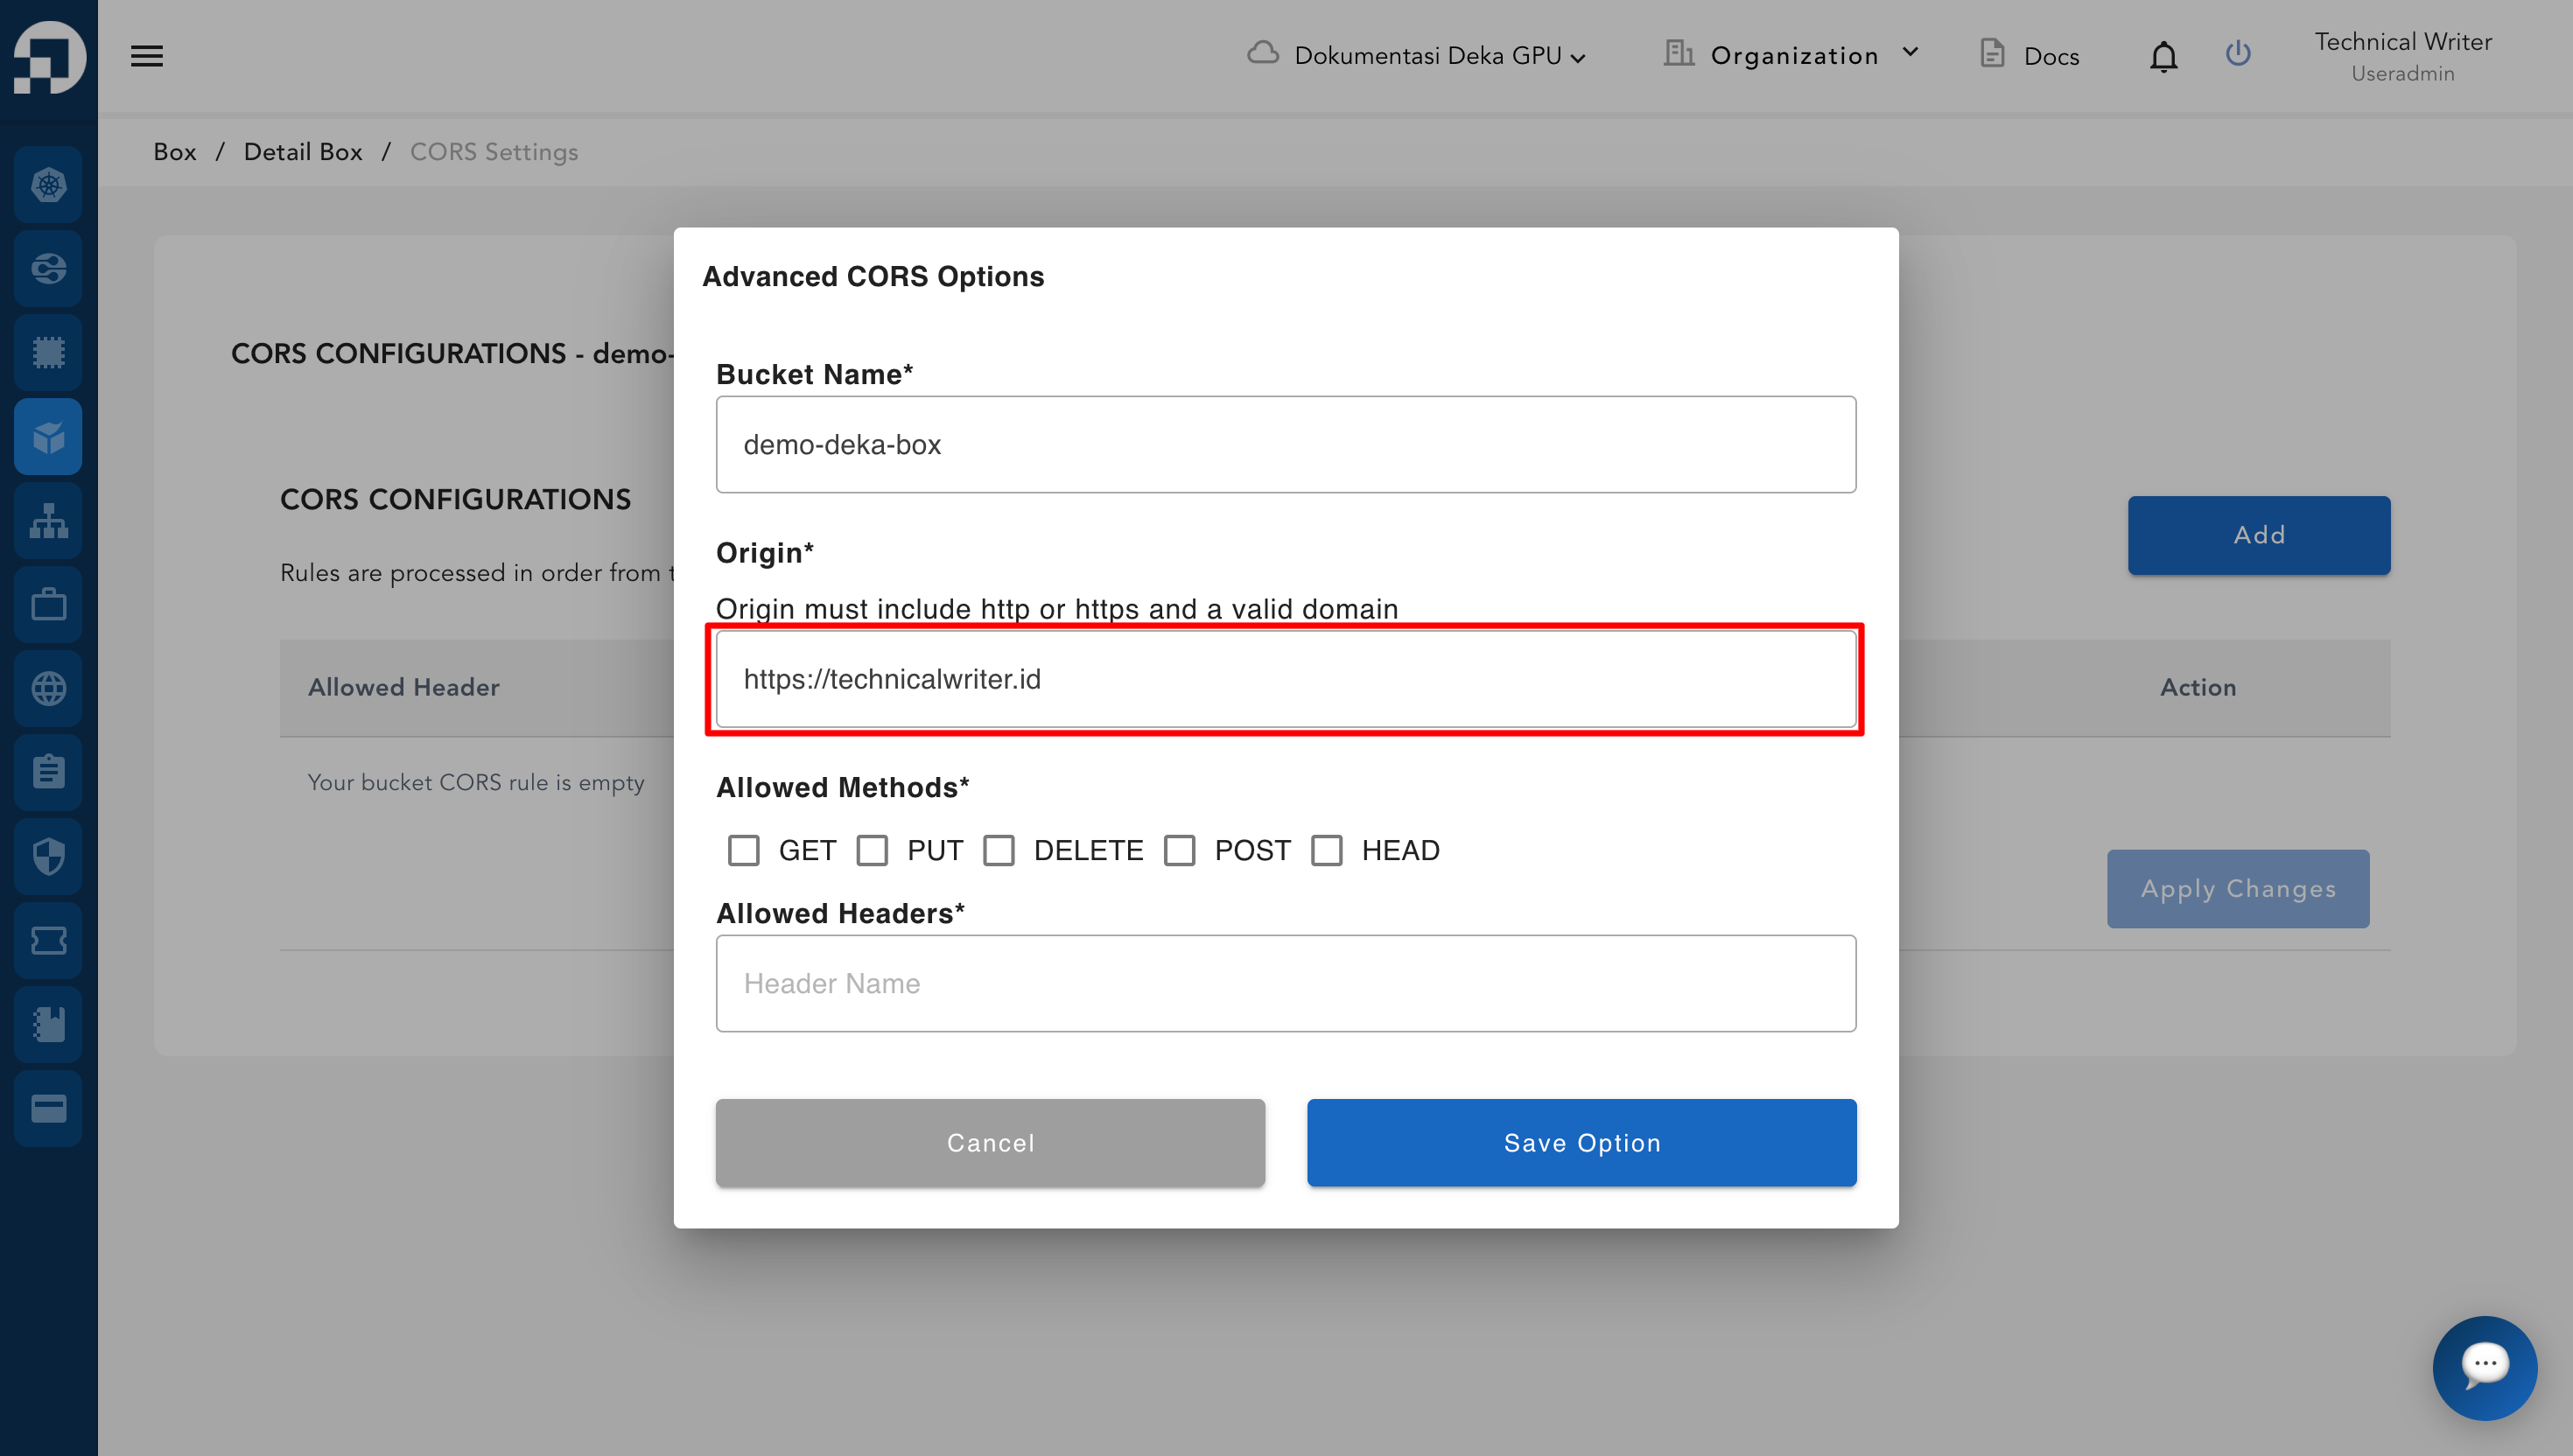
<table><thead><tr><th width="197">Column</th><th>Description</th></tr></thead><tbody><tr><td>Bucket Name</td><td>The name used to identify the bucket.</td></tr><tr><td>Origin</td><td>The request CORS uses in the scheme (http or https), domain, and port from which the request is sent.</td></tr><tr><td>Allow Methods</td><td><p>List of methods that are allowed to be used in CORS requests to the bucket:</p><ul><li><strong>GET</strong> is used to retrieve or read data from the bucket. It is the most commonly used method for static files on websites and must be selected if you require read access,</li><li><strong>PUT</strong> is used to upload files or overwrite objects in the bucket. This is typically used by web applications that allow users to upload files to the bucket.</li><li><strong>DELETE</strong> is used to delete files via API,</li><li><strong>POST</strong> is used to upload files through multipart forms,</li><li><strong>HEAD</strong> is used to request a file’s metadata without downloading the actual content.</li></ul></td></tr><tr><td>Allow Header</td><td>List of HTTP headers that are allowed to be used in CORS requests</td></tr></tbody></table>

In the **Origin** section, you can enter a valid website address. In this guide, we use `https://technicalwriters.id`.

<figure><img src="/files/ZhpBz81MXikM06paGxoS" alt=""><figcaption></figcaption></figure>

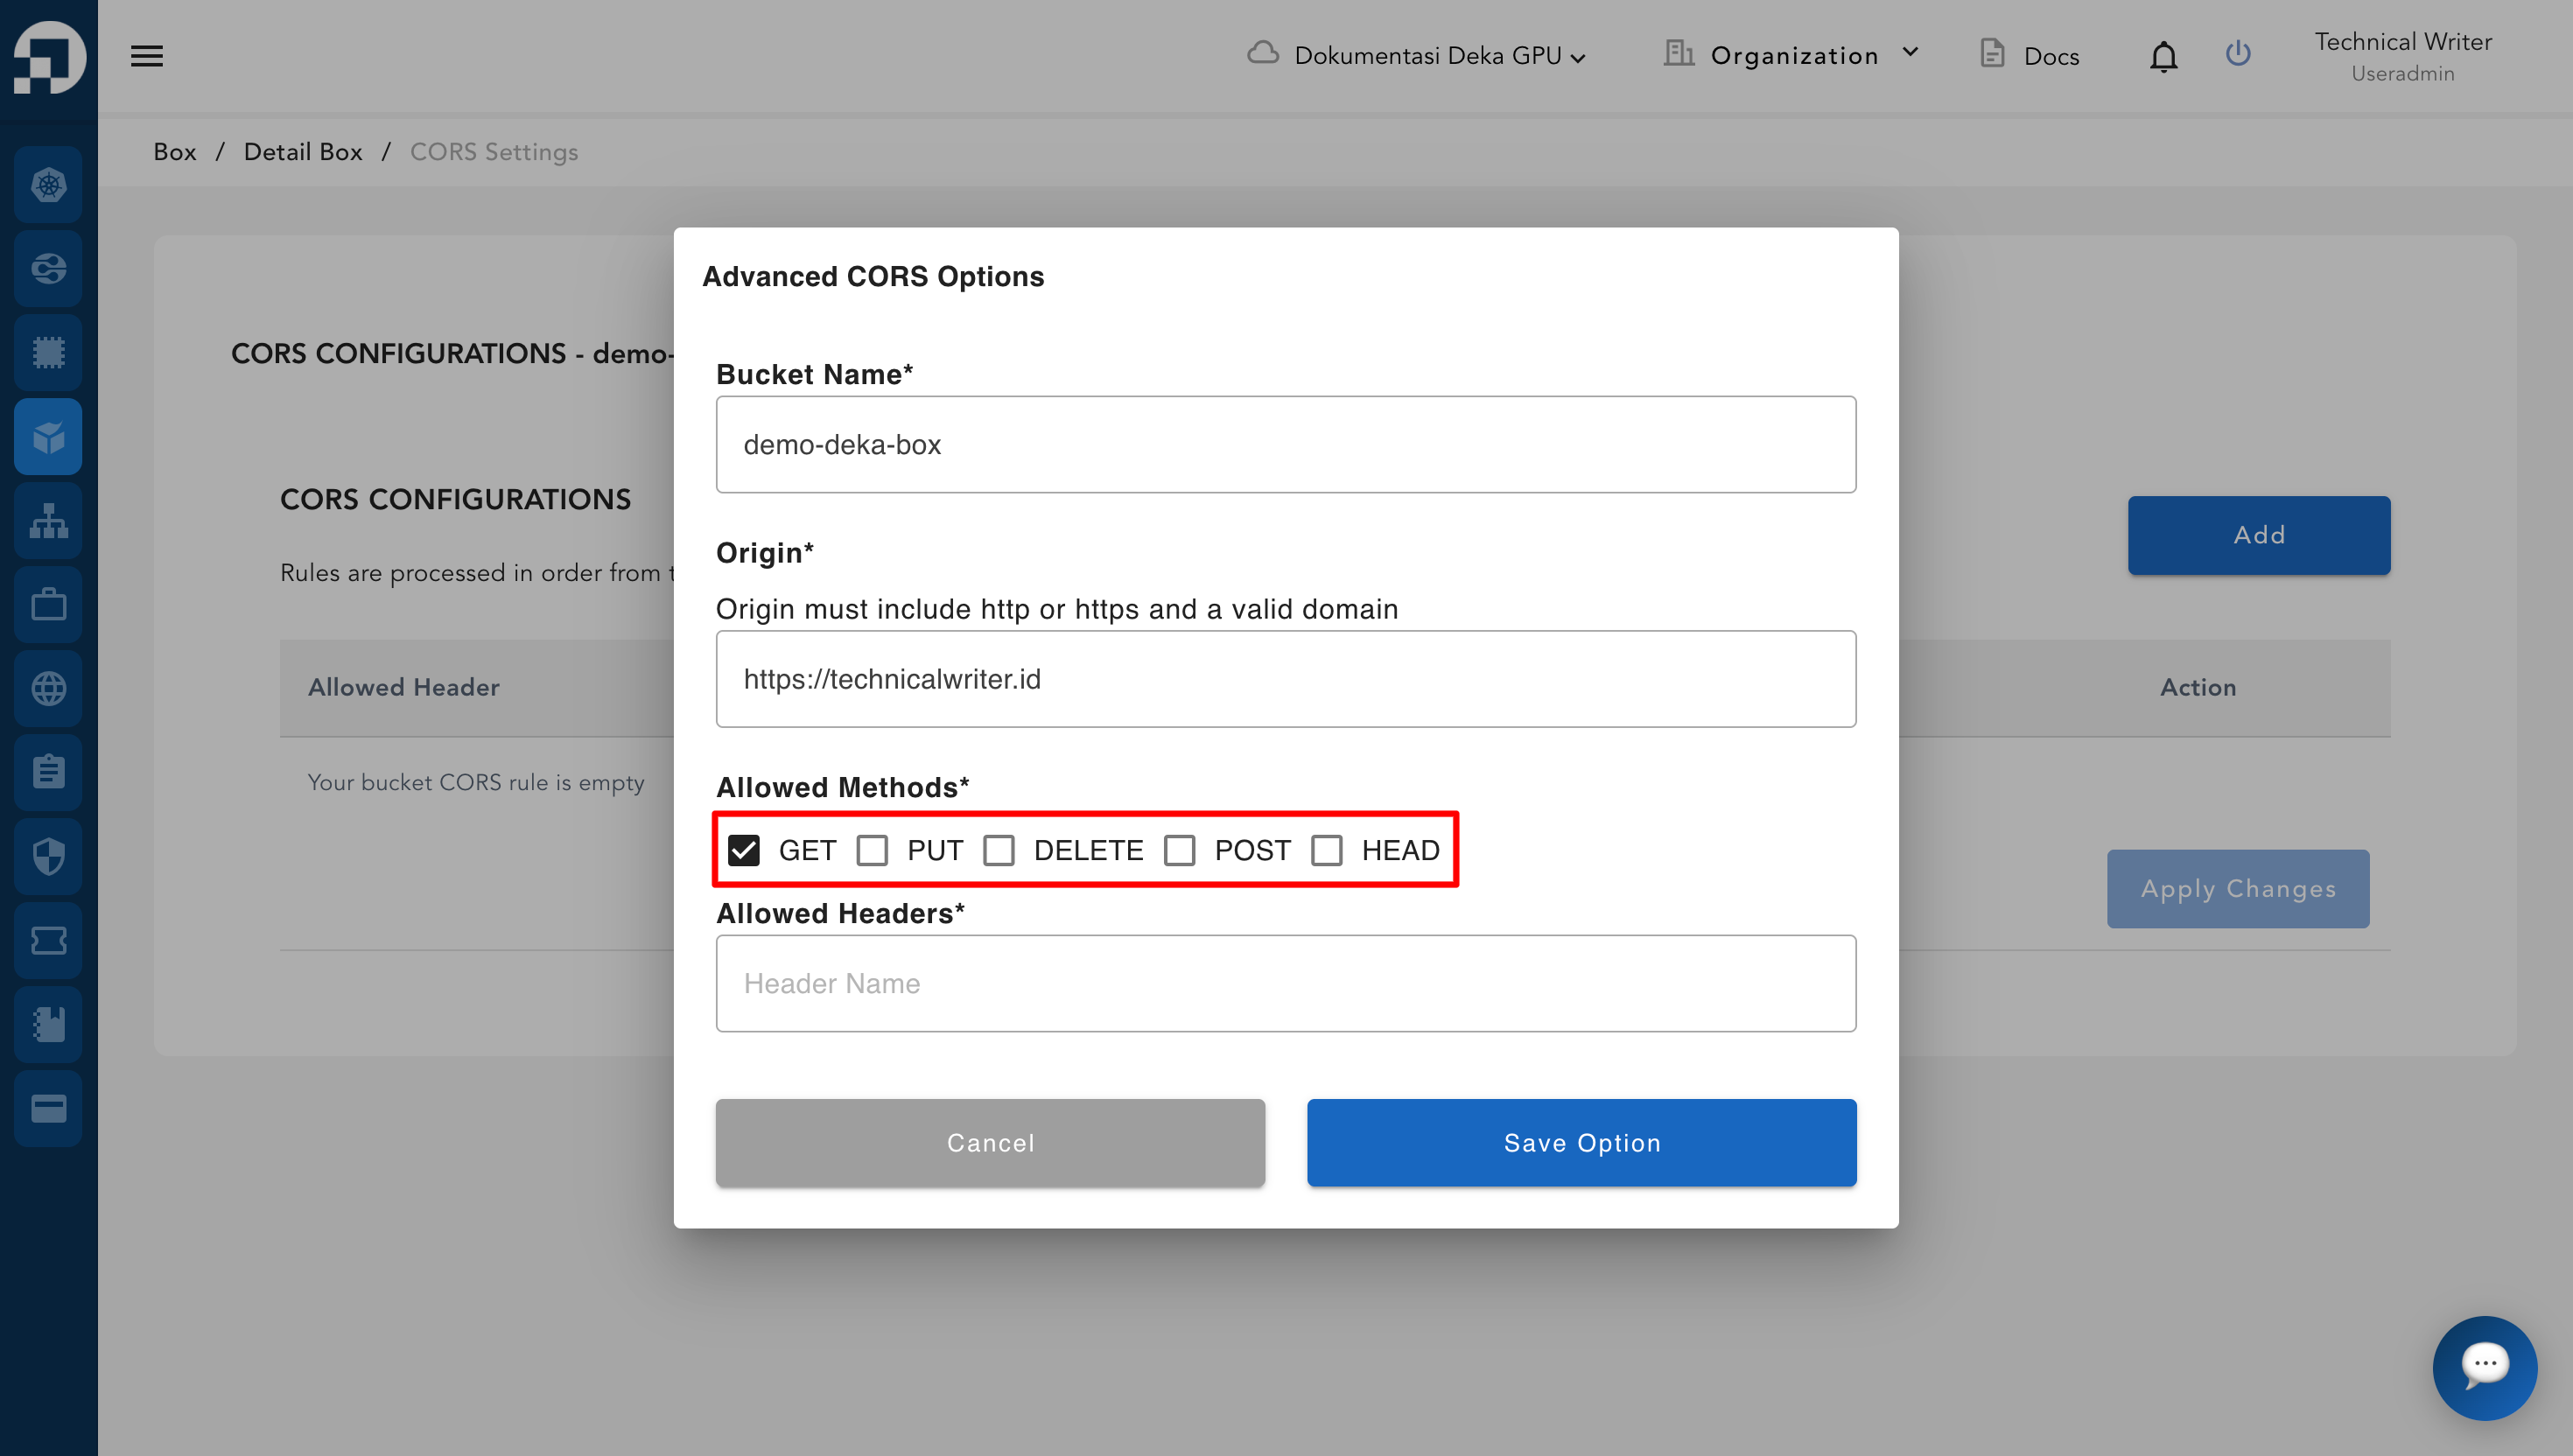
In the **Allowed Methods** section, since the website only displays images, it is sufficient to check the **GET** option.

<figure><img src="/files/59UccjFaYhvyKQpO46yV" alt=""><figcaption></figcaption></figure>

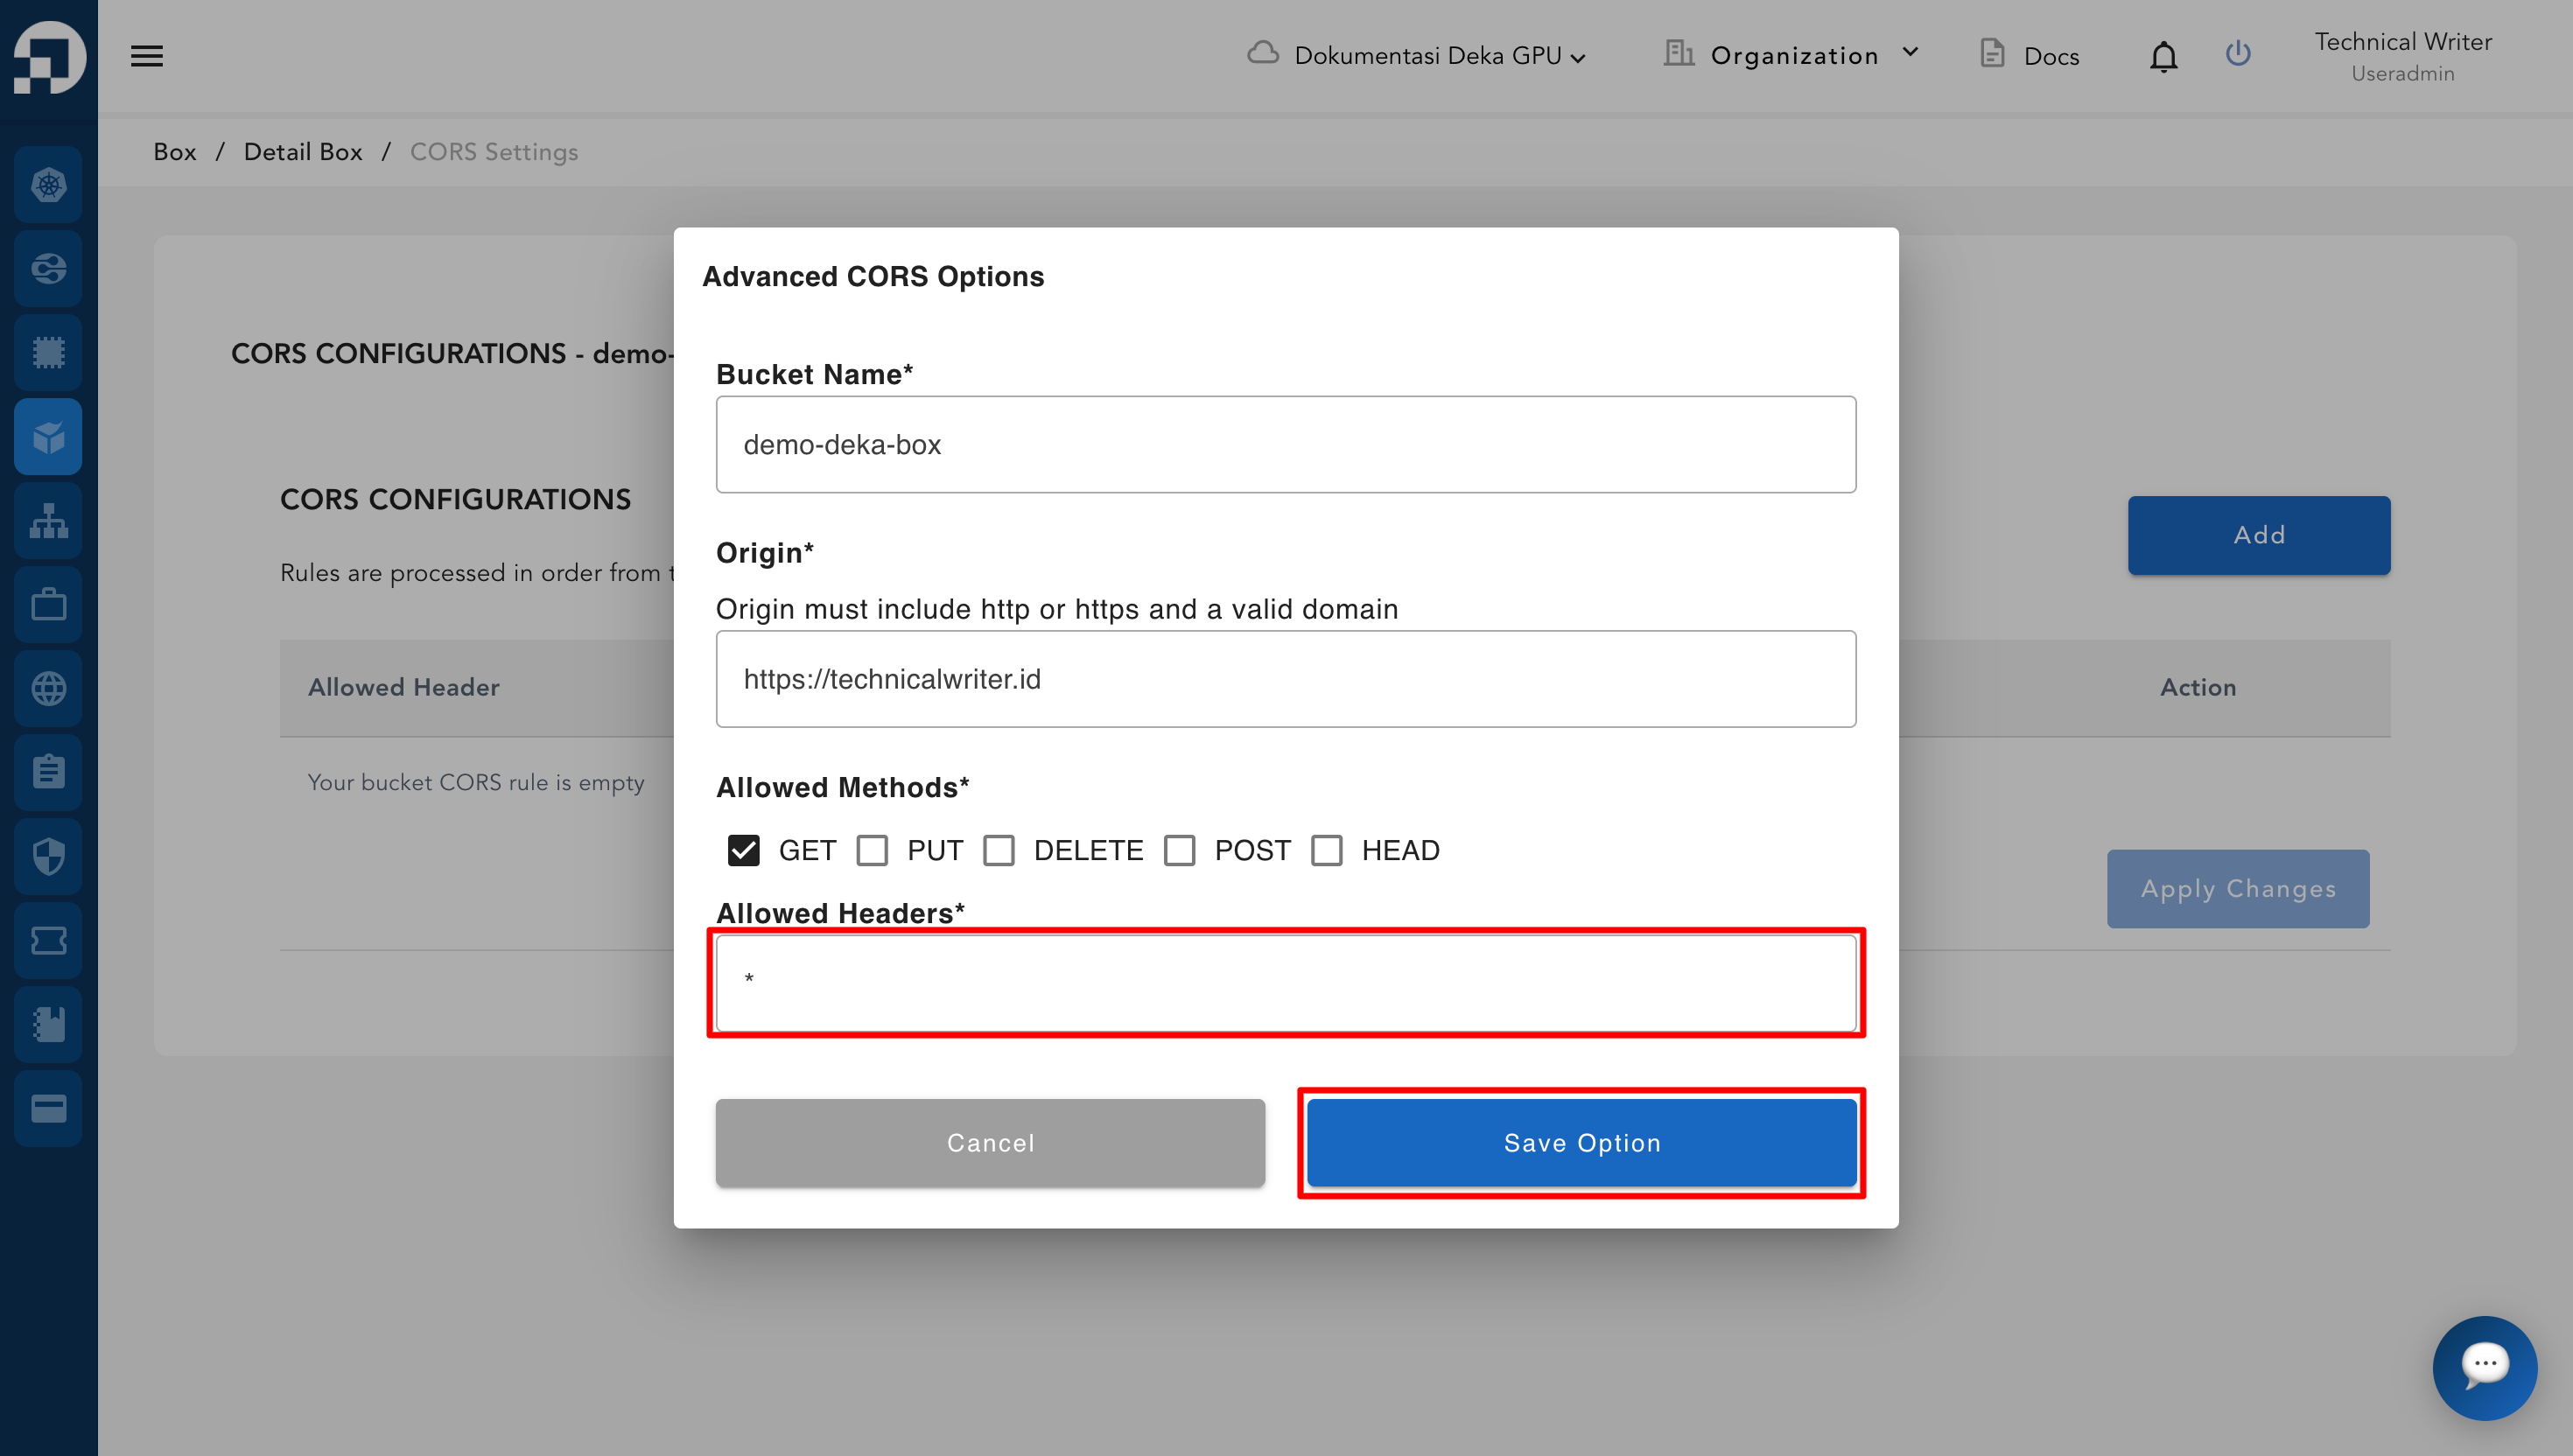
In the **Allowed Headers** section, you may leave it blank if no special headers are needed. However, for flexibility and safety, you can use a wildcard symbol `*`. The wildcard `*` means all types of headers are allowed (such as `Authorization`, `Content-Type`, etc.).

<figure><img src="/files/qjlDnGigCDh79uIbb0c2" alt=""><figcaption></figcaption></figure>

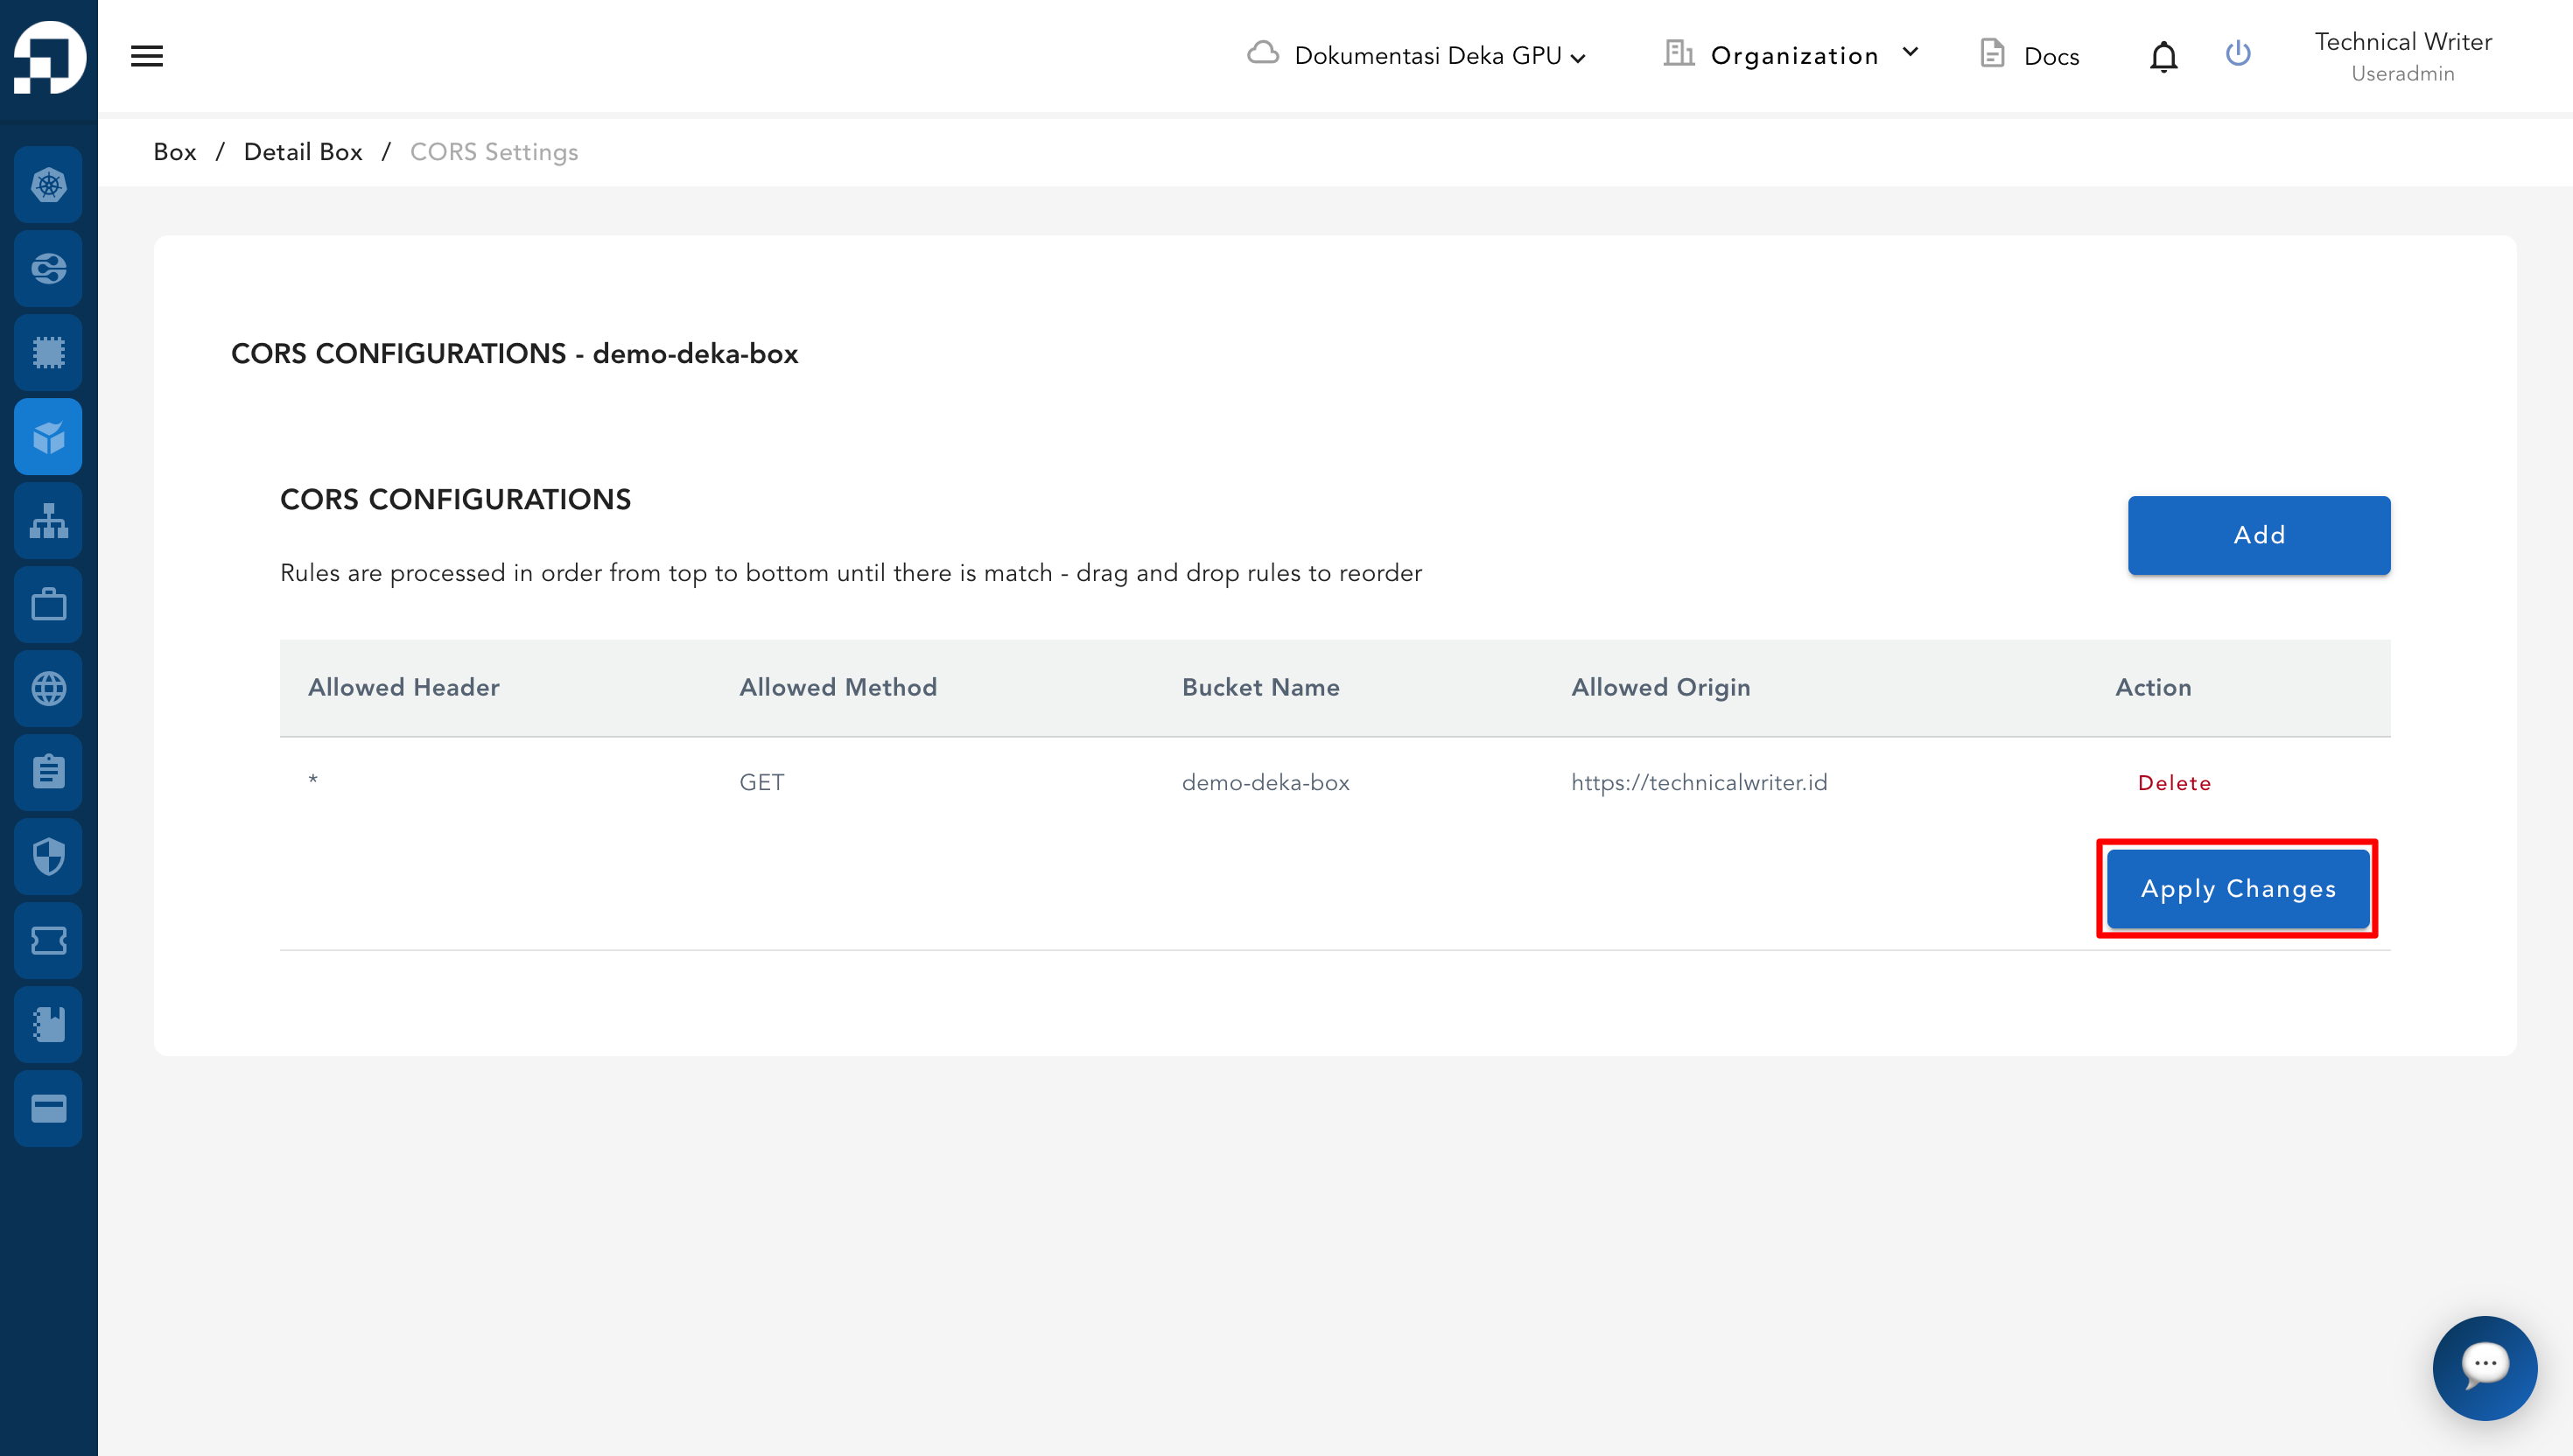
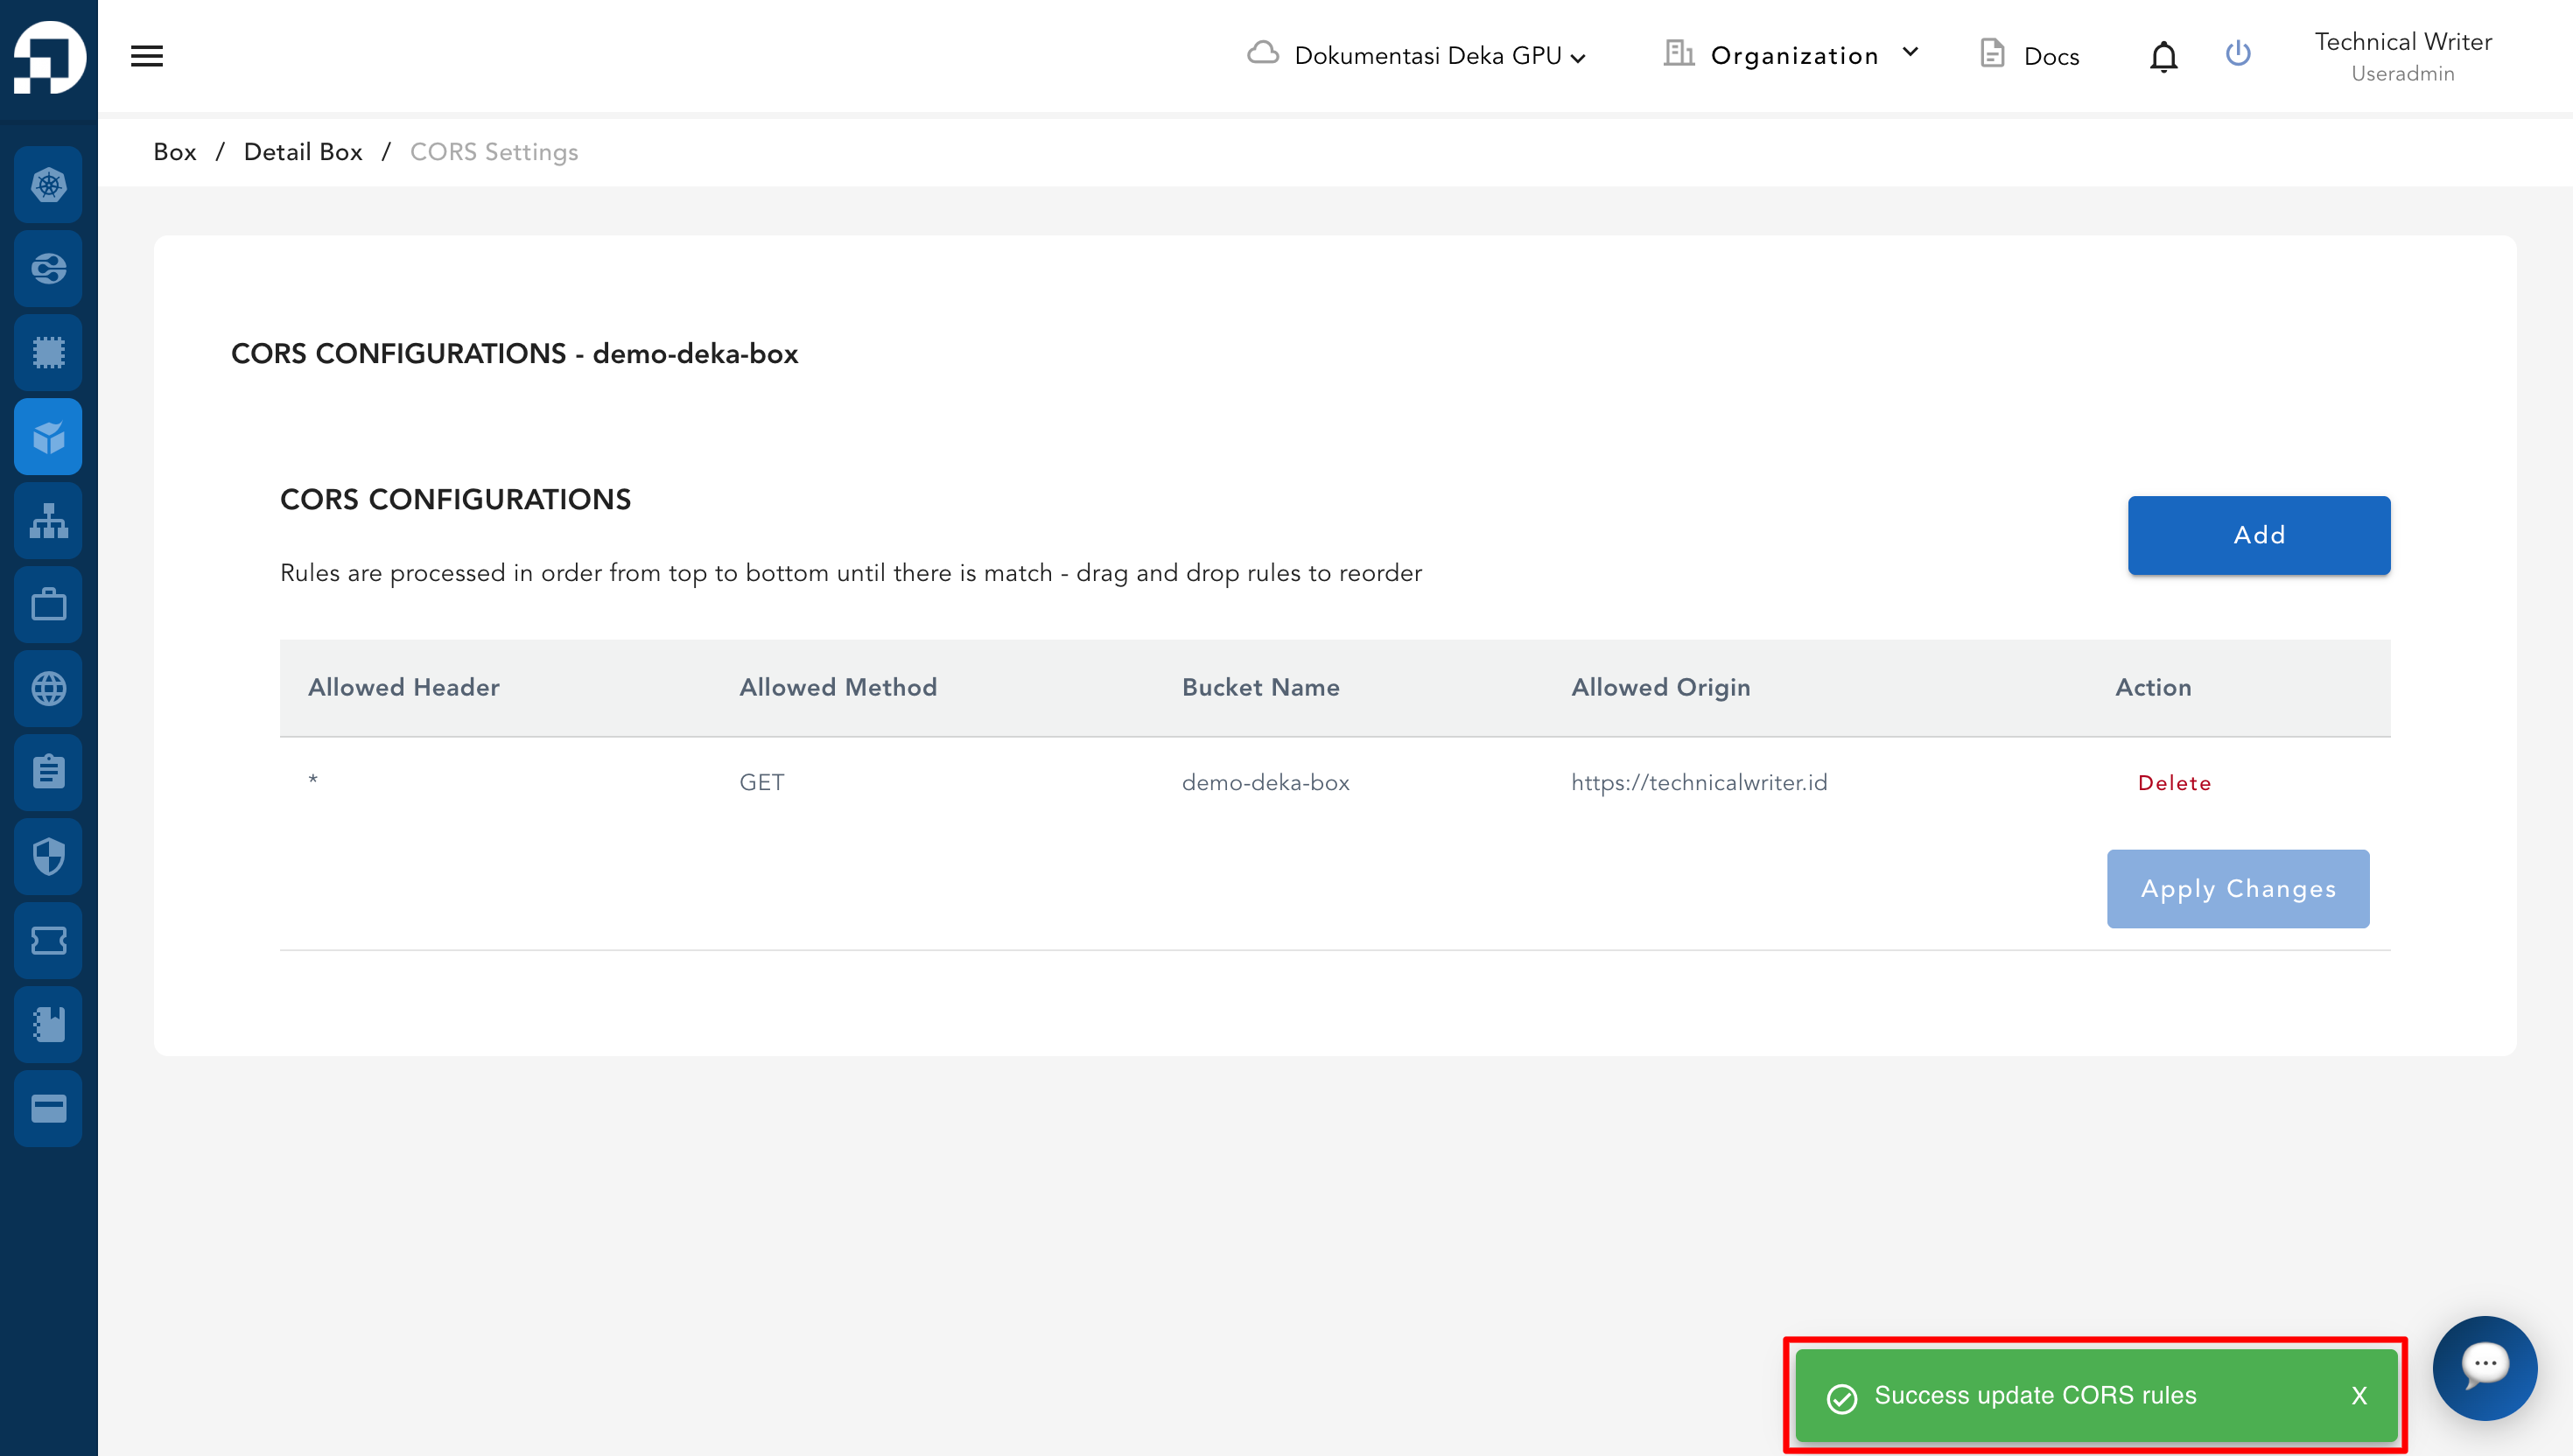
Once you have added the CORS configuration, click the **Apply Changes** button to save the settings.

<figure><img src="/files/c7trV8NIc4uB0vXN31vP" alt=""><figcaption></figcaption></figure>

Wait until the process is complete and the notification **"Successfully updated CORS rules"** appears.

<figure><img src="/files/QacEnAoognTpUq7hOxd3" alt=""><figcaption></figcaption></figure>

## Delete CORS Configuration

To delete the CORS configuration on a Deka Box that is no longer in use via the Service Portal Cloudeka. On the Overview Tab in Deka Box Details page click the CORS Settings button.

<figure><img src="/files/tcOUE7sMsIPg33fmejSi" alt=""><figcaption></figcaption></figure>

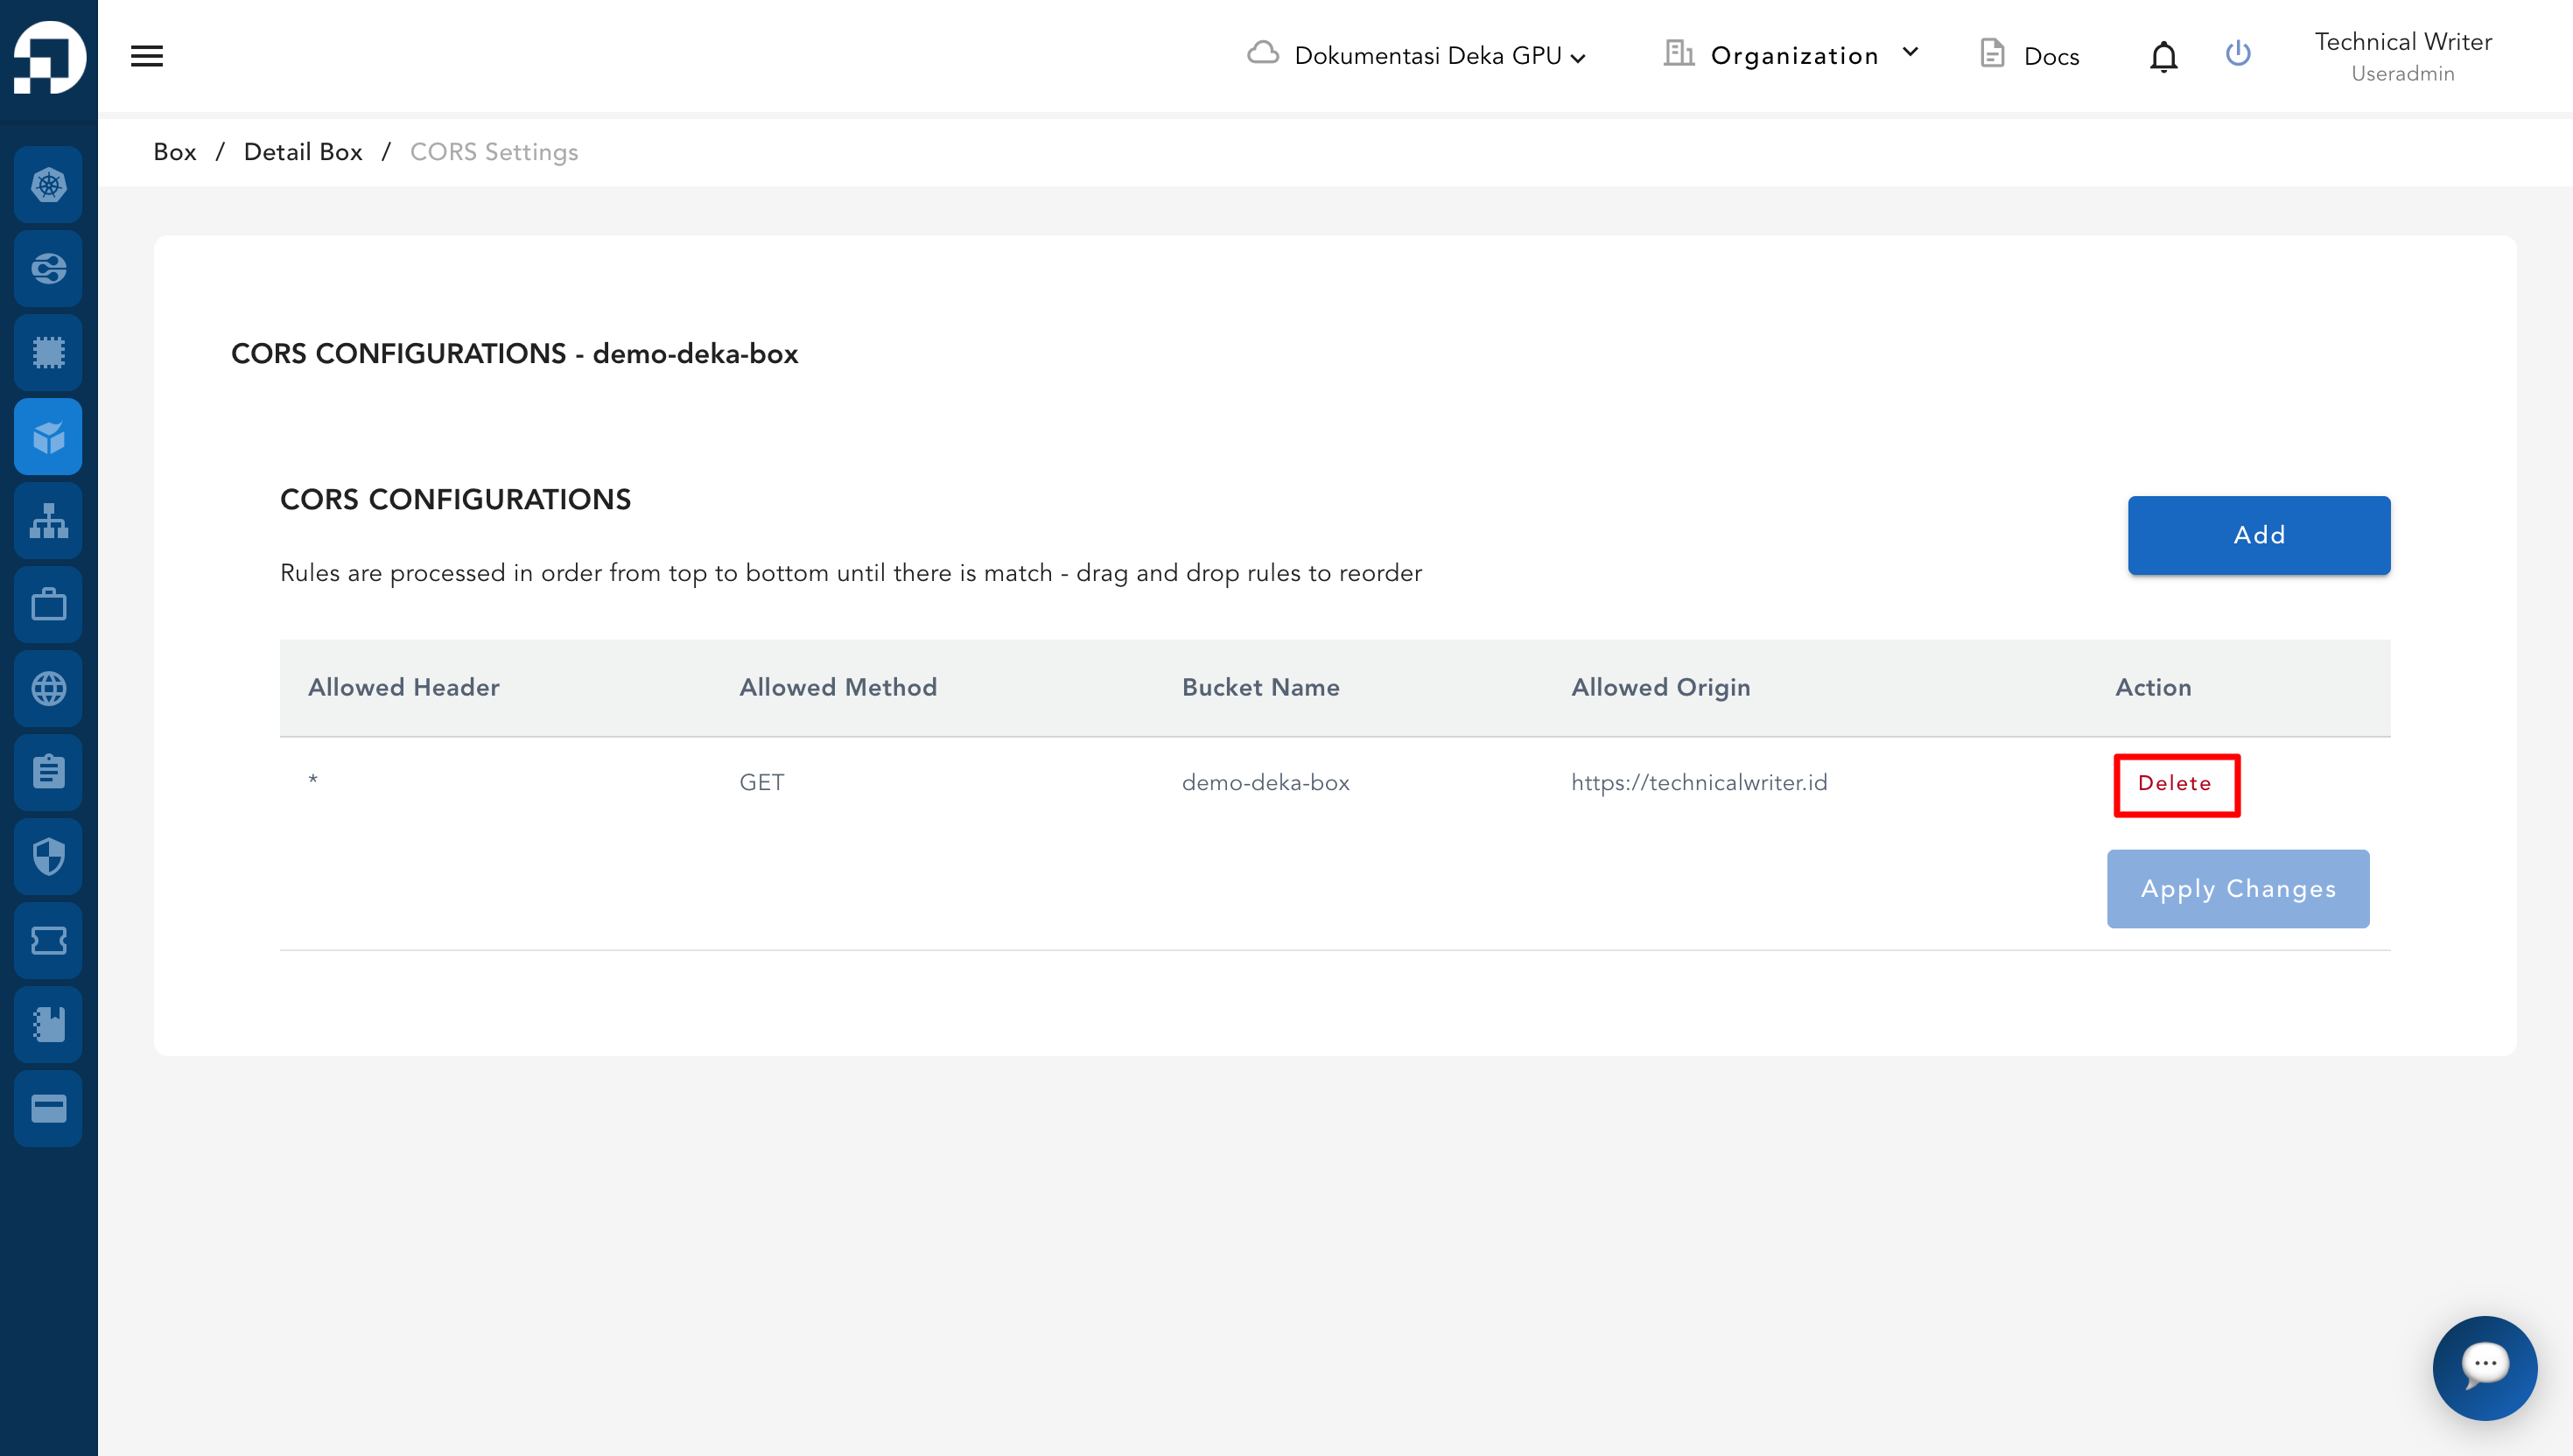
In the CORS Configuration list, click the Delete button on the CORS configuration that you want to delete.

<figure><img src="/files/V1Lb5VbTzQD2BtJEE8AH" alt=""><figcaption></figcaption></figure>

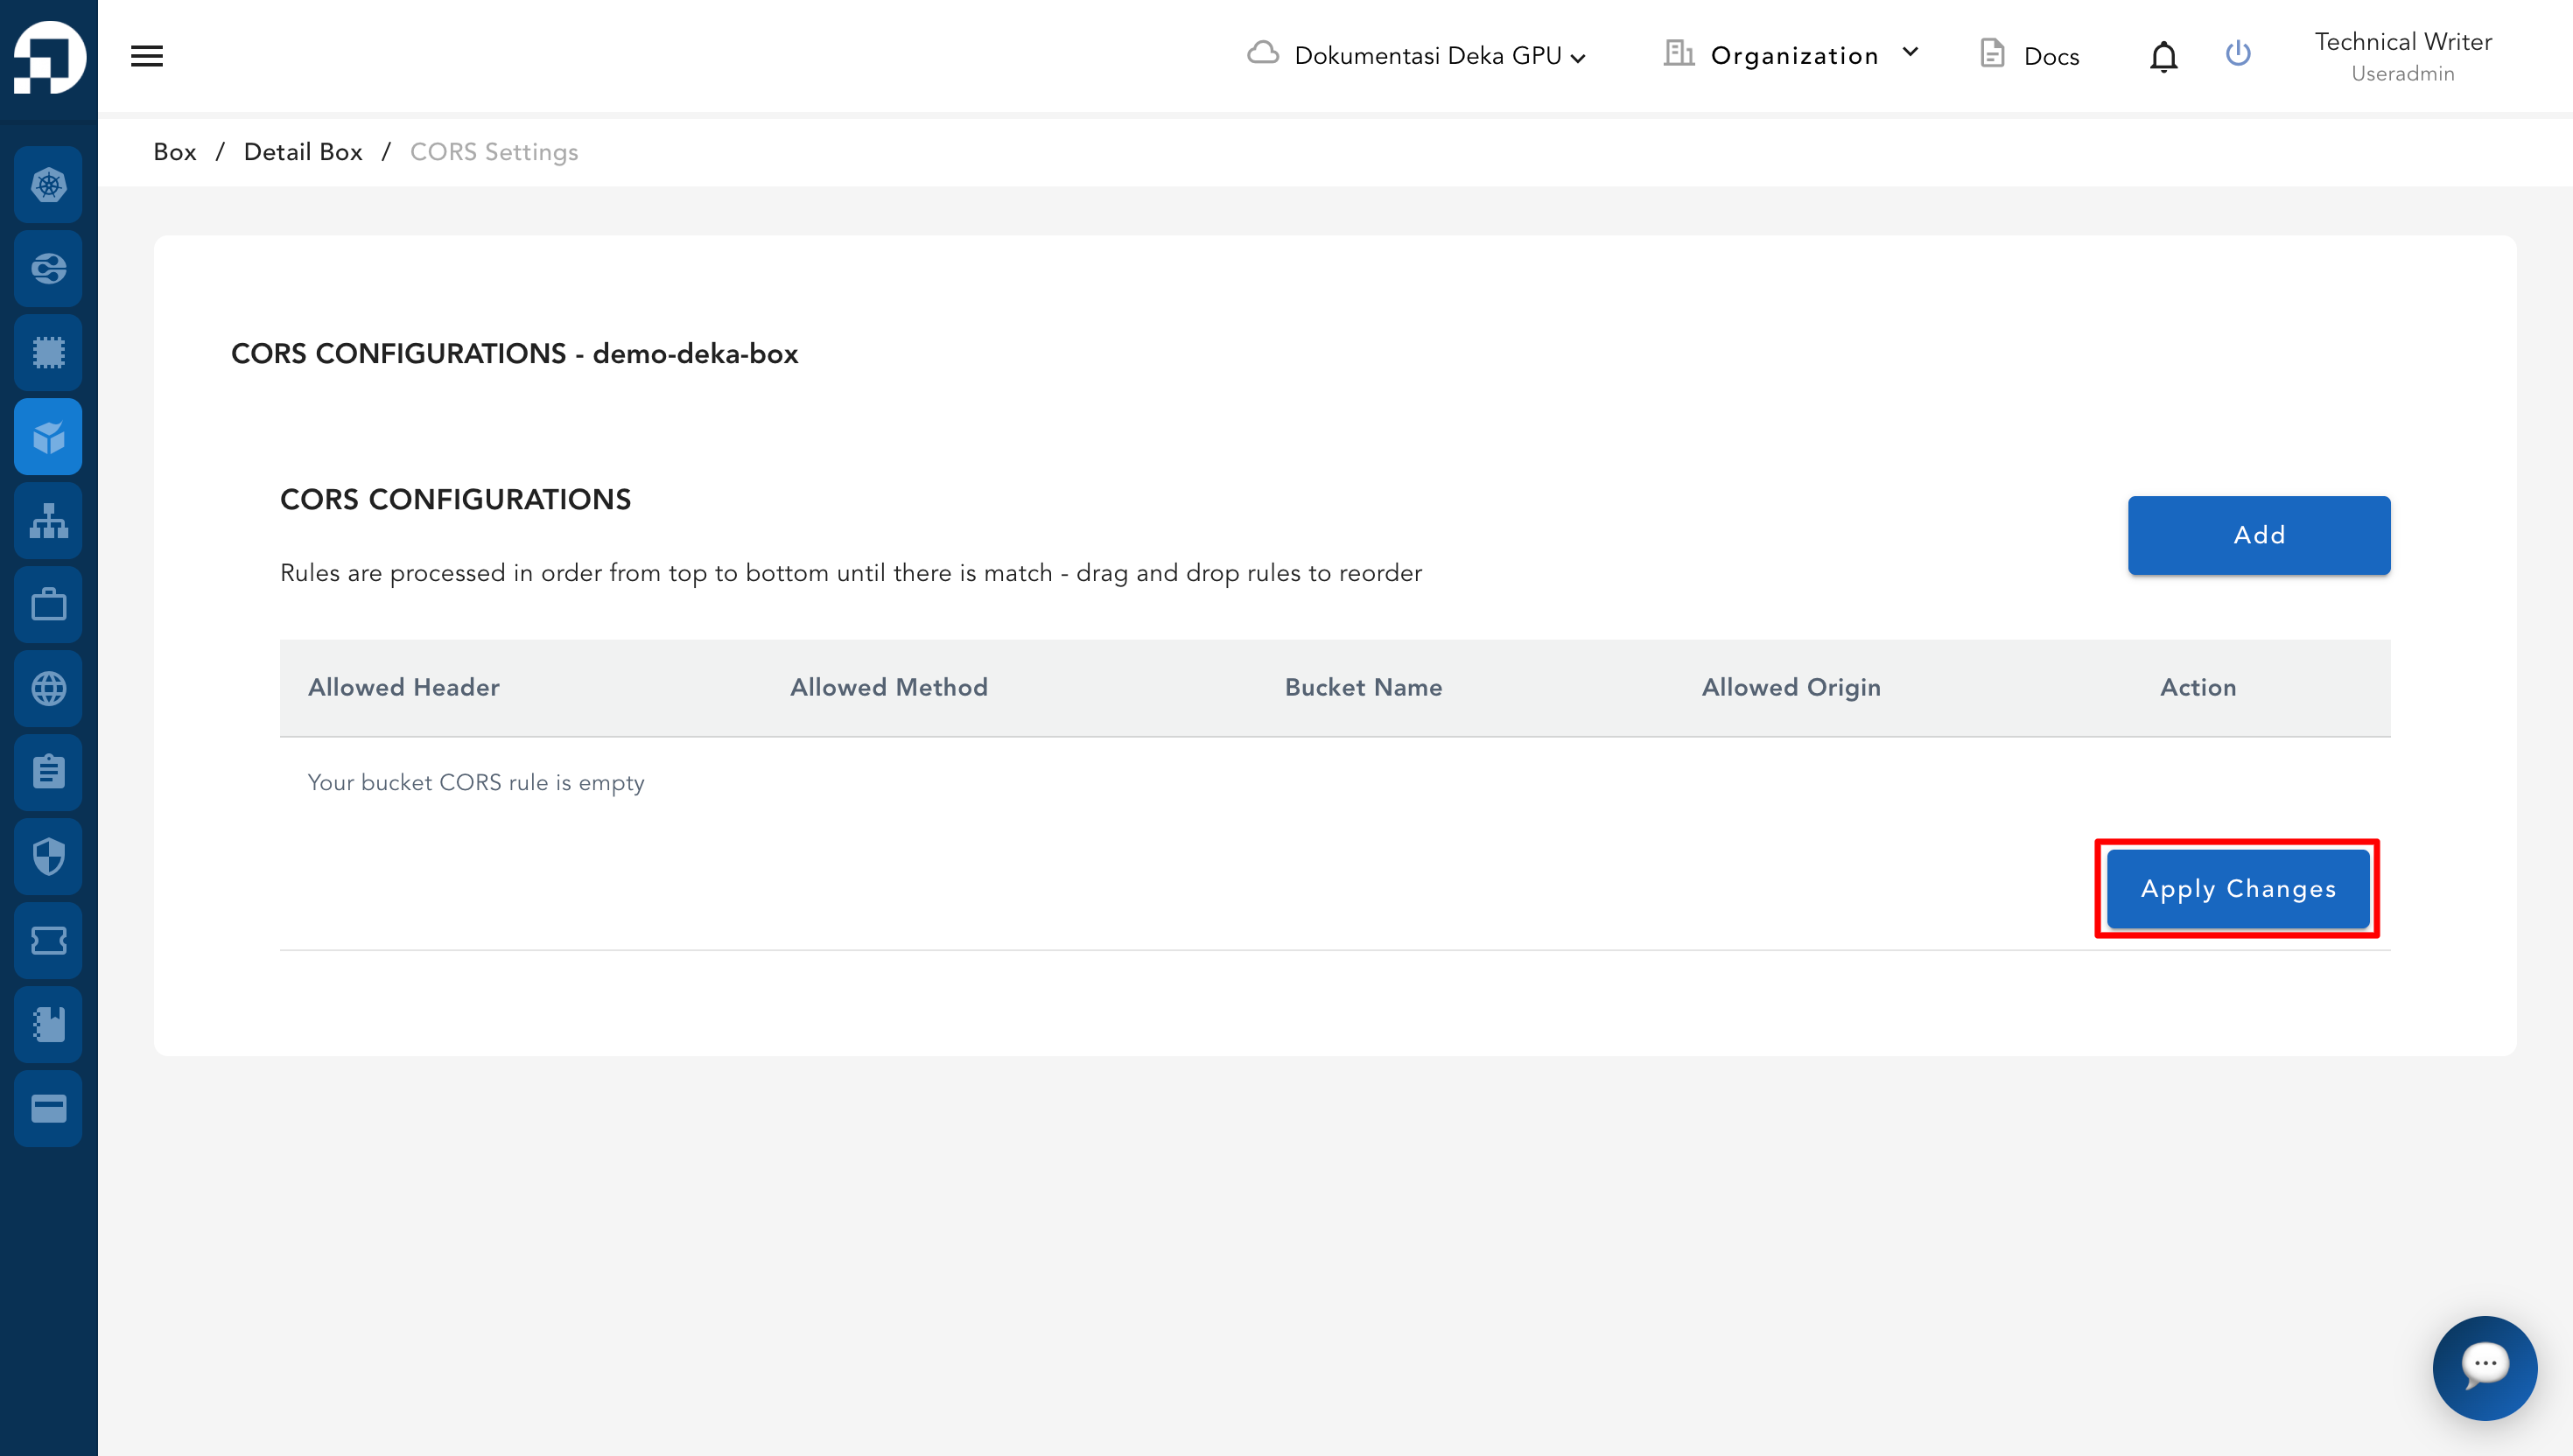
Then click **Apply Changes** to apply and save the configuration.

<figure><img src="/files/wUf7tMk0NAiCRPh8fTXZ" alt=""><figcaption></figcaption></figure>

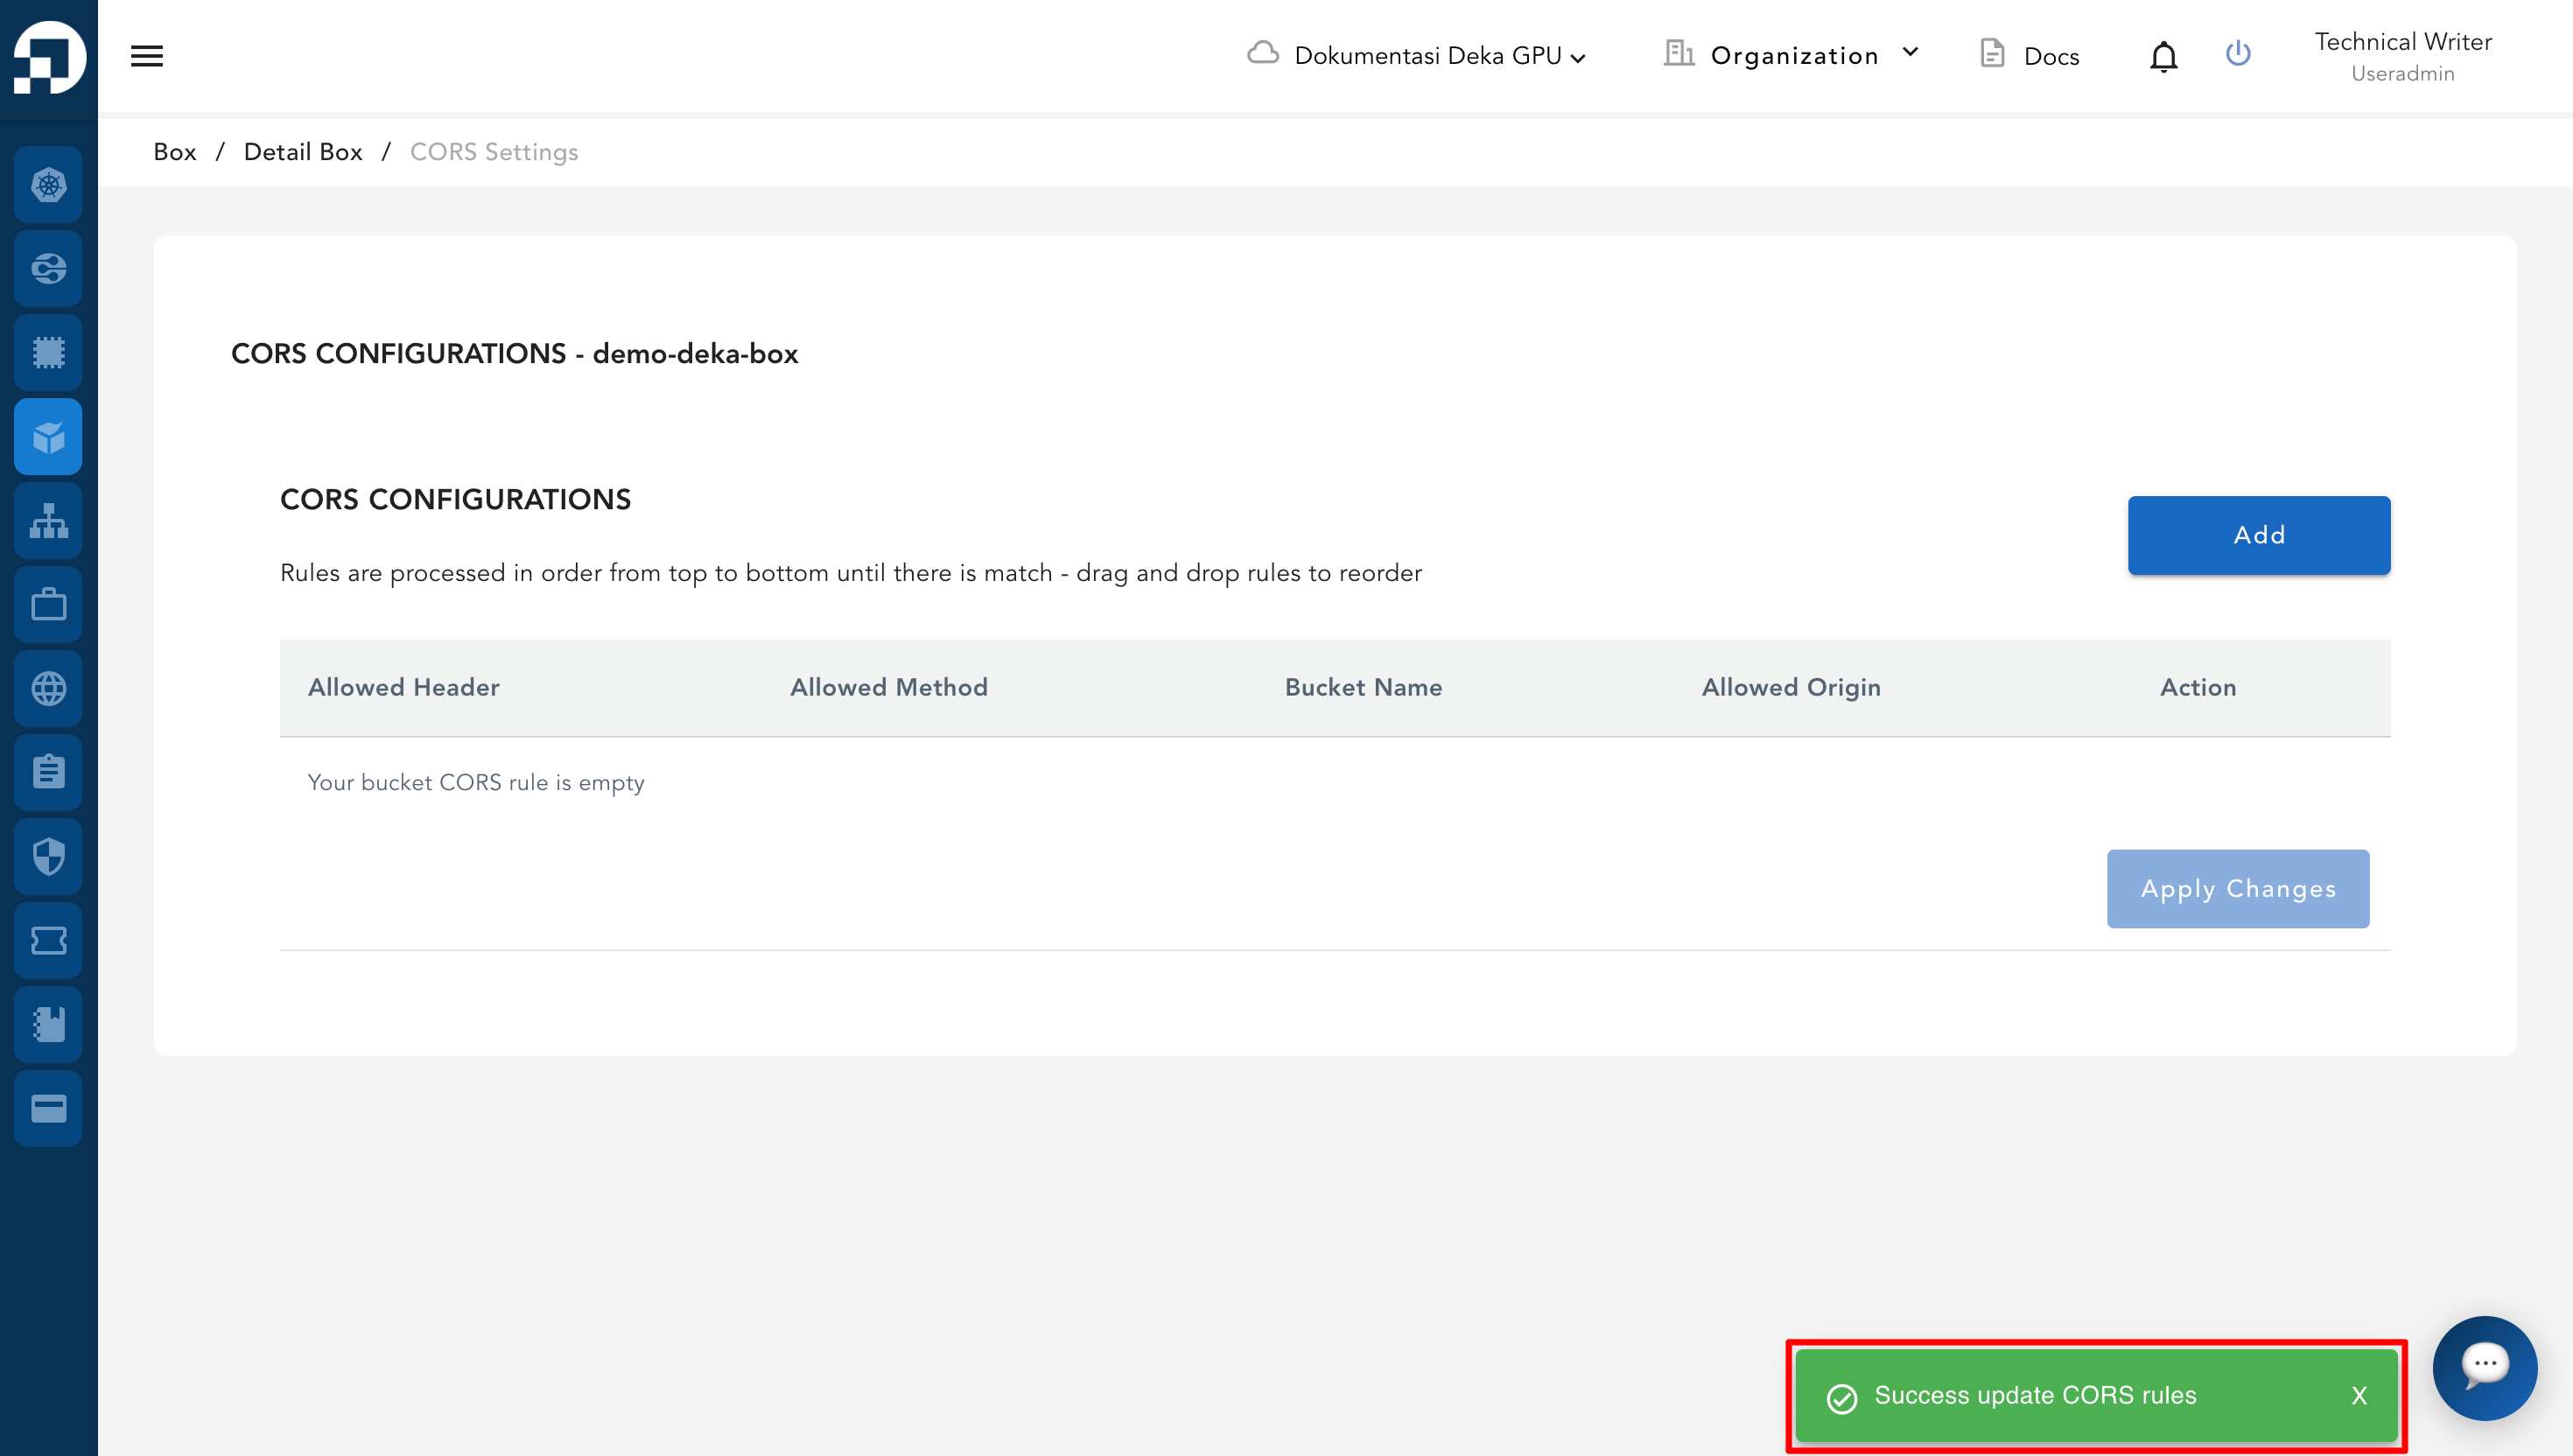
A success notification will appear indicating that the CORS configuration has been updated.

<figure><img src="/files/luCFsgryFC4YGqlnqQgG" alt=""><figcaption></figcaption></figure>